Build and Create Home

DIY Casket

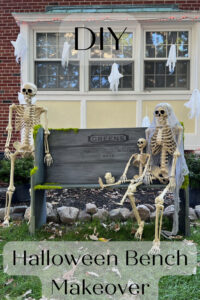
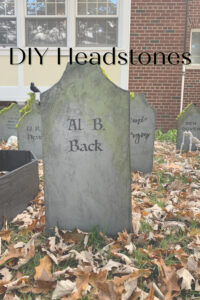
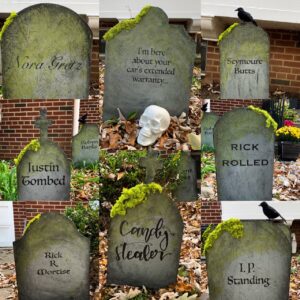
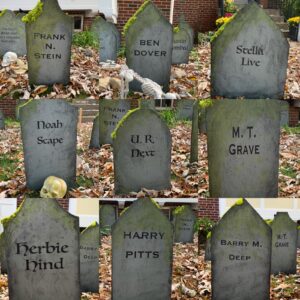
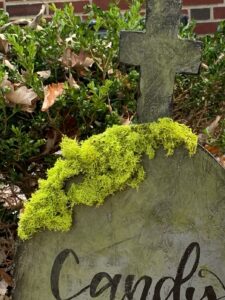
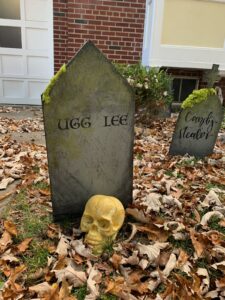
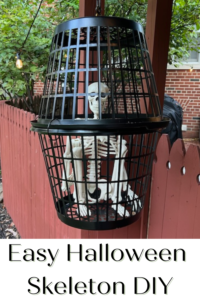
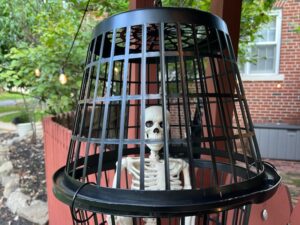
I have the headstones… and  I have the spooky skeleton in a cage… but my cemetery felt like it was missing something. I needed kitsch meets creep, so I decided to make this creepishly adorable coffin. The thing I love most about it is that I could add another skeleton escaping, to tie all of my DIY Halloween projects together in my graveyard of terrors!

This post contains affiliate links. Please visit my disclosure page if you would like more information and thank you for your support.

Supplies needed for your DIY Casket:

– 1 Piece of plywood or OSB
– 2×2 (2) to attach the plywood pieces
-A plastic skeleton
– Black Outdoor or Spray Paint
-Anything you choose to use to add a mysterious flare to your coffin

Tools needed for your DIY Casket:

-1 1/4 inch screws
-This isn’t a tool you NEED, but anytime I am covering a wide area with paint, I love to use this handheld paint sprayer

Step 1 – Make your plans

When you first get your plywood, I always like to sketch out my cutting plans so I can get the most bang for my buck. I made my drawing here, and as you can see I made the casket 24 inches high and 24 inches wide. As you can see, you should be able to get all of your cuts out of one piece of plywood.

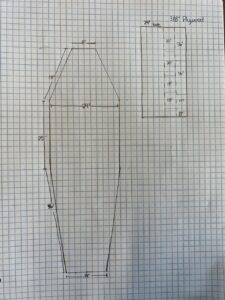
Knowing you are going to use 2×2 piece of wood to connect the sides and the base of the coffin, go ahead and measure those out and cut them as well. I cut them at an angle.


Step 2 – Drill

Assemble the coffin by laying down the base, then adding your 2×2. I screwed in the 2×2 to the back of the coffin. Once they were secure, I added the side pieces and screwed them in through the back of the coffin. Do this all the way around the casket, and you will see it start to take shape.

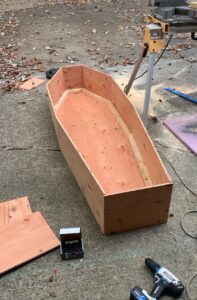
**ALTERNATIVE – You could technically paint these things first, but especially if you are using the handheld paint sprayer, having the casket assembled will make the painting process much easier to knock out!

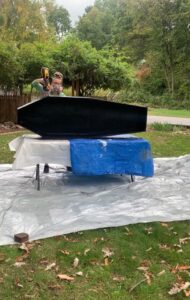
Step 3 – Lay out the drop cloth and make it black!

As you can see, a drop cloth is essential here. I also make sure to use a mask when using my sprayer. Lay that coffin out and start spraying with your black outdoor paint!

Technically if there is a color that suits your graveyard better than black, there is no reason your casket couldn’t be another color! Make sure to tag me on FB or Instagram if you branch out of the color pallet I use. I always get such great ideas from my followers, and am always looking to make my graveyard even better from year to year!

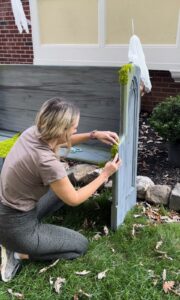
Step 4 – Finishing touches

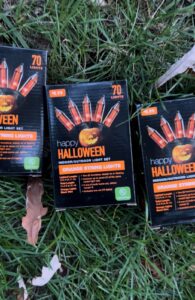
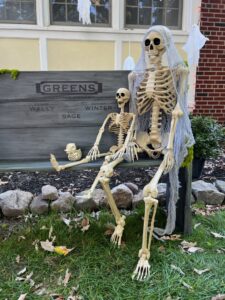
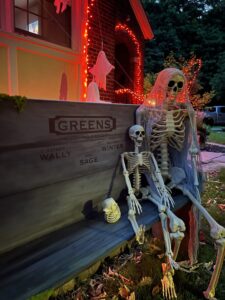
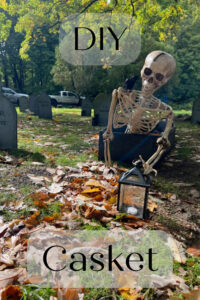
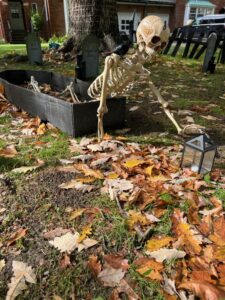
A coffin in a graveyard is fine. But a skeleton coming out of a coffin, reaching for a lantern surrounded by crows?! Now that’s crowd-pleasing. Once the coffin is assembled, this is your chance to add some zest to it. I loved using the skeleton to tie into my bench and cage, so I placed this skeleton on his stomach like he was crawling out of his tomb. Was it chilling? Yes. But I needed a little more. So I added a spooky crow to his shoulder and surrounded him with these black lanterns.


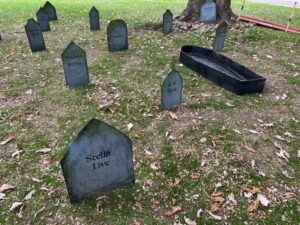
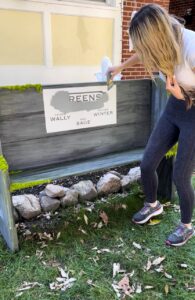
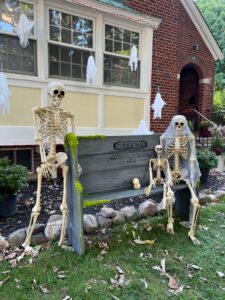
Find the perfect spot nestled in between your hilarious headstones, or beside your spooky bench. You’re “ghoul” to go!


Build and Create Home

DIY Spooky Bench Makeover

This is the PEAK example of drab to fab. I got this bench on Facebook Marketplace, and decided it was the perfect piece to add to my haunted graveyard as a spooky bench. My goal this year was to make my haunted yard just that much bigger and better, and I think this is the thing to take it over the top.

This post contains affiliate links. Please visit my disclosure page if you would like more information and thank you for your support.

Supplies needed for the DIY bench makeover:

– A bench, pew, swing… anything that you want to makeover!
-Grey, black and green outdoor paint (I actually used what was leftover from my headstones!)
-A dropcloth
Fake Sticky Moss
-Accent pieces (a skeleton family, orange string lights, we had to have the skeleton duck… whatever adds your pop of family flair!)

Tools needed for your DIY Headstone Cemetery:

Sponge brushes

(Don’t you just love a project that takes minimal tools? Don’t get me wrong, I love getting those power tools out too…. but man a simple DIY is sometimes so fun!)

Step 1 – Find your bench

As I mentioned above, I found my bench on Marketplace. I think it might have been a pew at one point… but regardless… it needed some attention.

I actually decided not to sand or prime the bench, and that’s because I want to be able to repurpose it again and potentially use it in another DIY!

Step 2 – Make it cute

I used outdoor paint to paint everything grey… I think grey as a base is a good choice because it makes it easier to see the names of your skeleton family.  But of course, you’re not tied to my color pallet, and any light outdoor color would work as a base!

Once you have covered your bench, take another outdoor black and distressed it a bit to add some depth to the color. I also used some of the same sticky moss  I used for the headstones, just to make the bench look even more creepy and weathered.

The next step is deciding if there is anything you want to be written on your bench. We decided to use a stencil to add our family names to the bench, but if you have a steady hand and a creative mind- feel free to freehand those names! We went with a family of three as our featured guests this year. The Greens made such a great bench addition- and the skeletons came from Walgreens- I had them in different sizes to make it feel most like a family, and you can grab yours here!

**ALTERNATIVE – If you’re looking for ridiculous and hilarious names to use on that bench for the skeletons you add, be sure to check out the photo gallery on my headstones post, we have a lot of great options on there! (And be sure to tag me on FB or Instagram if you do, I love seeing what you all come up with!)

Step 3 – Add the props and accents!

Look how you’ve already transported your sad bench to Halloween fabulous! Now it’s time to add those finishing touches. I picked up most of my accent pieces at Walgreens, such as these great orange Halloween lights. I used the gauze to make a veil for Mrs. Green and finished it off by hanging the ghost and draping the lights behind them.

I really love how it looks at night, and I think it will be a huge talking point come Halloween. The Greens are a welcome addition to our Halloween cemetery yard. I can’t wait to see the benches you all come up with. I hope you have as much fun putting this together as I did!


Build and Create Home

DIY Headstone and Cemetery

If you’re looking to add the perfect touch of humor to your Halloween, this DIY is perfect. It is a great blend of spooky to fit the season, and adaptable to fit your humor.

I love this one because I was able to get my daughter involved in part of the process. Any DIY that brings in my family… but in a way that doesn’t make my life harder… moves up on the priority list.

Want the creepiest yard on the block? Let’s go!

This post contains affiliate links. Please visit my disclosure page if you would like more information and thank you for your support.

Supplies needed for your DIY Headstone Cemetery:

– 1 sheet OSB (oriented strand board)
-Grey, black, and green outdoor paint
-A dropcloth
– Wooden Garden Stakes
Fake Sticky Moss
-Accent pieces (blackbirds, skulls, spiders, anything you want to make it your own!)

Tools needed for your DIY Headstone Cemetery:

-Jigsaw (I love this one… and if you need a new blade set this is a great pack. I use the smallest size to make more detailed curves.)
-Circular Saw (this is my go to)
-Hammer for putting in wooden stakes
Sponge brushes
-Brad nailer and 1.25′ nails / or a Drill and screws (this will be at attaching the headstones to their posts)

Step 1 – Start designing

If you’re one who tends to jump into a DIY without much planning, this first step may be hard to swallow. I used grid paper to map out the size and shape of my headstones before I even touched my OSB. I really suggest mapping it out so that you can get the most “bang” for your buck out of one board. (You know I always aim to get you the cheapest option… and who wants to buy more than one board if they don’t have to?!)

Once I knew I could fit about 20 rectangles out of my board, I cut them out of my OSB using my jigsaw and circular saw. Love this outdoor DIY because once I was cut, there was no sanding or finishing needed.

Step 2 – Paint, Paint, Paint

I used outdoor paint to paint everything grey… you’re not tied to my color pallet if you want headstones of a different color. But I think the light grey made it easier to add the names in the next step.

It’s so helpful at this point if you have a teenager for hire like I did because I paid my daughter to paint hilarious names on each of the headstones. We were cracking up when we were brainstorming, and it honestly might have been the best part of the project!

Need ideas? Here are some of our graveyard residents:

  • Frank N. Stein
  • Barry M. Deep
  • Anita Hand
  • U. R Next
  • “I’m just here to talk about your car’s extended warranty”

**ALTERNATIVE – If you want to add a personalized touch, you can add names that mean something to your family or your neighborhood. We just got a kick out of the “funny” names… but add your own spin on this! (And be sure to tag me on FB or Instagram if you do, I love seeing what you all come up with!)

Step 3 – Assemble and Stake

Now it’s time to take those stakes and decide how far into the ground you want them to go (I measured and marked them ahead of time). Pace out the yard and decide where you want them to go, and start hammering them in! Once they were in, I spaced out the headstones and attached them to the stakes.

Stepping back to look at them, I decided they needed a little bit more dimension, so I took some of that green and black outdoor paint and sponged it on. I tried to make the outter rim of the headstone the heaviest with paint, so as not to draw the eye away from the center and to create a more realistic look of moss and grass.

To add depth and texture, I cut out some of this sticky moss and attached it to the sides.

** If you’re feeling exceptionally adventurous, you can add plastic birds, spiders or ghouls to the headstones! Make it your own! **

Trick-or-treaters loved it, and so did their parents! We got so many great suggestions on names we could use, and I can’t wait to add more to it this year!


Build and Create Home

Easy DIY Skeleton Cage Project

DIY Halloween projects don’t get much easier than this DIY Skeleton Cage Project! Halloween is just around the corner for my crafty friends.

(looking for a trickier project? We have those too! Check out our pillars, or our pillar arch!)

Halloween is one of those holidays that can get left out with decorations. I find that you either love decorating for Halloween…. or you skip the holiday and go for an overall Fall decor. If you’re one who loves the spooky decor but doesn’t want to invest too much monetarily, this skeleton cage craft is the one for you.

The idea of creating cheap Halloween DIYs popped into my head, and I wanted to find the perfect balance of spooky without gory. I really think this nailed it!

This post contains affiliate links. Please visit my disclosure page if you would like more information and thank you for your support.

Supplies needed for your DIY Halloween Skeleton Cage:

– 2 round plastic laundry baskets
-3 foot chain (I love the idea of using this chain that is already black, but if you can only find gold you can always spray paint it!)
-A plastic skeleton (I chose a 3 foot skeleton as my prisoner)
– Any 1 x poplar material to rip into smaller pieces for the mosaic pattern (or see step 2 for other alternatives)
– 4 shower curtain rings
– Black Outdoor Spray Paint

The only tools needed for this DIY is whatever you choose to use to hang it. And if you end up just draping the chain over something… no tools needed. Now THAT is an easy craft!

Step 1 – Lay out the drop cloth of your choice and spray paint

This DIY Skeleton Cage Project is one I did outdoors because spray paint might be needed. The first step is going to be to lay out a drop cloth and prepare for painting! When it comes to drop cloths, I’m no snob and you can use anything that gets the job done! If you need a suggestion, I love this tarp. All things that need to get painted need to be done first, so they can dry and be assembled. I started by spraying the baskets, then set them aside to dry because they need to be clamped together first. Then lay that long chain out, and spray it down! This one might need a few more coats to get all sides of the chain! (If you can’t find black shower curtain rings, don’t forget to spray those too!)


Step 2 – Assemble the baskets for your skeleton cage

Take one of the baskets, and set it up like normal. Then, grab your prisoner! 😉 Mine was a 3-foot skeleton this year, and he was a very charming captive! Prop them up in the basket, then take basket #2 and turn it over the top. This is when you’ll need the shower curtain rings! Clamp those two baskets together going all the way around. (If you’re worried about the prisoner shifting or trying to escape, feel free to add some super glue or hot glue to the bottom of basket 1. I like to leave it separate for easier storage, and I don’t mind if he shifts around in there a bit. That just adds to the spooky aesthetic!)

**ALTERNATIVE – If you couldn’t find the shower rings, black zip ties would work. You would have to cut them to get the skeleton out, or you could store it all together!

Step 3 – Add the chain to the top of the skeleton cage

Depending on the type of basket that you’re able to find, you may need some glue on this portion as well. My baskets were woven on the bottom as well as the sides, so I looped the chain through those holes using one of the shower rings.

Once the chain is attached to the basket- find the spooktacularly perfect place to drape that guy. Mine fit perfectly on out the patio but may make his more permanent resting place in the DIY cemetery.

This is a Halloween craft that is simple and such a cute conversation starter. If you decide to try this DIY Skeleton Cage Project, be sure to tag me in a picture on social media!


** This is not my original idea- simply my take on it! Other creators have done versions of this craft as well… specifically thenavagepatch.com and thetiptoefairy.com. Be sure to send them some love! If you attempt this project too, please feel free to tag me on Instagram or Facebook.  love seeing what you come up with! **