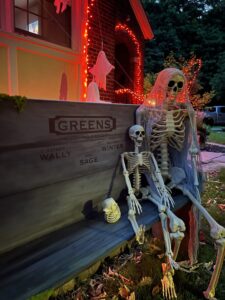
This is the PEAK example of drab to fab. I got this bench on Facebook Marketplace, and decided it was the perfect piece to add to my haunted graveyard as a spooky bench. My goal this year was to make my haunted yard just that much bigger and better, and I think this is the thing to take it over the top.
This post contains affiliate links. Please visit my disclosure page if you would like more information and thank you for your support.
Supplies needed for the DIY bench makeover:
– A bench, pew, swing… anything that you want to makeover!
-Grey, black and green outdoor paint (I actually used what was leftover from my headstones!)
-A dropcloth
–Fake Sticky Moss
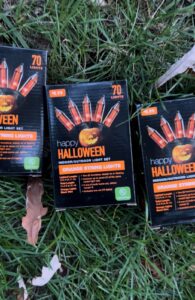
-Accent pieces (a skeleton family, orange string lights, we had to have the skeleton duck… whatever adds your pop of family flair!)
Tools needed for your DIY Headstone Cemetery:
(Don’t you just love a project that takes minimal tools? Don’t get me wrong, I love getting those power tools out too…. but man a simple DIY is sometimes so fun!)
Step 1 – Find your bench
As I mentioned above, I found my bench on Marketplace. I think it might have been a pew at one point… but regardless… it needed some attention.

I actually decided not to sand or prime the bench, and that’s because I want to be able to repurpose it again and potentially use it in another DIY!
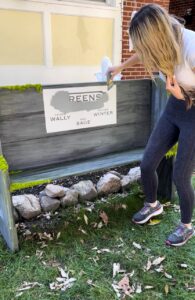
Step 2 – Make it cute
I used outdoor paint to paint everything grey… I think grey as a base is a good choice because it makes it easier to see the names of your skeleton family. But of course, you’re not tied to my color pallet, and any light outdoor color would work as a base!
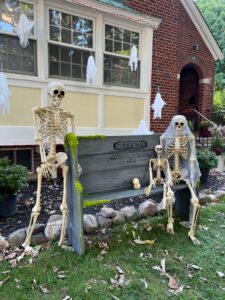
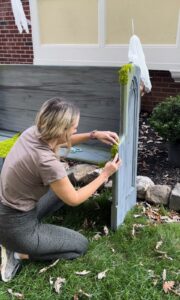
Once you have covered your bench, take another outdoor black and distressed it a bit to add some depth to the color. I also used some of the same sticky moss I used for the headstones, just to make the bench look even more creepy and weathered.
The next step is deciding if there is anything you want to be written on your bench. We decided to use a stencil to add our family names to the bench, but if you have a steady hand and a creative mind- feel free to freehand those names! We went with a family of three as our featured guests this year. The Greens made such a great bench addition- and the skeletons came from Walgreens- I had them in different sizes to make it feel most like a family, and you can grab yours here!
**ALTERNATIVE – If you’re looking for ridiculous and hilarious names to use on that bench for the skeletons you add, be sure to check out the photo gallery on my headstones post, we have a lot of great options on there! (And be sure to tag me on FB or Instagram if you do, I love seeing what you all come up with!)
Step 3 – Add the props and accents!
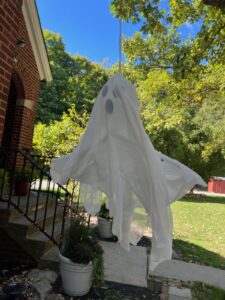
Look how you’ve already transported your sad bench to Halloween fabulous! Now it’s time to add those finishing touches. I picked up most of my accent pieces at Walgreens, such as these great orange Halloween lights. I used the gauze to make a veil for Mrs. Green and finished it off by hanging the ghost and draping the lights behind them.
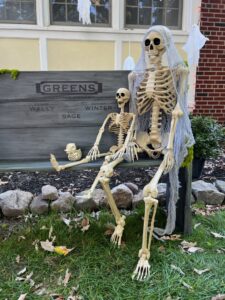
I really love how it looks at night, and I think it will be a huge talking point come Halloween. The Greens are a welcome addition to our Halloween cemetery yard. I can’t wait to see the benches you all come up with. I hope you have as much fun putting this together as I did!