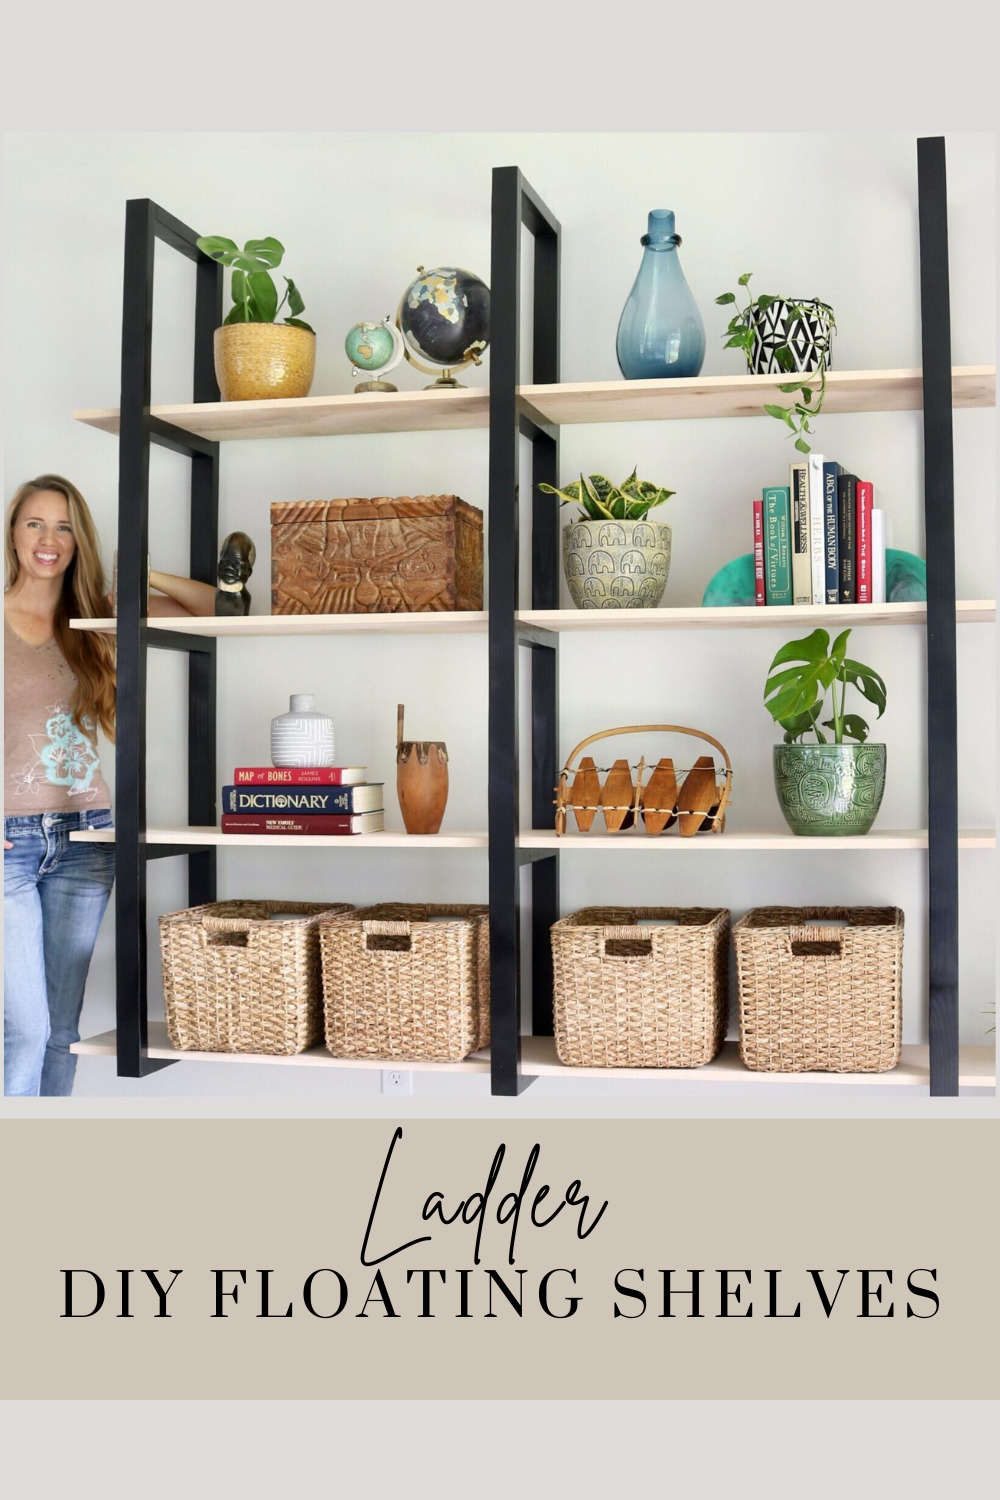
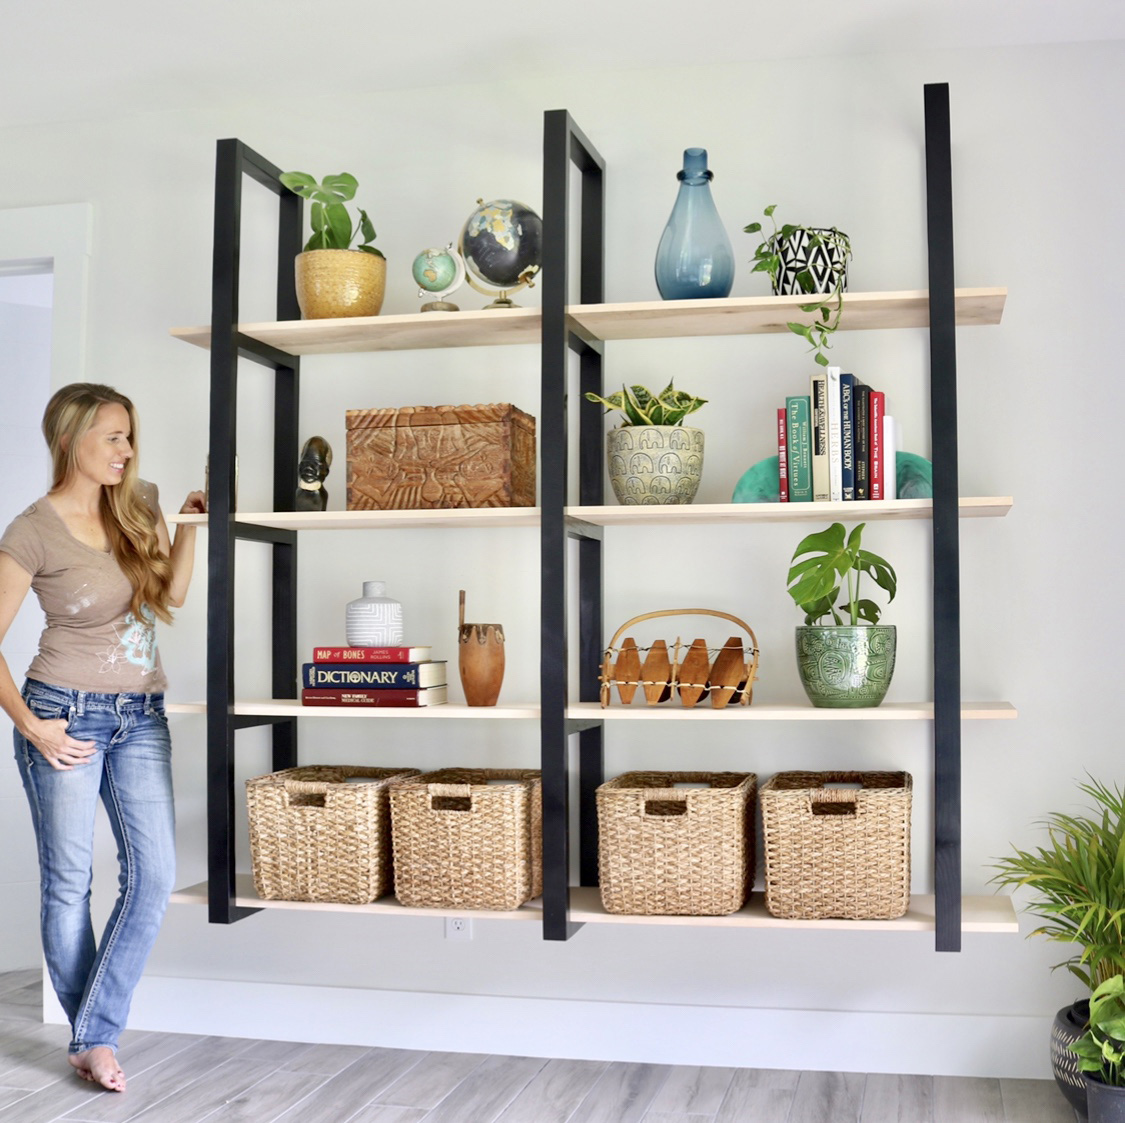
These DIY Floating Ladder Shelves is the perfect thing to add to any office space. It gives you more storage and more space for item after item in your home.
BEFORE BUYING SUPPLIES, PLEASE DO STEP 1!
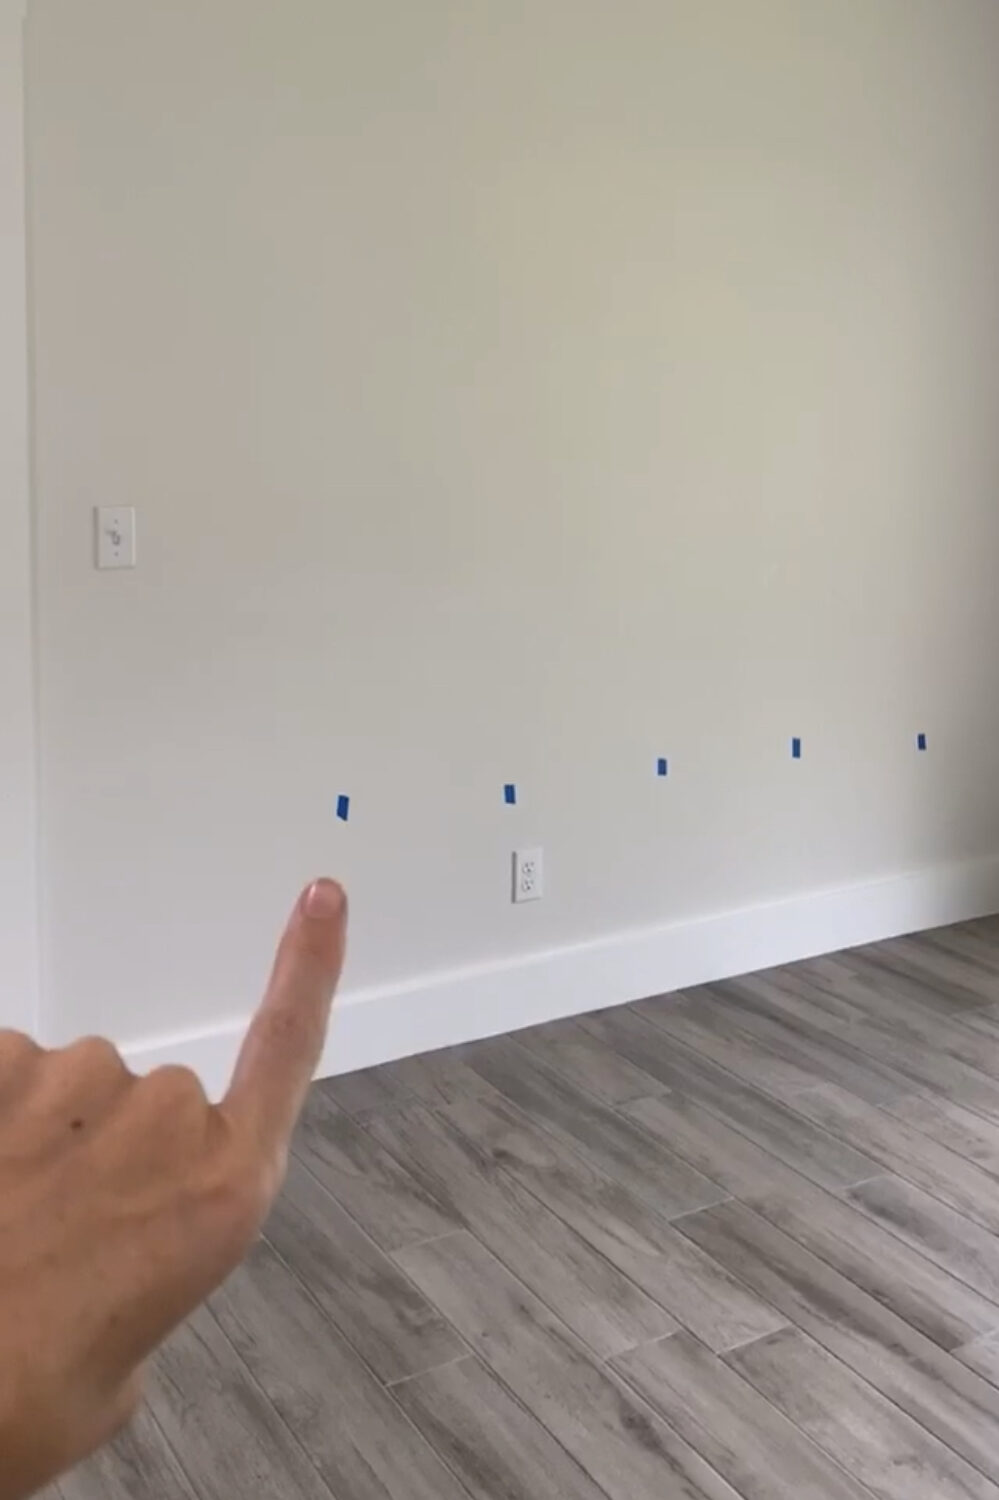
Step 1: Use a stud finder to find the studs in your wall
**This is the most important step for building the unit without a cleat across the back. In order for these shelves to be strong enough, you will need to attach each of the vertical pieces directly to a stud.
(If you don’t have a stud finder, consider it a worthy investment!)
For homes in the U.S., the standard spacing is 16″ on center, so my vertical pieces are spaced 32″ on center. If yours are spaced more than 32″, please keep shelf strength in mind and consider either doubling the plywood or using a hardwood instead; otherwise, you may find your shelves sagging over time.
Please also note that you will need enough room on either end to be able to slide the shelves in. I’ll be sharing a solution for tight spaces in an upcoming project!
Step 2: Gather supplies needed to build the Floating Ladder Shelves
**I’m going to provide instructions to build the shelves exactly like mine. Please make adjustments based on the stud distance you measured in step 1.
SUPPLIES:
– 2x4s (x7)
– 1 sheet of 3/4″ birch or maple plywood (ripped to 11.75″)
– Iron-on veneer edge banding (I used birch)
– 3.25″ deck screws (you will need at least 12
– 1.25″ screws
– 2″ pocket hole screws (at least 60)
– Paint and stain

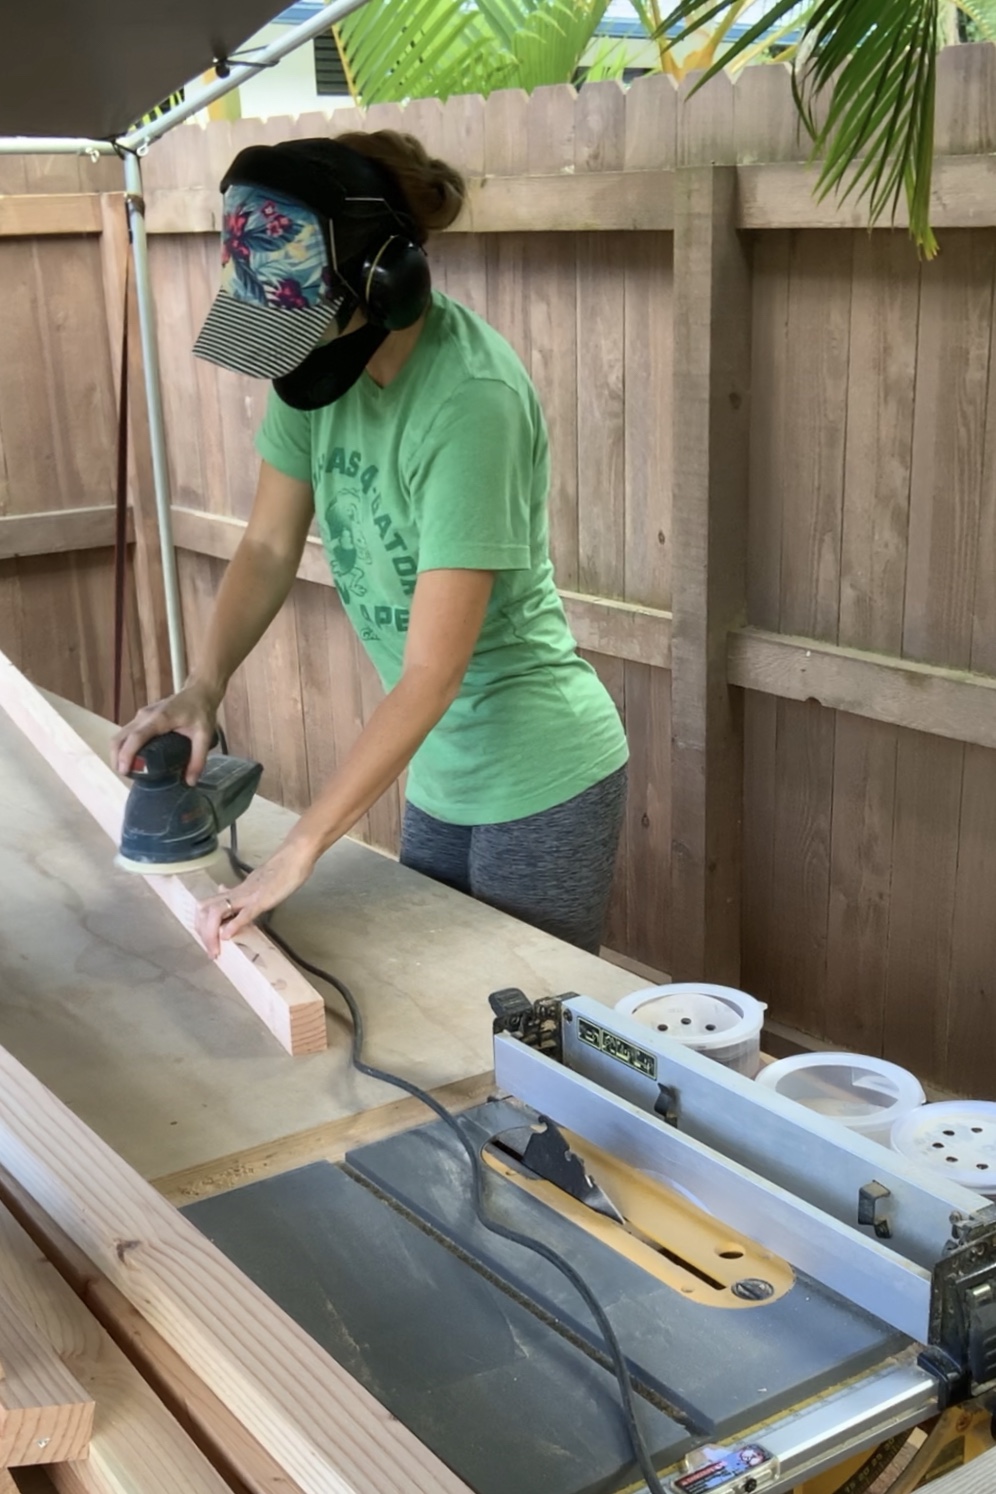
Step 3: Prep the 2x4s
If you’re using standard, construction-grade 2x4s, they might be in rough shape. If you’re looking for quick and easy, you can leave them as is, patch a few knots, sand a little, and move on to the next step. I really wanted my Floating Ladder Shelves to look clean, and I wanted them to be a bit more narrow than the standard 3.5″ width. I used my table saw to rip off the round-over edge on one side and then flipped it over and ripped it down to 2.75″.
Then I took it to my planer and ran it through once on each side to smooth out the rough top and bottom a bit.
And then I sanded. And sanded. And sanded. Ha! Don’t skip this step! Since I had planed already, I started with 100 grit and moved up to 220. If you don’t have a planer, you may need to start with a lower grit.
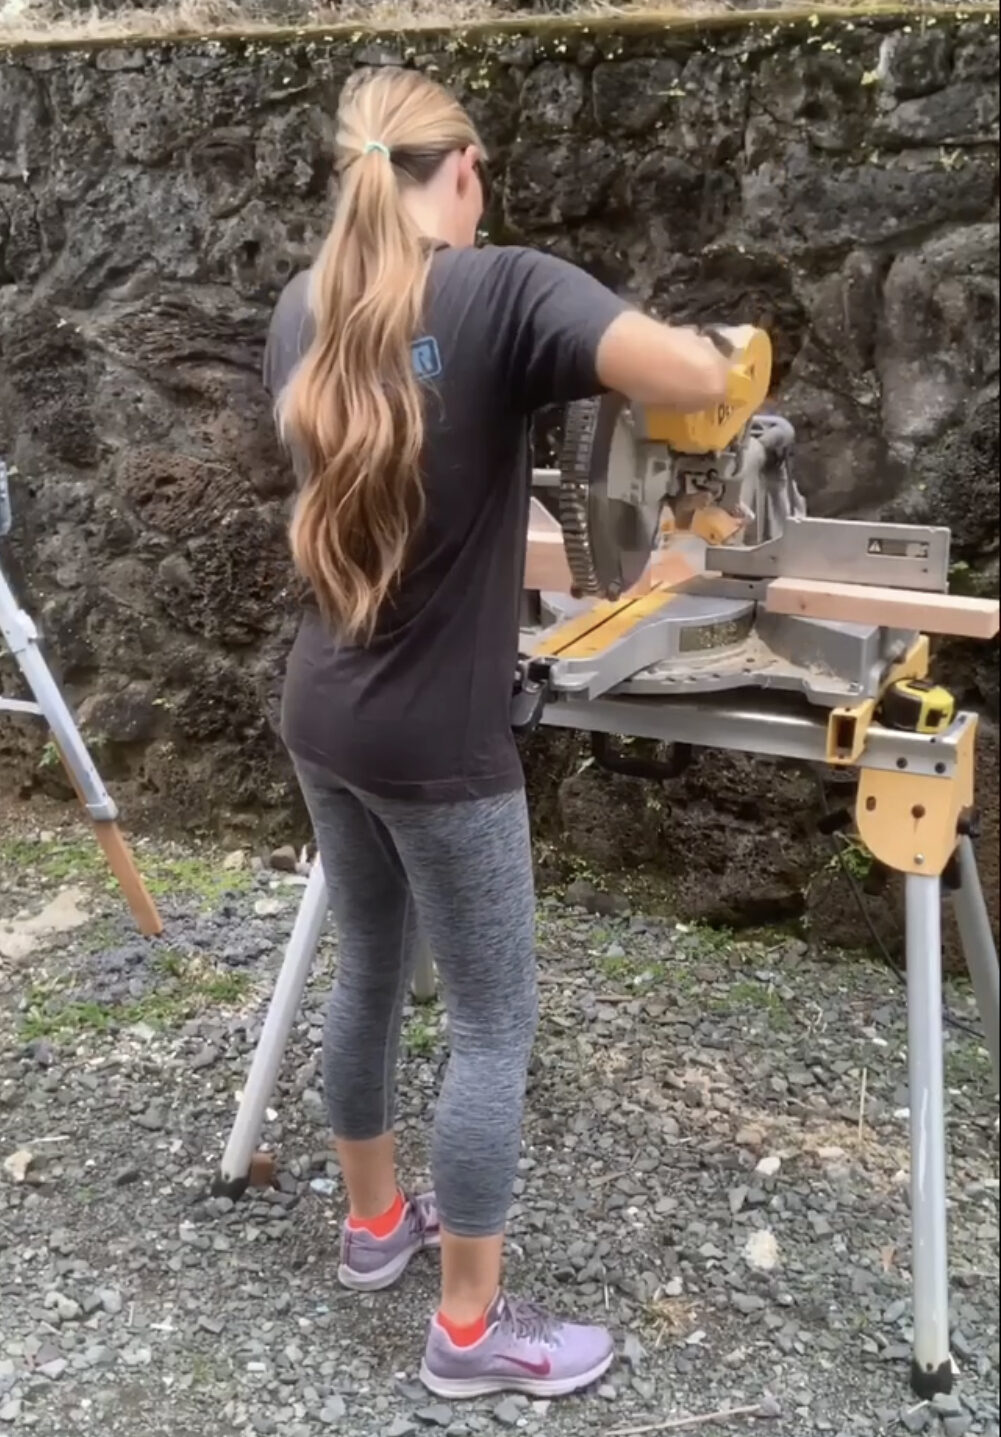
Step 4: Cut the 2x4s
Cut 6 of your 2x4s down to 72″ each for your vertical pieces for the Floating Ladder Shelves. Then, using the off-cuts from your vertical pieces and the last 2×4, cut 15 pieces to 11 7/8″.
Sand off any tear-out you may have.
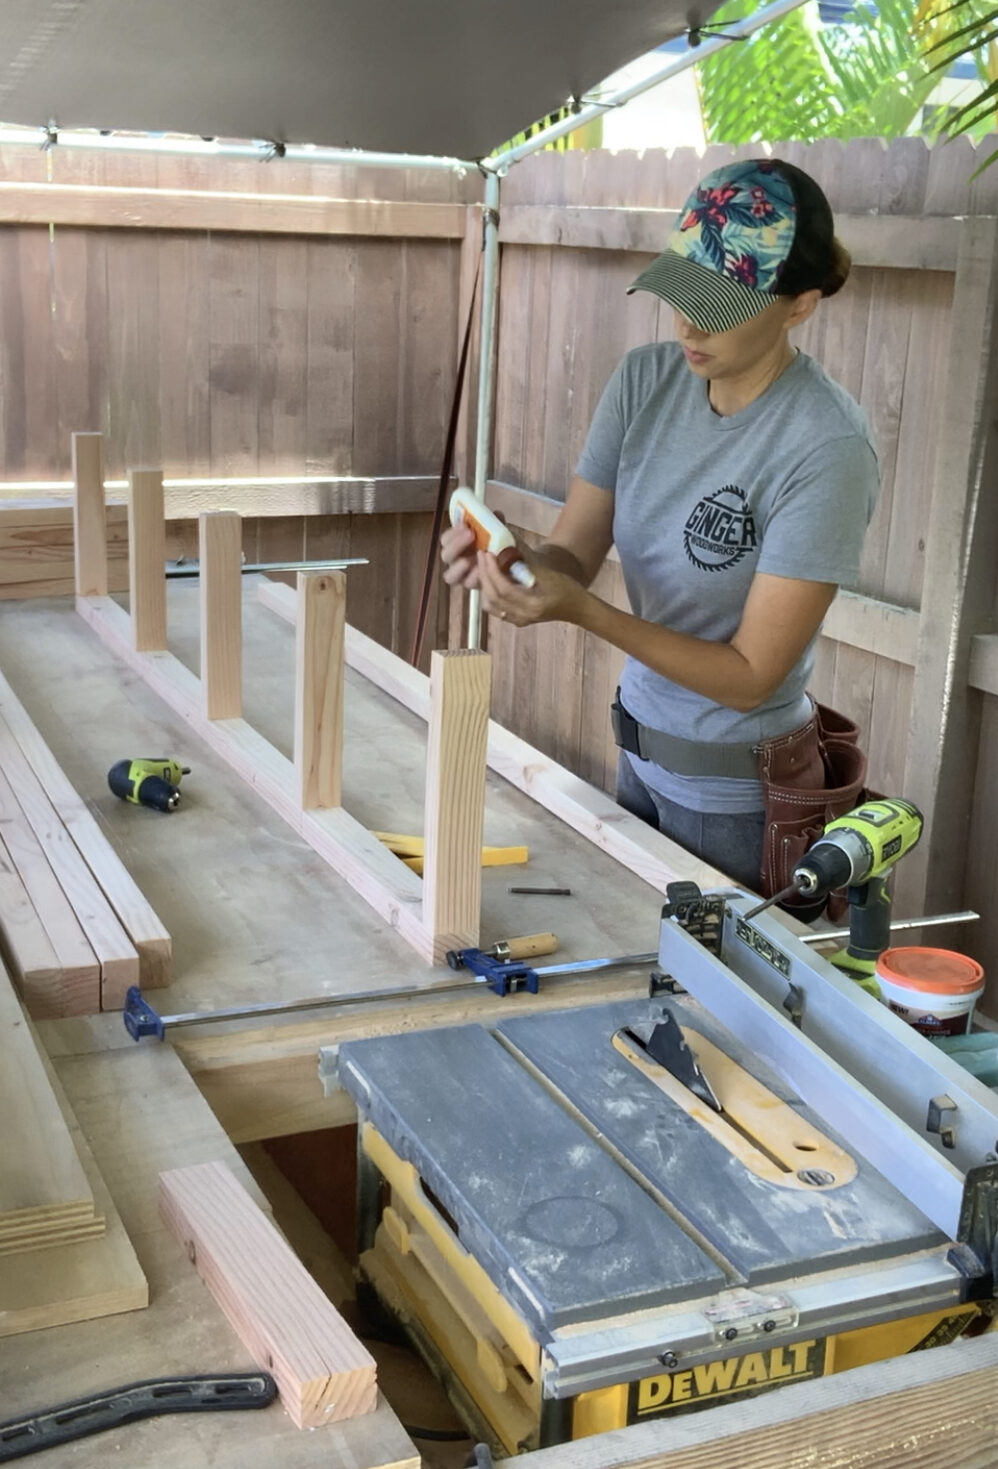
Step 5: Drill pocket holes
Use a pocket hole jig to make 2 pocket holes in each side of your 15 rails. Sand any tear out.
Step 6: Assemble the floating ladder shelf frame
Attach the small rail pieces to the long vertical pieces using 2″ pocket hole screws. Keep the pocket holes facing up, so they will be covered with shelves or at the top and not visible to anyone under 7’2″ tall. 😉 I also used wood glue at each joint.
For equal spacing, there should be 17 5/8″ from the bottom of one rail to the bottom of the next rail.
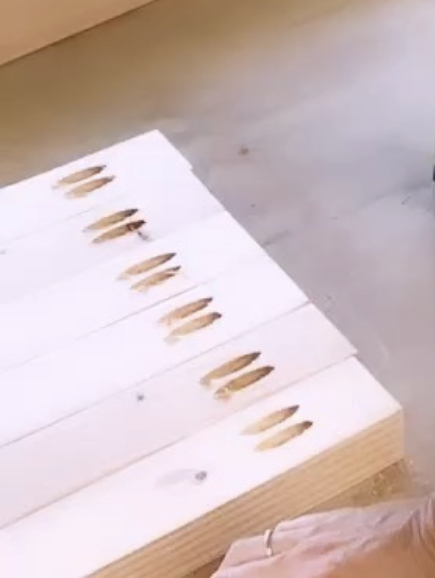
Step 7: Cut the plywood down to length
Since the plywood is less than 12″, I just used my miter saw to cut each piece to 76″. This gave me about a 4.5″ overhang on each end.
I gave them each a light sanding with 220 grit sandpaper and my orbital sander and then attached the iron-on edge banding. Trim the extra edge banding with a utility knife or an edge banding trimmer like this one.
If you didn’t get a nice seal with the iron, using an orbital sander will heat up the glue and really help bond the two together a little better, too. Just be careful not to over-sand and go through the edge banding!
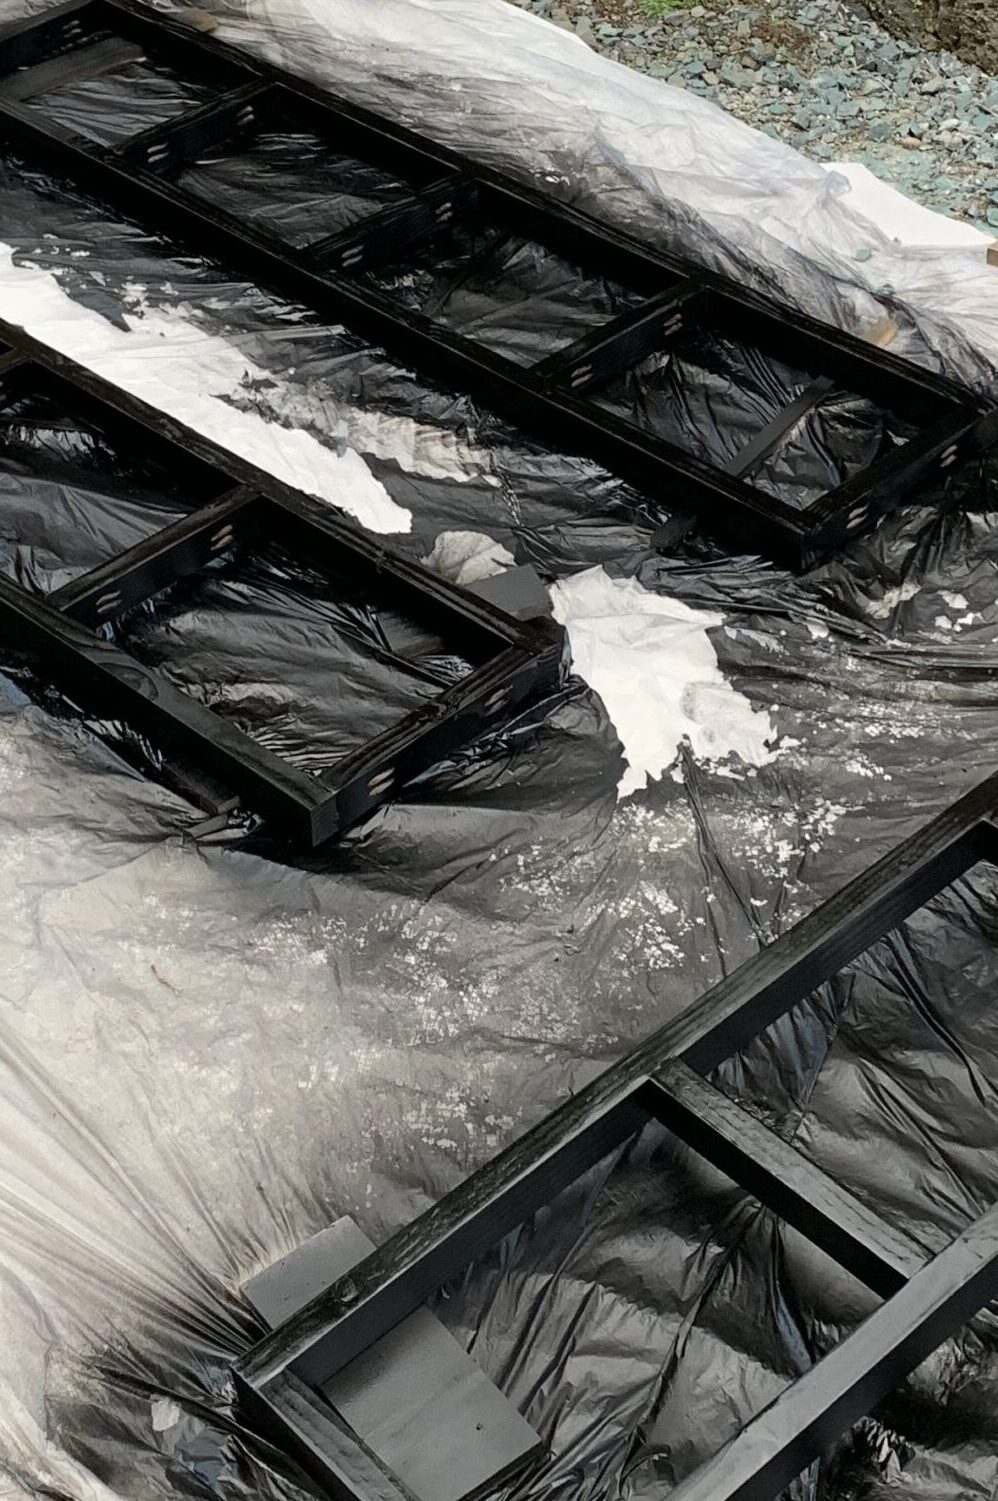
Step 8: Paint and stain
I used my Graco cordless airless sprayer to spray the rails. Black spray paint would also work for this project. I am still undecided on the stain for the shelves and have just left them as is for now.
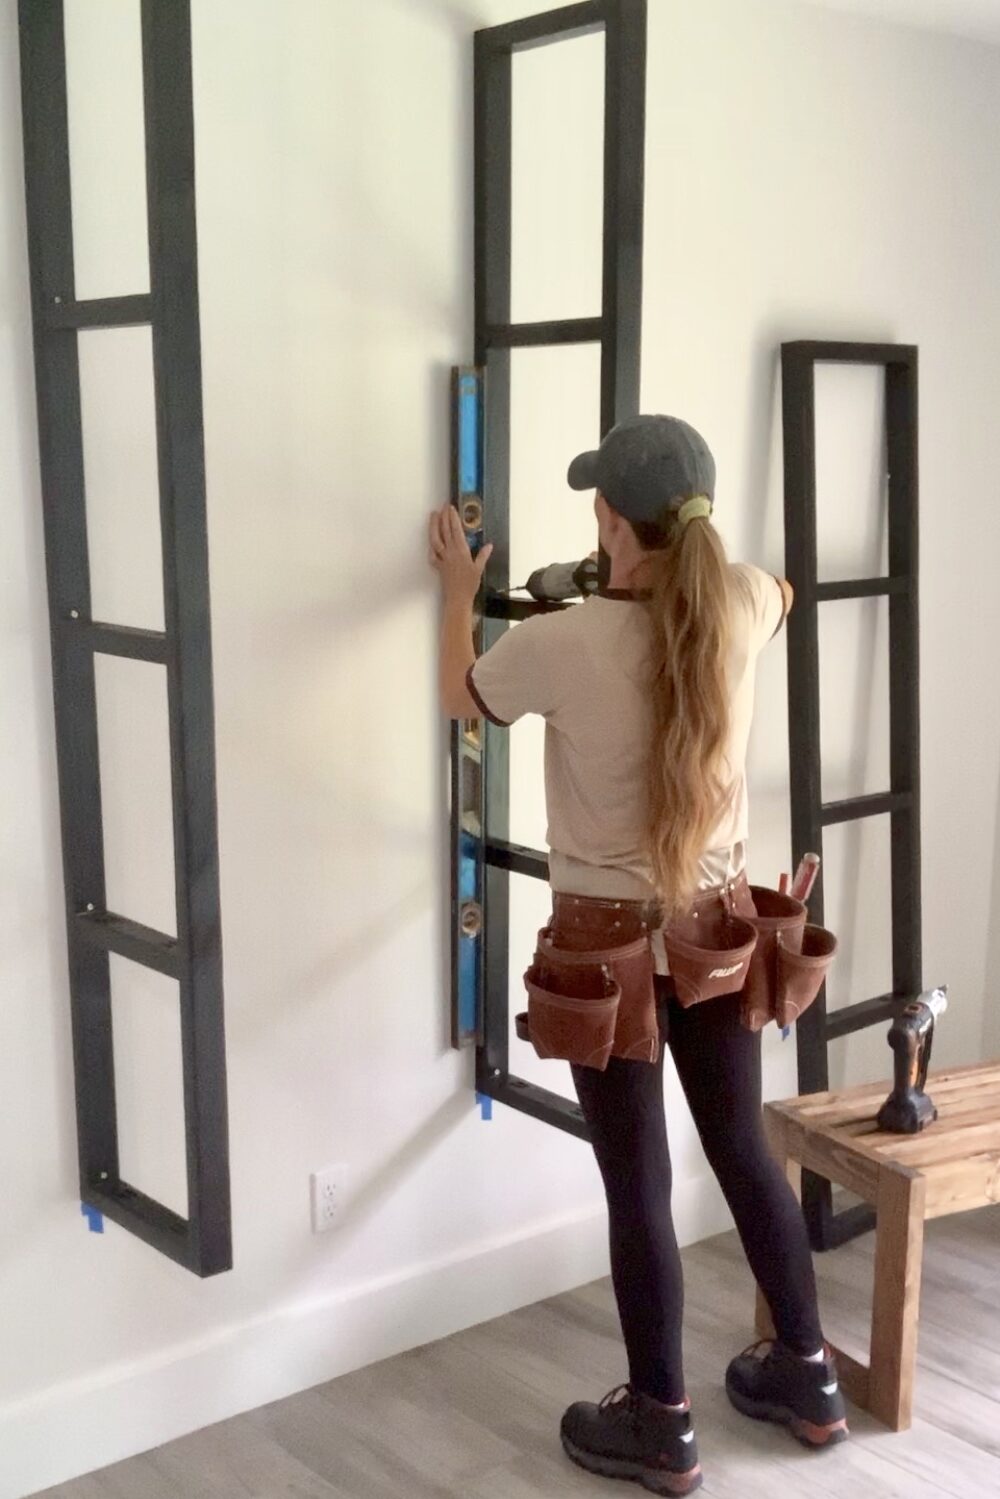
Step 9: Attach to the studs
I used painter’s tape to mark 14.5″ from the floor and had already marked where each of the studs were that I’d be using.
Originally, I had used a bench to help me hold each piece while drilling, but then I decided it was too high and moved them down, and the bench wouldn’t work. Soooo…even though you see me using a bench in the video, I didn’t use it the second time around, and it worked just fine for me to hold them and just brace them on my knee. Ha!
I drilled pilot holes just above each of the bottom 4 rails and also drilled countersink holes, so my screws would sit flush. I wanted them close to the rails, so the plywood shelves would hide them. Then I used an impact driver to drill 3.25″ star head deck screws into the pilot holes I’d made.
Step 10: Place shelves on the Rails
Once each shelf is placed on the rails, use the 1.25″ screws to secure them down to the 2x4s.
Need more DIY inspo?
Love it, but note that the wall must be wide enough to be able to slide the shelves into it…🤔
Definitely! There’s a note in step 1 about that possible situation. 😉
Love this – I am wondering if you think I could suspend this from the celing rather than wall? I am looking to make something a little lighter with maybe only one or two shelves in it. Maybe even use glass shelves. It is for my kitchen. Thanks, Dee.
Sure! You’d still need to find the ceiling joists to drill into, but it’s definitely doable. 😉
I saw this project and convinced my husband to do a version in our home! We’ve opted to use India ink for the brackets, but I’m also undecided on the shelves for now. I love how you styled your shelves as well.
Thank you! Glad you liked the idea. 🙂
Beautiful!!!! I am going to make these shelves for my bathroom…..of course not as wide.
Très bien fait, vous êtes top.
I have a 10′ wall I’m working with and this Ladder Shelving will work good. With offset shelves I can get the boards in with out to much of a problem. Thank you for this idea, will be working this out first.
What measurement did you use on your pocket jig?
Love these ! Good job GIRL POWER! I wanted this type of design for my dining room makeover but I was thinking without the back piece and then have a long buffet underneath the shelving so I can display my white dishes but cutting down on the wood on the wall is that possible still?
Where exactly does the iron edge veneer banding go? I love these bookshelves and am currently measuring and planning to build my own set tomorrow!
Great project, going to get started. You are extremely talented and explain things easily. First time on this site, will come back again. Nigel
Great job! Do you have links to the shelving items on your Amazon referral page? Thanks.