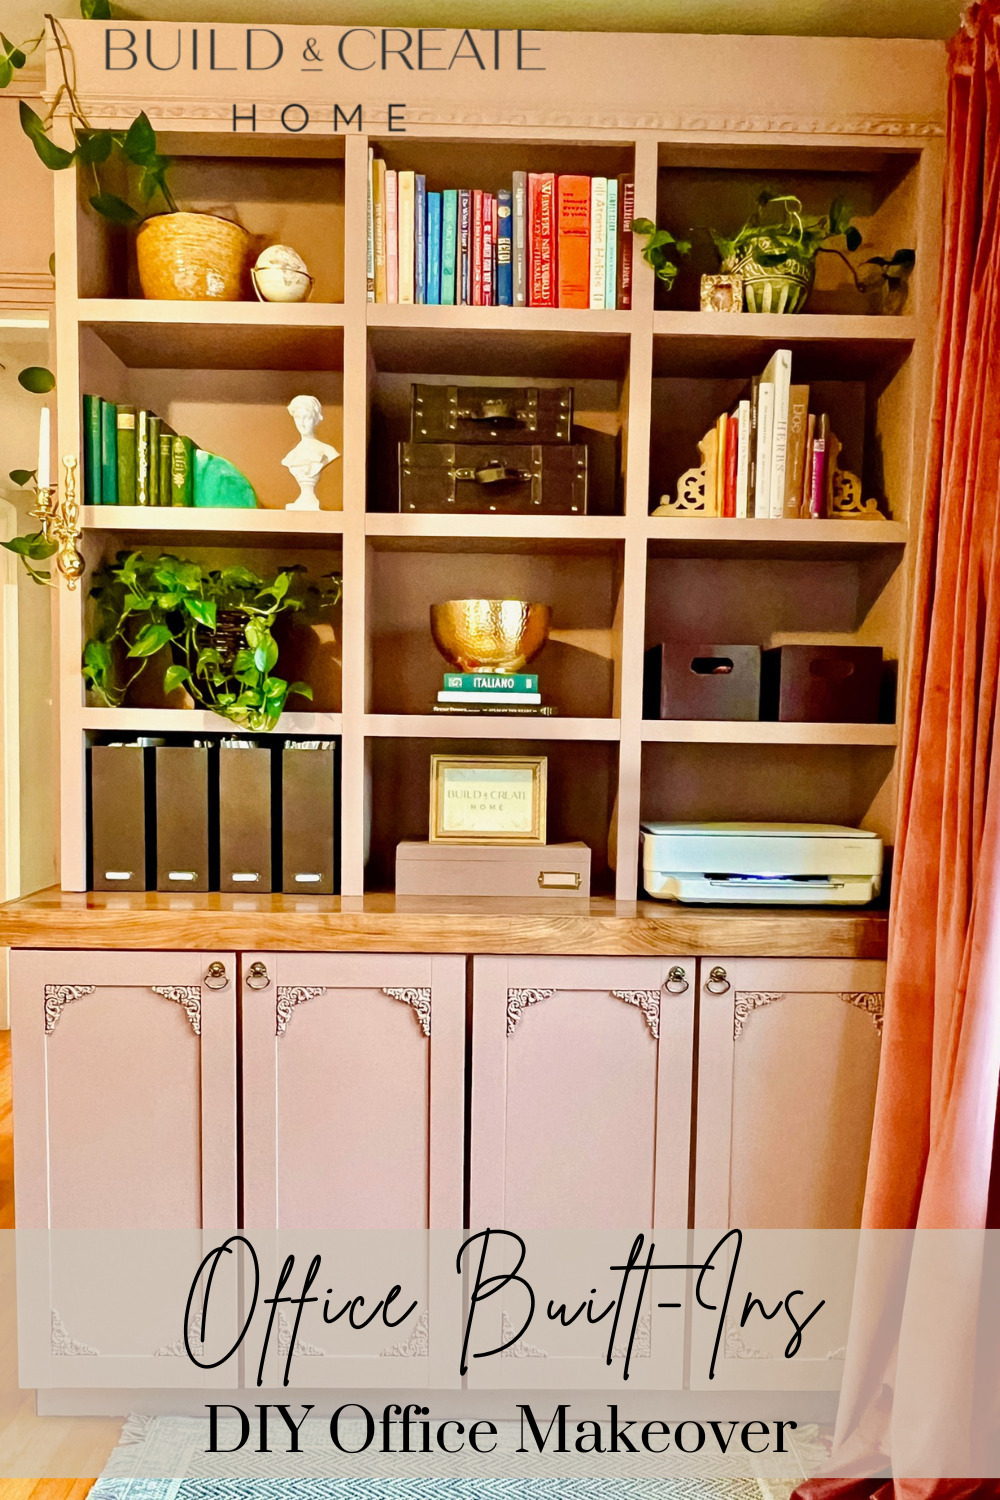
Self care means creating these DIY Office Built- Ins for my own office. I knew I needed it to be the perfect mix of practical, functional, feminine and fabulous. And not to brag but… I nailed it.
If you haven’t had a chance to check out my DIY Breakfast bar, go do that! A lot of the process is very similar, and can be used here. So if you have already done the breakfast bar, you’re ready to roll in your office as well!
This post will contain affiliate links- please see my disclosures page if you need any information on that!
Supplies needed to make your DIY Built-in Shelves:
-cabinets (The ones I used on the bottom are linked here in the post- These are 15″. To save even more money you can buy these unfinished! You will have to paint them either way, but on the unfinished ones, the coverage isn’t quite the same)
-4×8 foot plywood
-poplar 1×2 is the trim around the edge of the top (poplar is sold by the foot so one piece 89 inches and one that is 26 inches long to go around the edge)
-1×2
-1×6
-trim
-pvc decorative trim (there is option after option after option!)
-metal panel
-black paint
-Sherwin Williams Redend Point
Tools needed to make your DIY Built-in Shelves:
-table saw
-cabinet screws
-miter saw
-jig saw
-multi-tool
-brad nailer
Step 1- Get your supplies
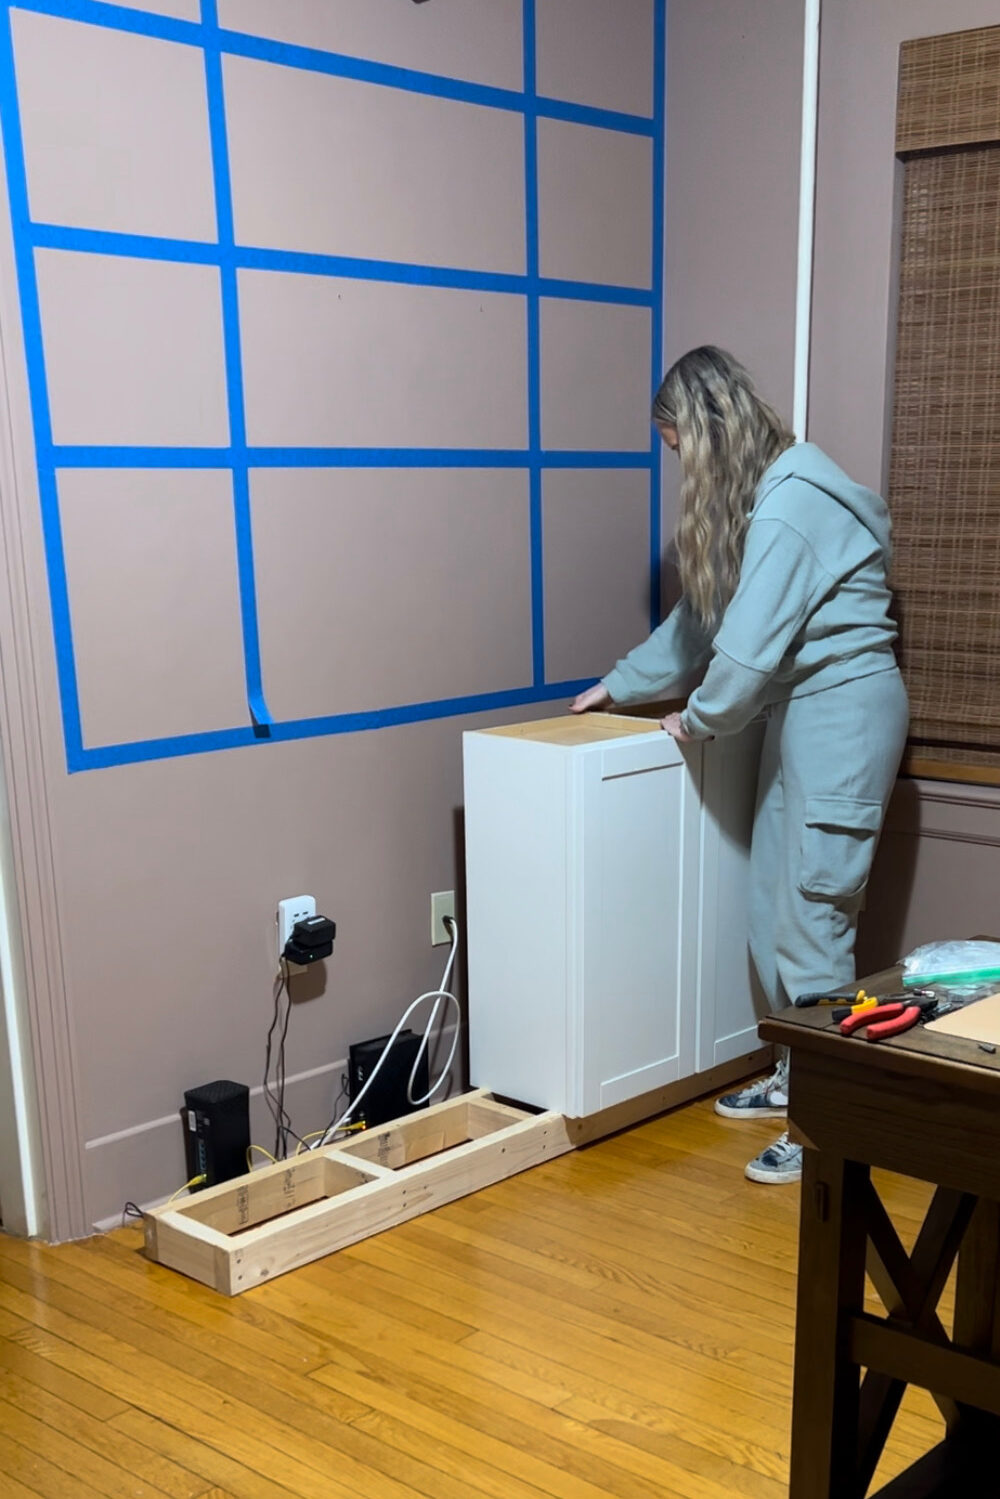
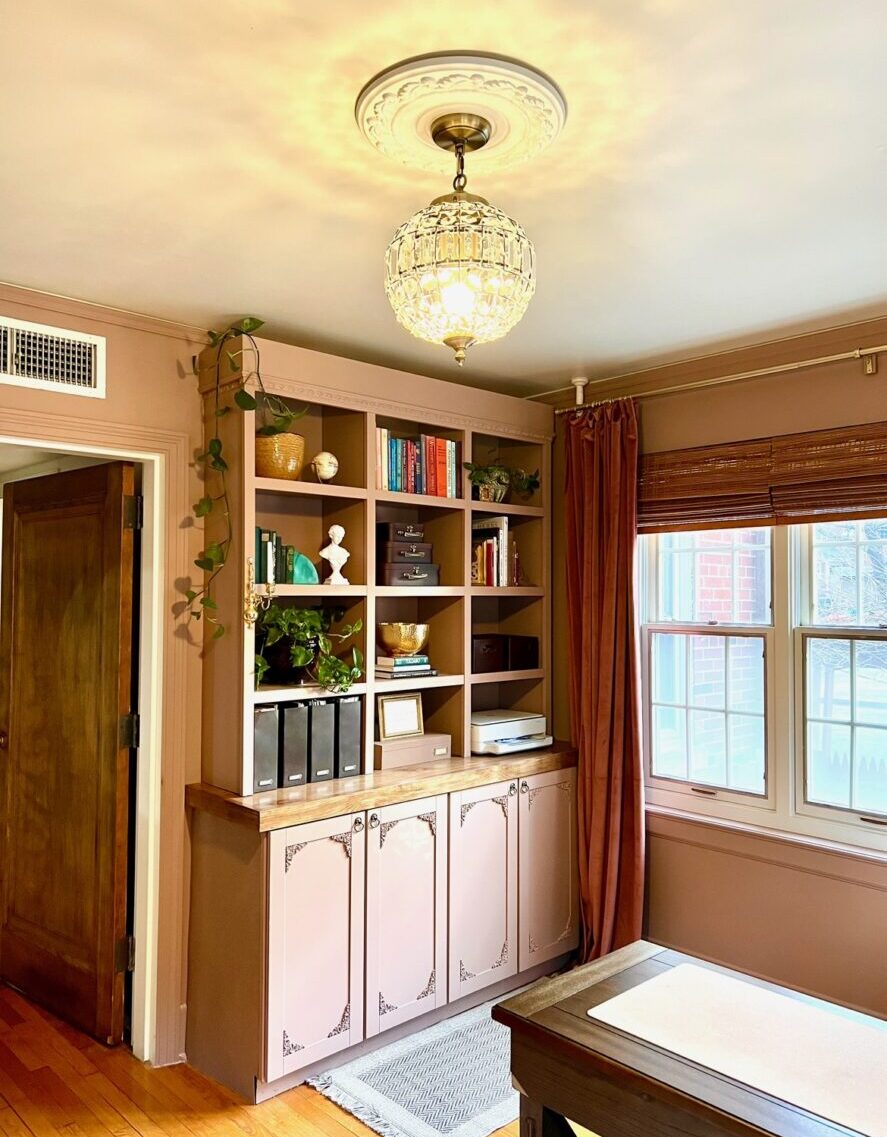
Cabinets are a must-have for these office spaces, I needed storage first and foremost in my DIY Office Built- Ins.
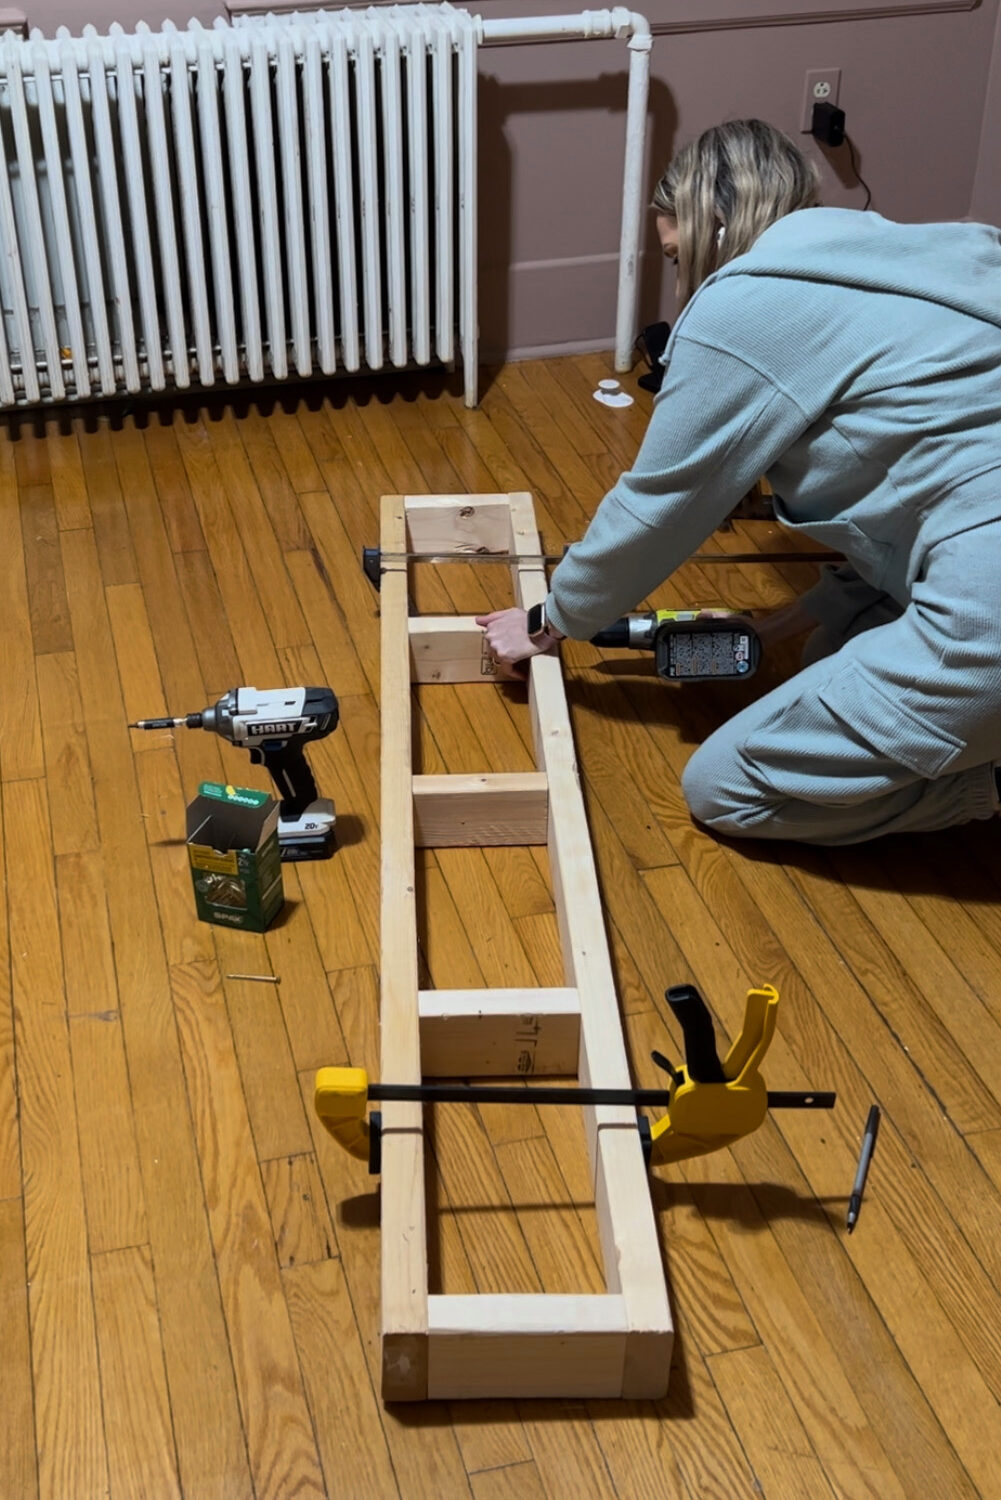
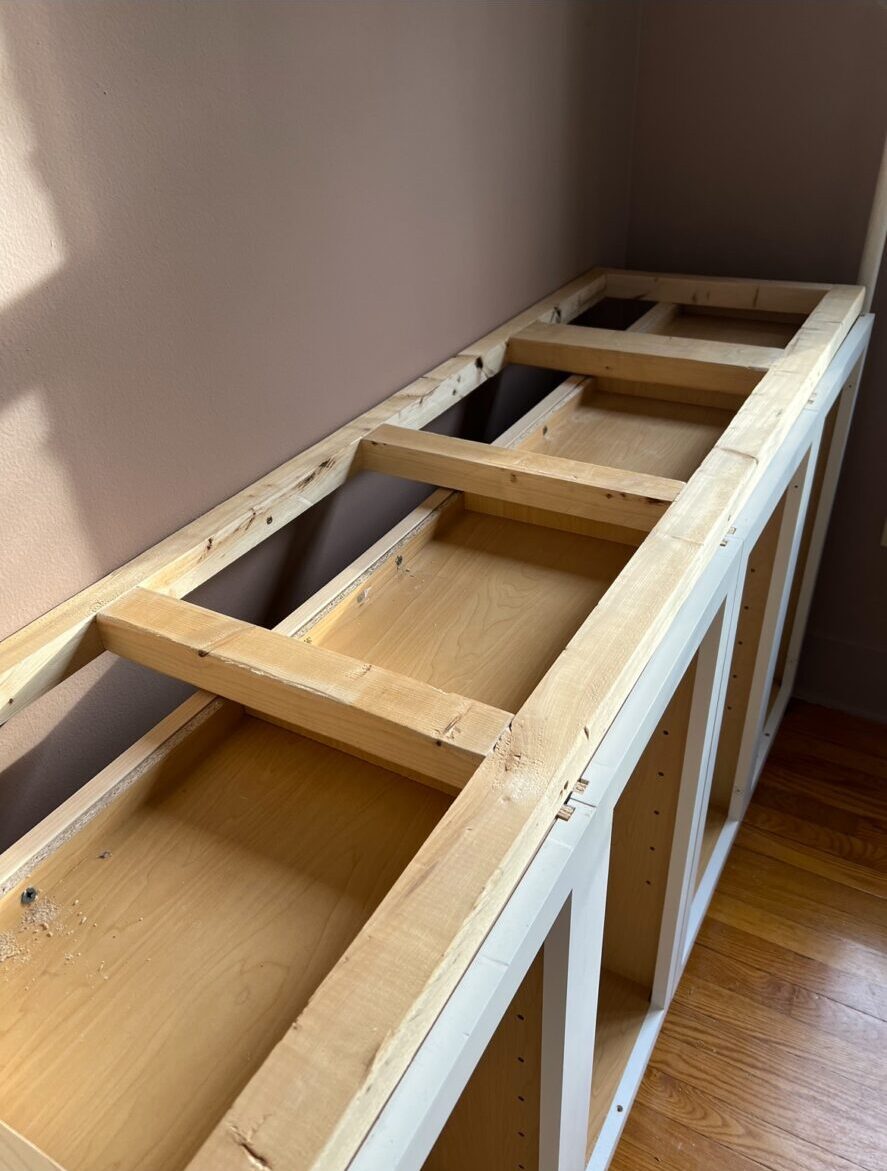
Then you want to find your bottom cabinets. I used two of these 15″ bottom cabinet drawers. I didn’t want them sitting directly on the floor to keep a gap for the wires, routers, and power cords I needed. To give it a raised base, I used 2x4s to build supports. They were screwed together, then the lower shelves were set and screwed on top of them.
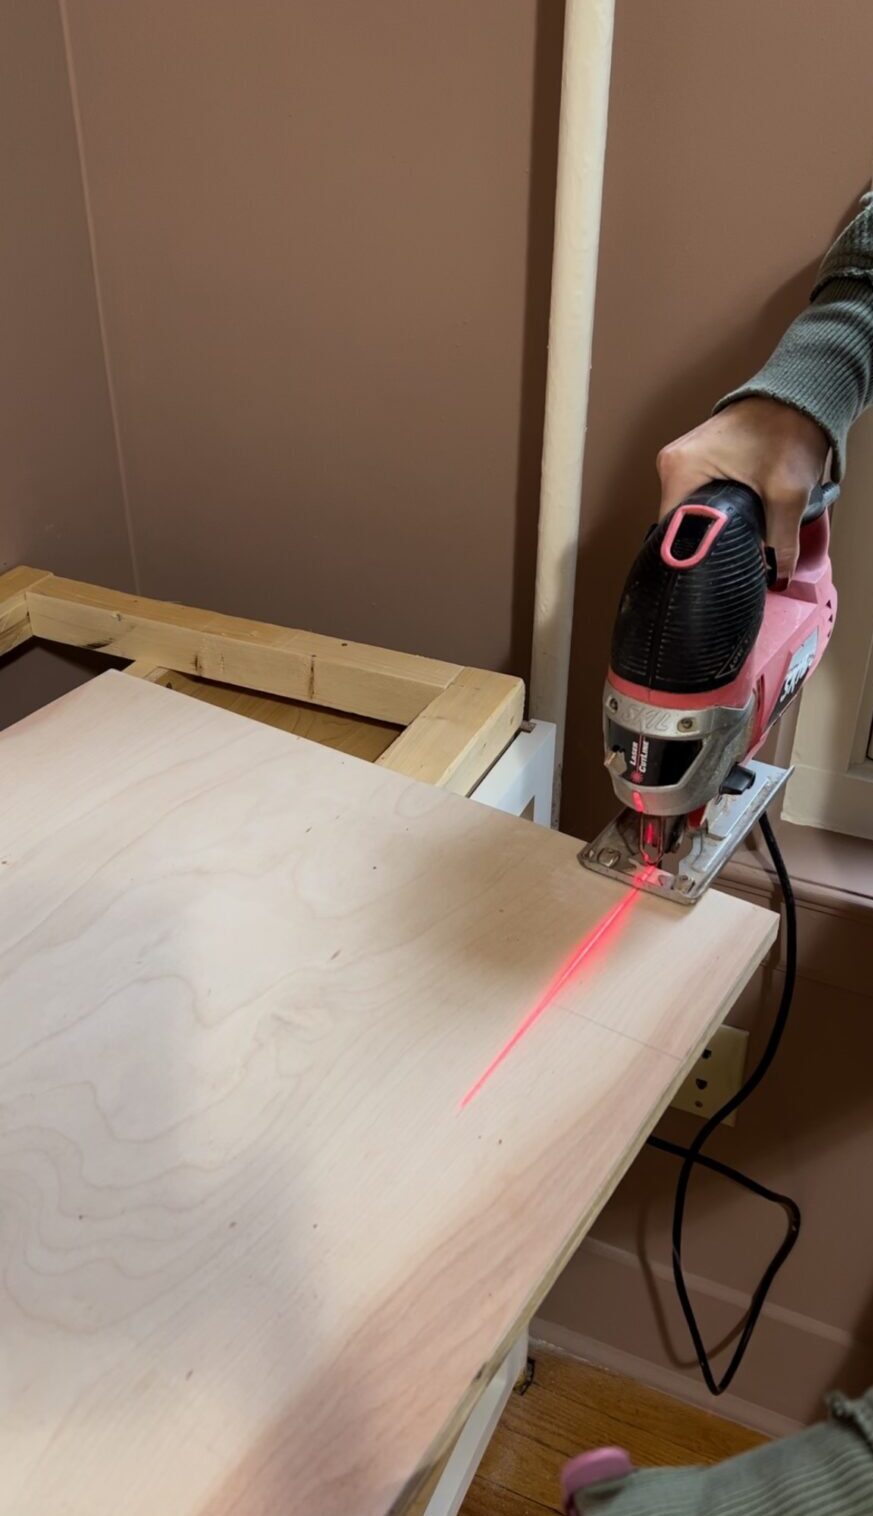
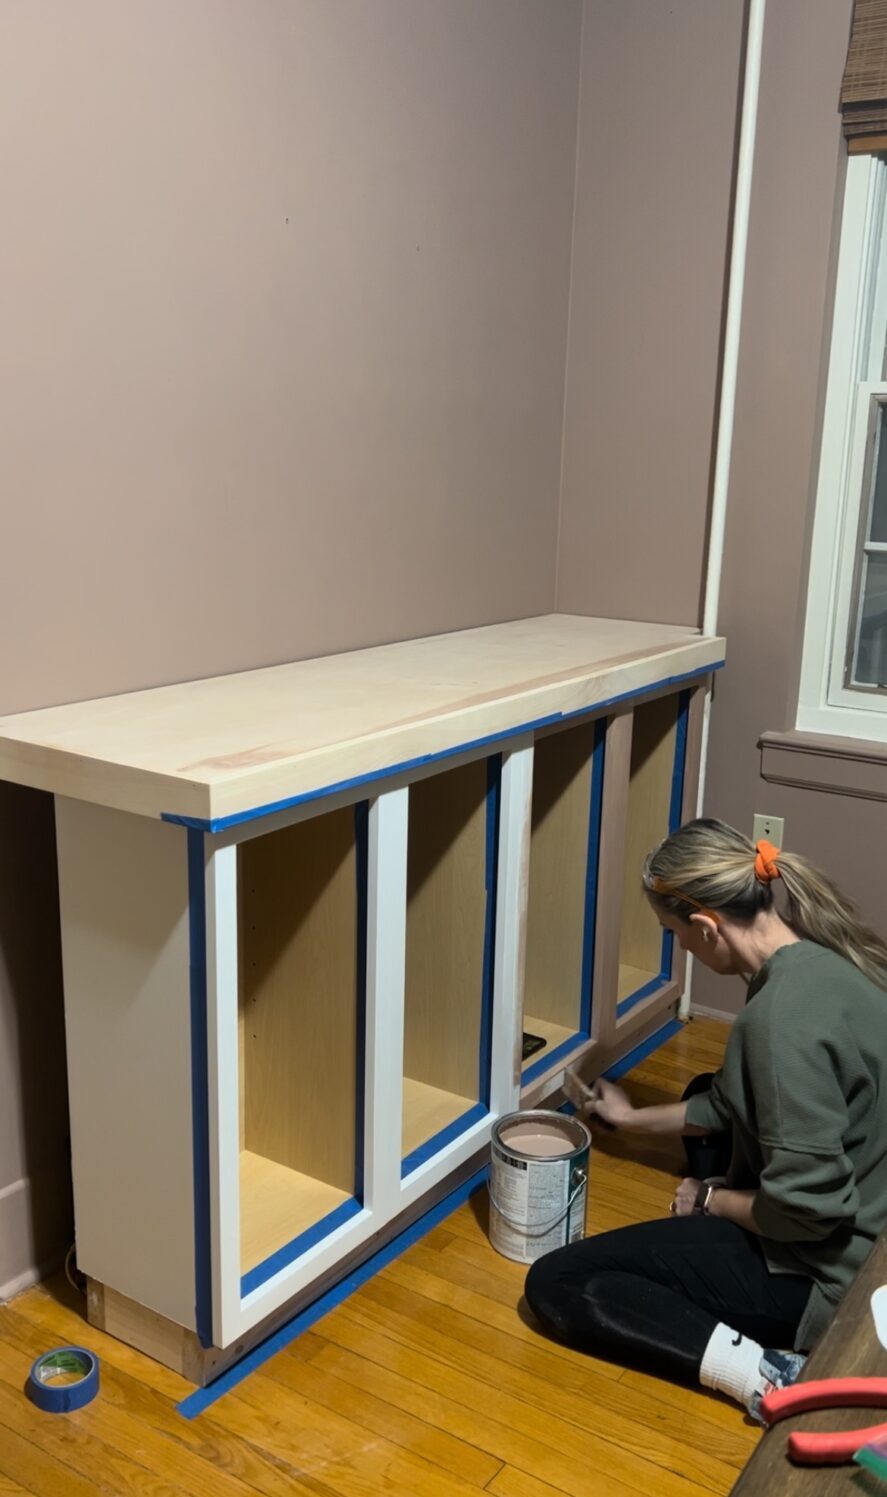
(Before I started on the countertop, I used the 2×4 frames underneath them so there would be support there. They got placed on top of the bottom cabinets and screwed both into the wall studs and into the cabinets. The counter on top is a 4×8 foot plywood piece of plywood I had ripped to fit the top. You can do this yourself with a table saw, or you can have it ripped for you at Home Depot or Lowes.
Step 2 – Secure the cabinets and make the shelves a countertop
I clamped the lower cabinets together and attached them with screws. I drilled pilot holes first. This makes the whole things seem super secure and sturdy.
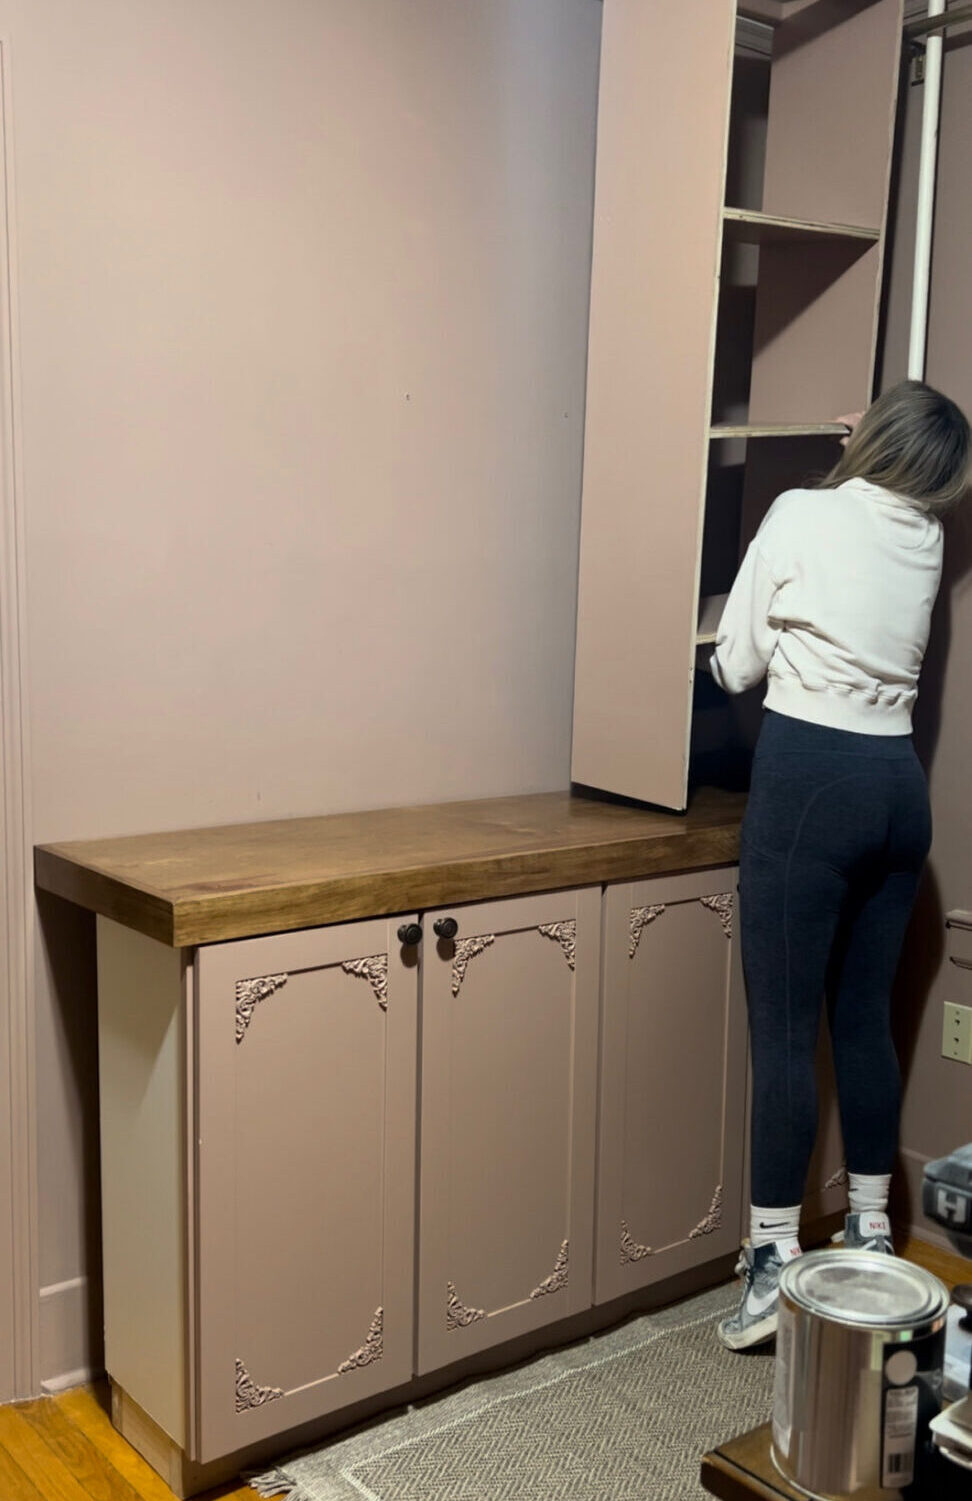
This is when I started the countertop on the lower cabinets. The countertop was not stained yet, because I wanted to paint the lower cabinets, and I wanted to add tape before I did that. I needed to cut the plywood to get around some PVC in my home, so I was sure to make it fit like a puzzle. I added trim down the sides to finish it up.
Step 3 – Start painting your shelves, and add stain to your countertops
When I tell you I had no idea that a paint color could cause such an uproar… phew! I called this Sherwin Williams color “pink” (which I stand by, it is definitely pink in person) and boy did I get some hot debates in my comments. Pink, tan, mauve, whatever you want to call it. I love this color and it was the perfect addition to my office space.
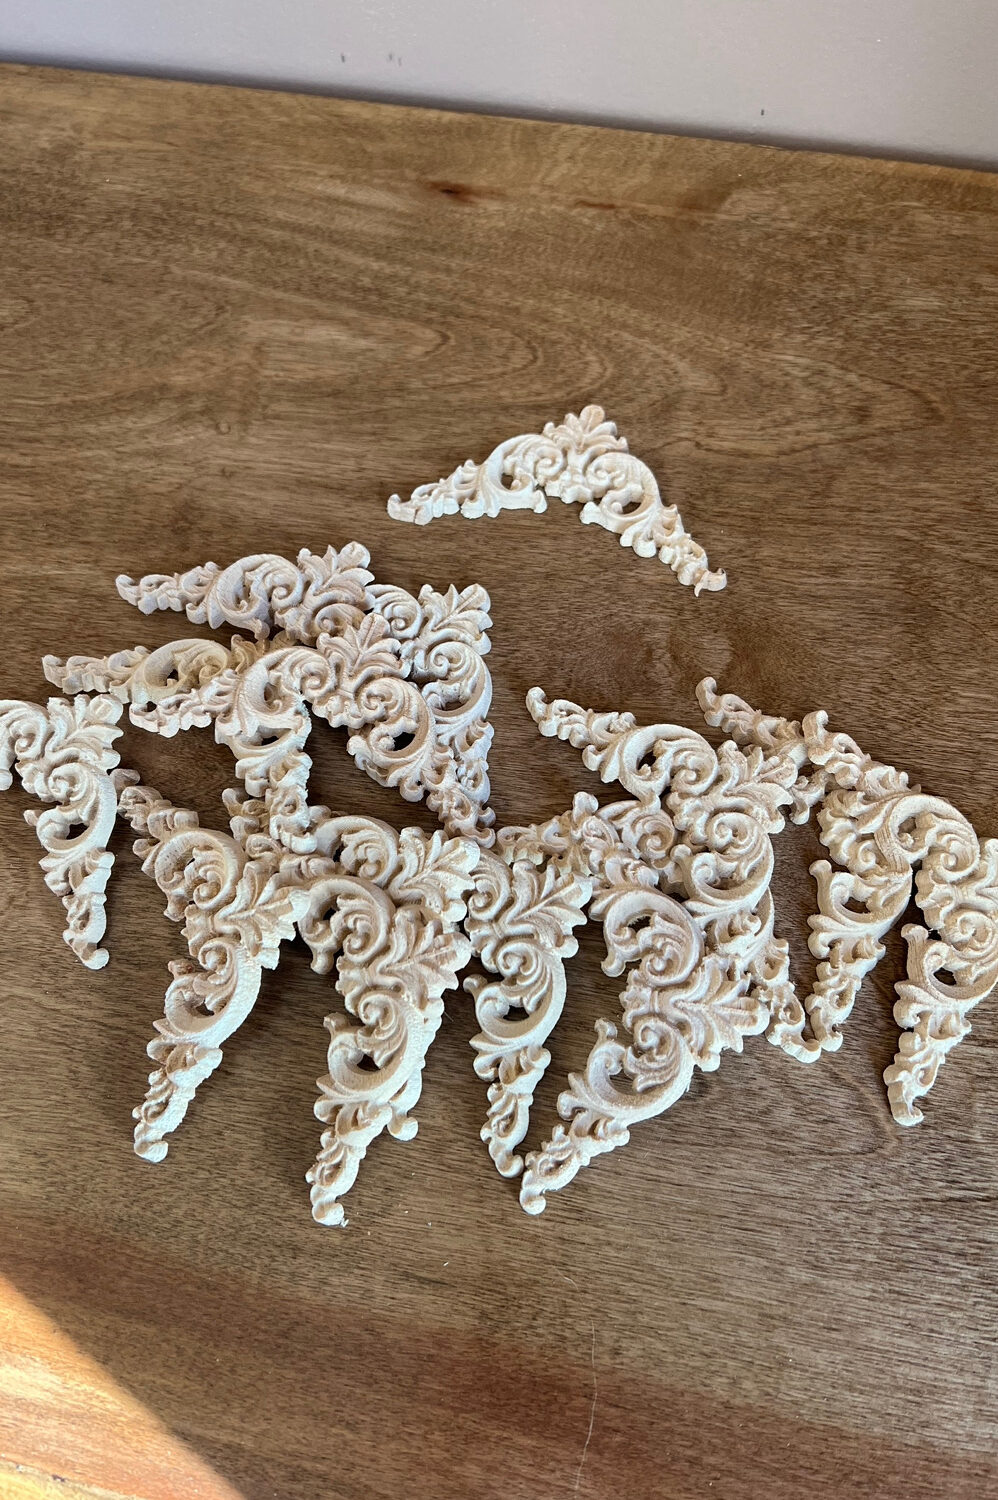
Our home is historical and Victorian, and I wanted to bring that into the DIY Office Built-ins as well. I found these amazing little accent pieces to add to the corners with Krazy Tape. This stuff is crazy fast, and crazy strong! I think it added just the right touch to my cabinets.

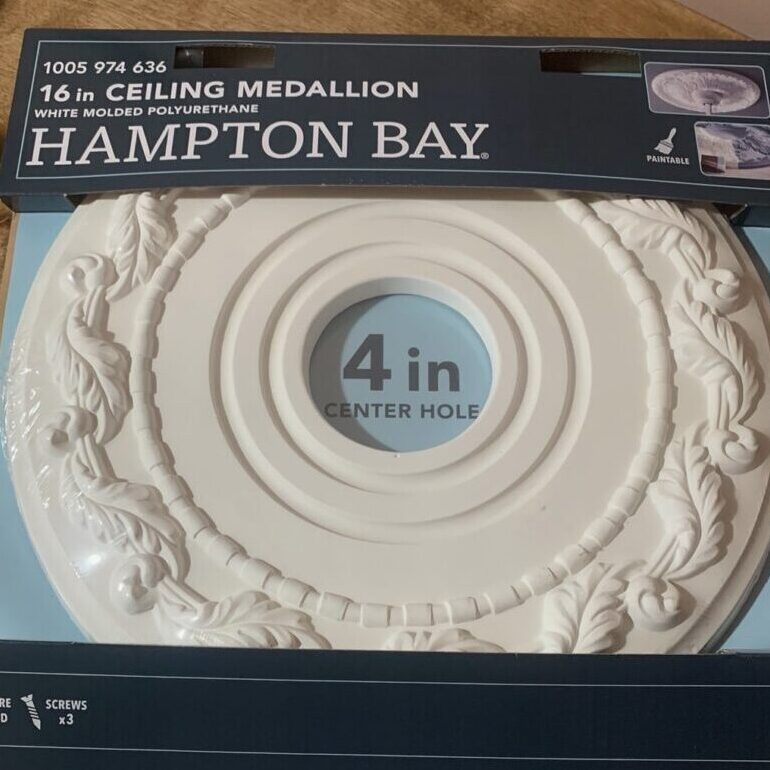
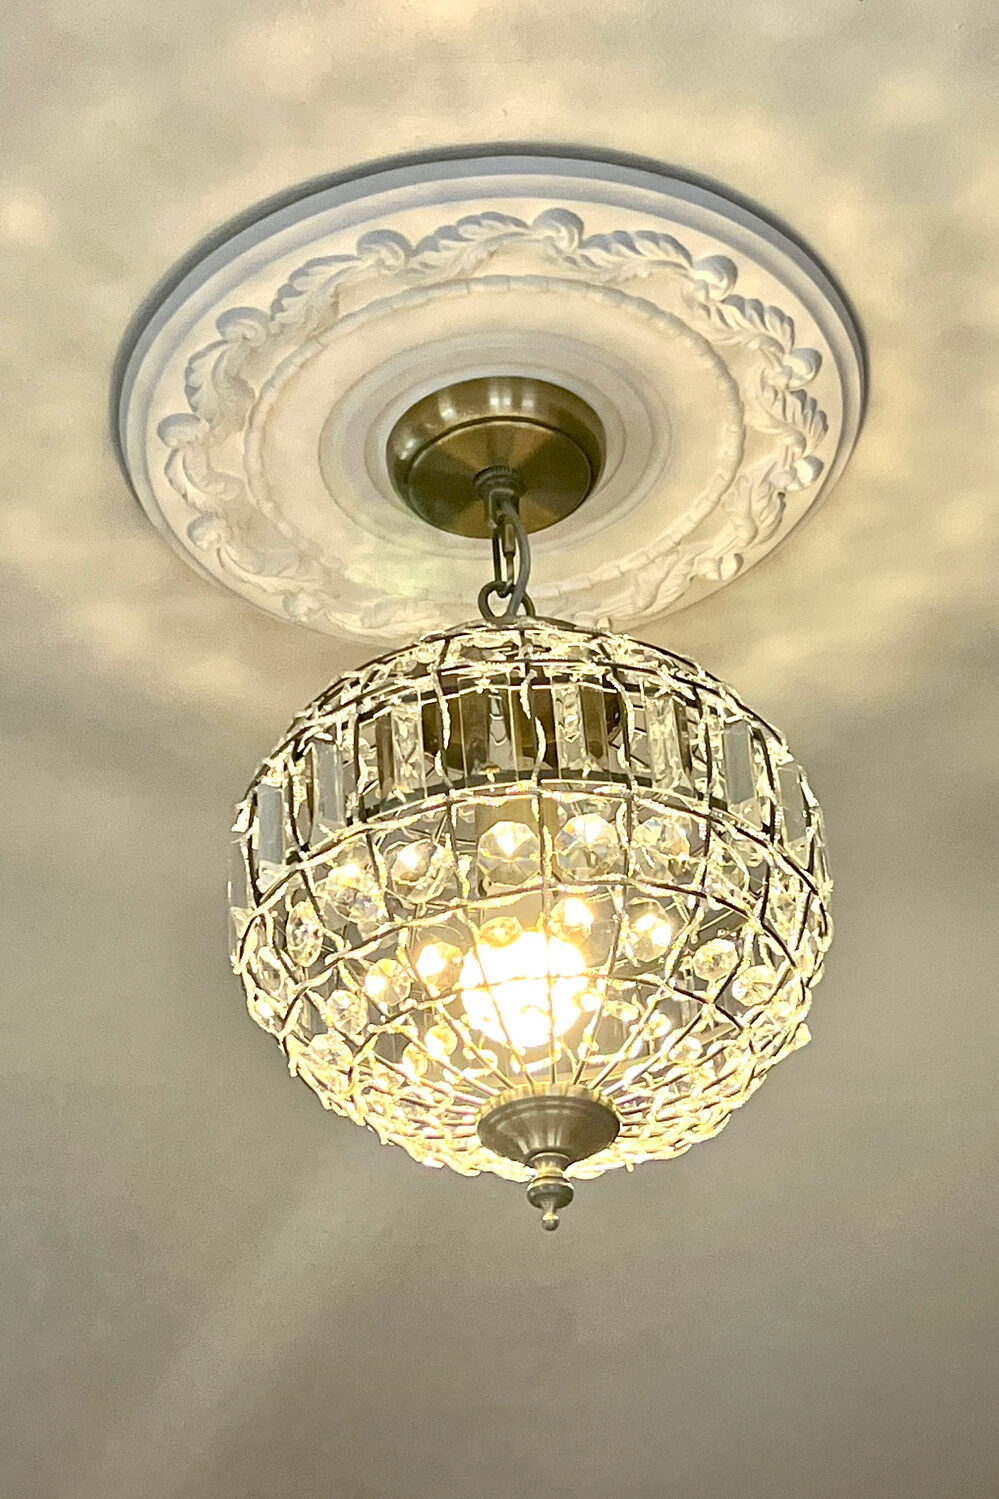
I was also able to find the perfect accent piece to math and go around my chandelier that hangs in front of the office shelves!
For the stain, I used this pre-stain wood conditioner. Next, immediately I used one coat of medium walnut. I used this stain and followed with FOUR (yes. Four) coats of this polyacrylic. This process was all about layering, so I added the stains pretty immediately on top of each other.
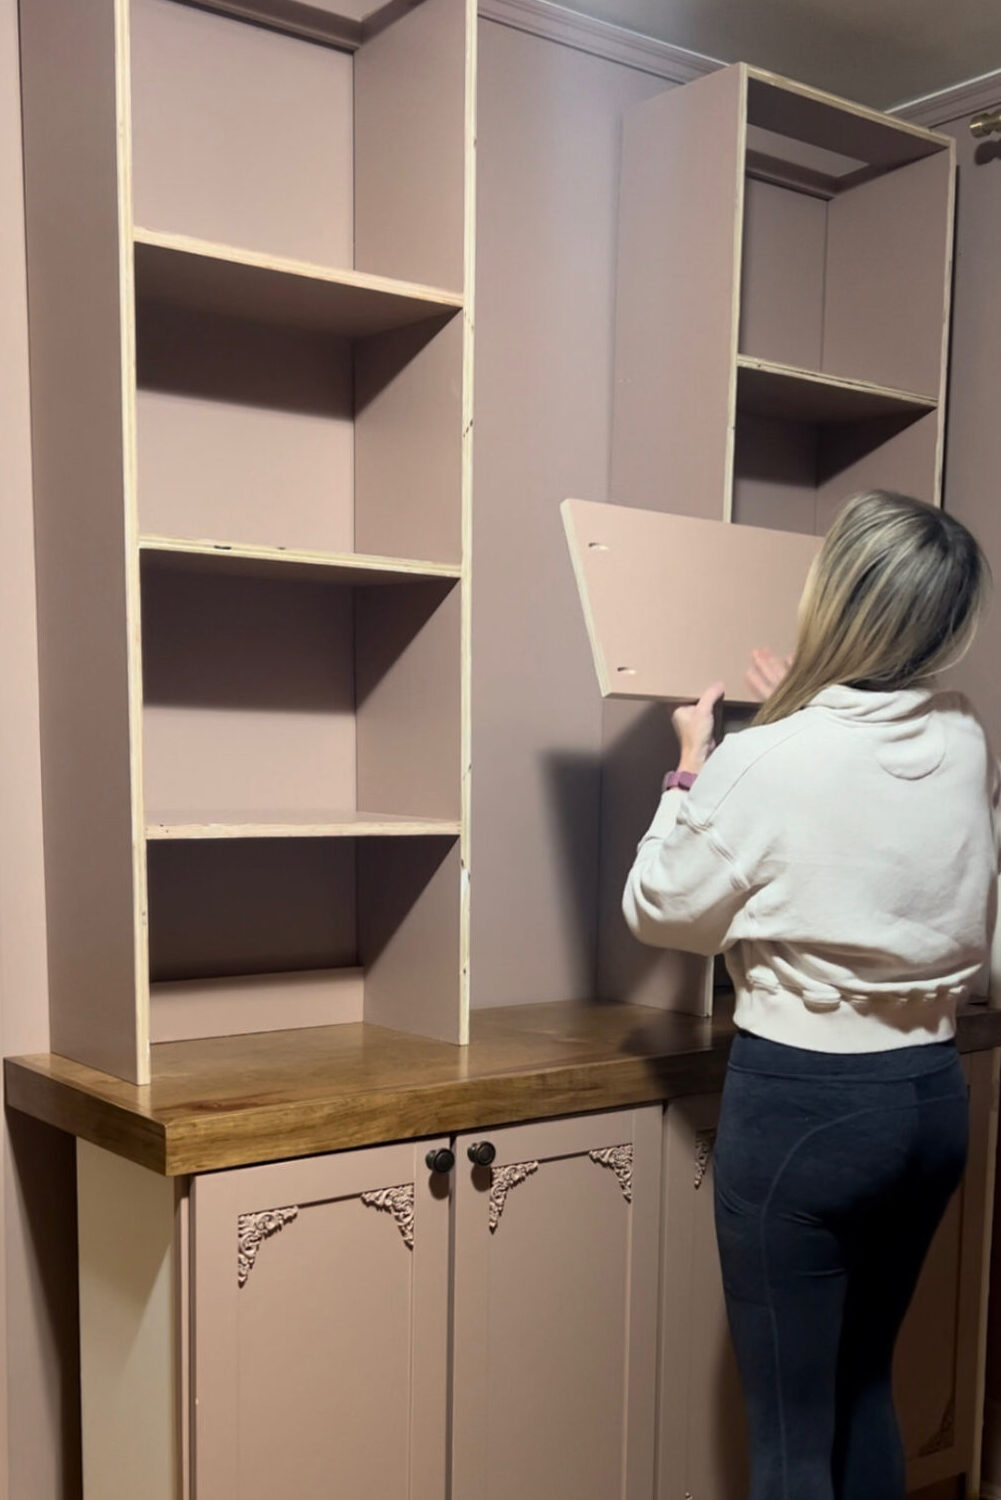
Step 3 – Paint and Secure your upper cabinets and countertop
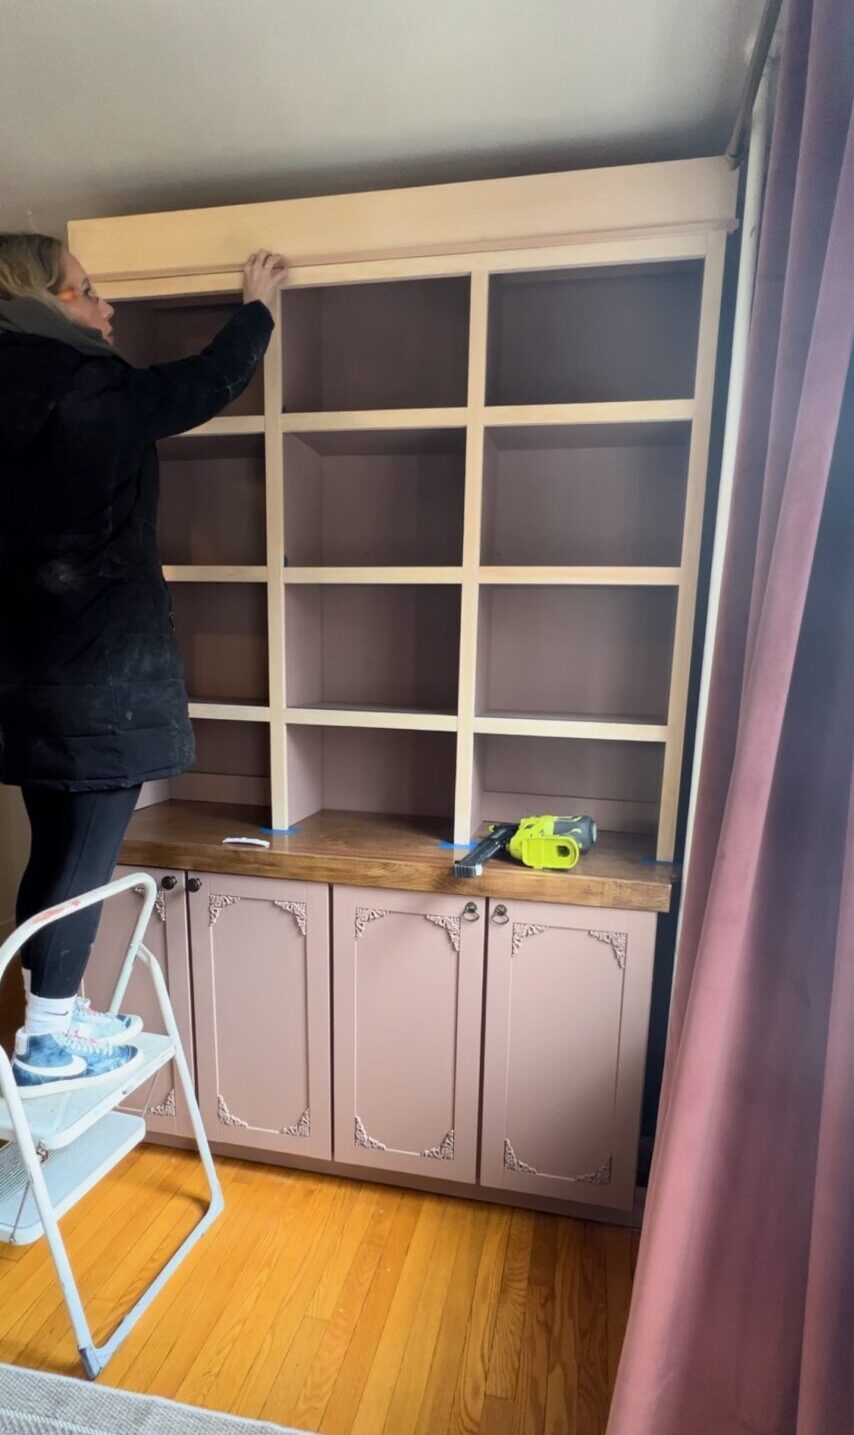
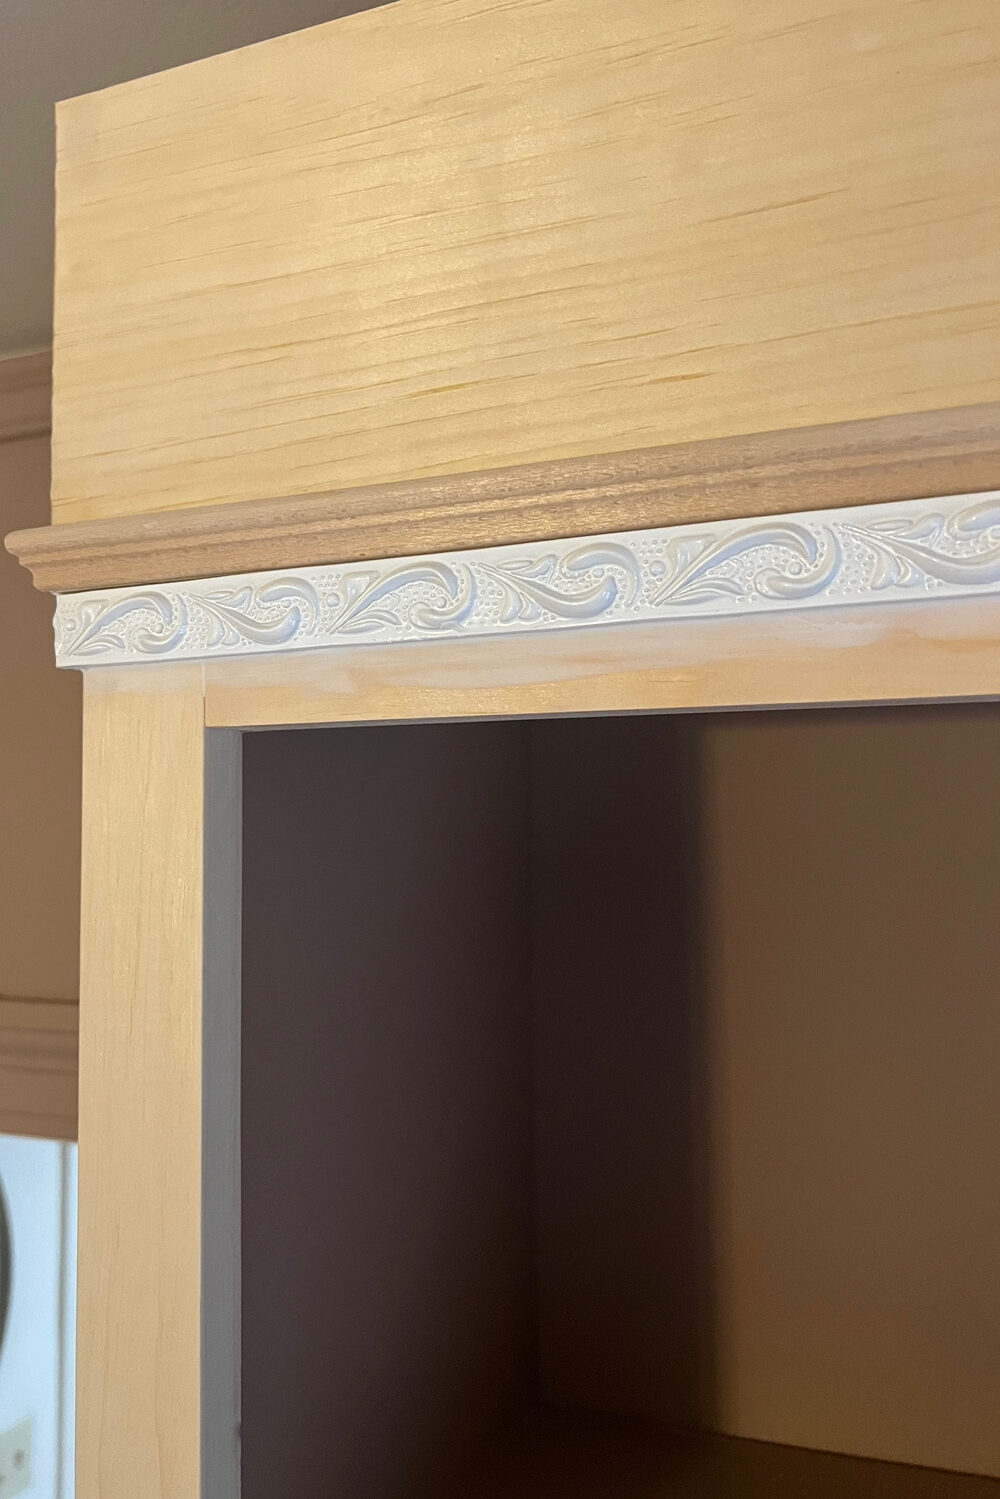
Once I had the countertop stained, it was time to add the upper cabinets. I used plywood and built and painted the two sections. The shelves between the two of them are made with ripped plywood, and connected them using pocket holes in the center shelves. Lastly, I added a top to the unit with 1x2s as trim, and a 1×6 around the top that I connected to the wall. I wanted to cover the seam and add a decorative element. So I added this PVC with adhesive that I attached and painted. So gorgeous!
I also painted the side black because of the gap in the wall. The router needed to be covered, but still have good airflow. I attached the metal panel to the cabinets, and it was such a perfect solution!
These Built-Ins are SO loved, they’re the perfect mix of vintage and modern. It’s the perfect workspace for me. I added decor and styles to the rest of the room to match, and now my office is a dream.
One thought on “DIY Office Built-Ins”