If you haven’t seen my video on my Rev-A-Shelf DIY cabinet video… check it out here. So I put it together, and I have that project broken down. I LOVE the breakfast bar project for adding organizational solutions to a small space. If you’re looking to add even more space, let’s elevate that already awesome project with DIY Breakfast Bar Floating Shelves.

(Those of you holiday lovers, don’t forget we have some Christmas DIYs waiting in the wings. Check out the soda can jingle bells! Or challenge yourself and elevate your tree game with the tree box stand! We’ve got what you need to put the holly in your jolly.)
This post will contain affiliate links- please see my disclosures page if you need any information on that!
Supplies needed to make DIY Floating Shelves:
-2×4
–plywood (if you worked on the DIY breakfast bar, this can be what is leftover from that)
-screws
-level
-pre-stain conditioner
–oil
–stain
–polyacrylic
Tools needed to make DIY Floating Shelves:
-table saw
–drill
Step 1- Test it out with tape, and set up your floating shelves
I am a visual learner. So step one for me was to tape on the walls to make sure I liked the height of the shelves. So glad I did that because I ended up changing the tape around a few times before I settled on their placement. I would take a picture, step back and make sure it was the height I wanted.
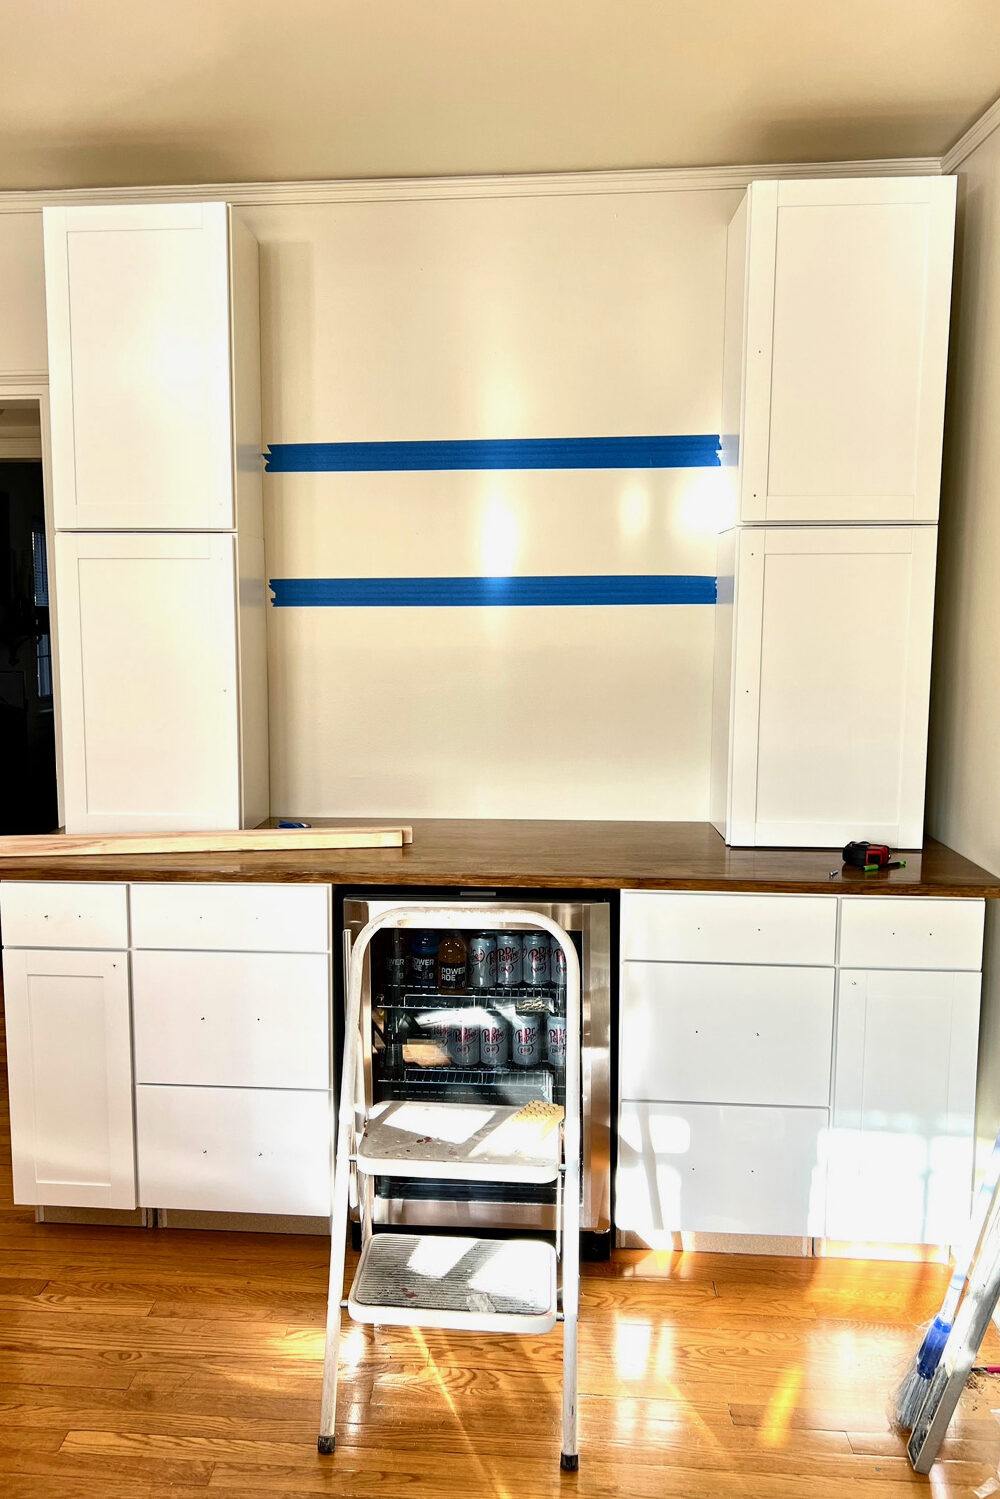
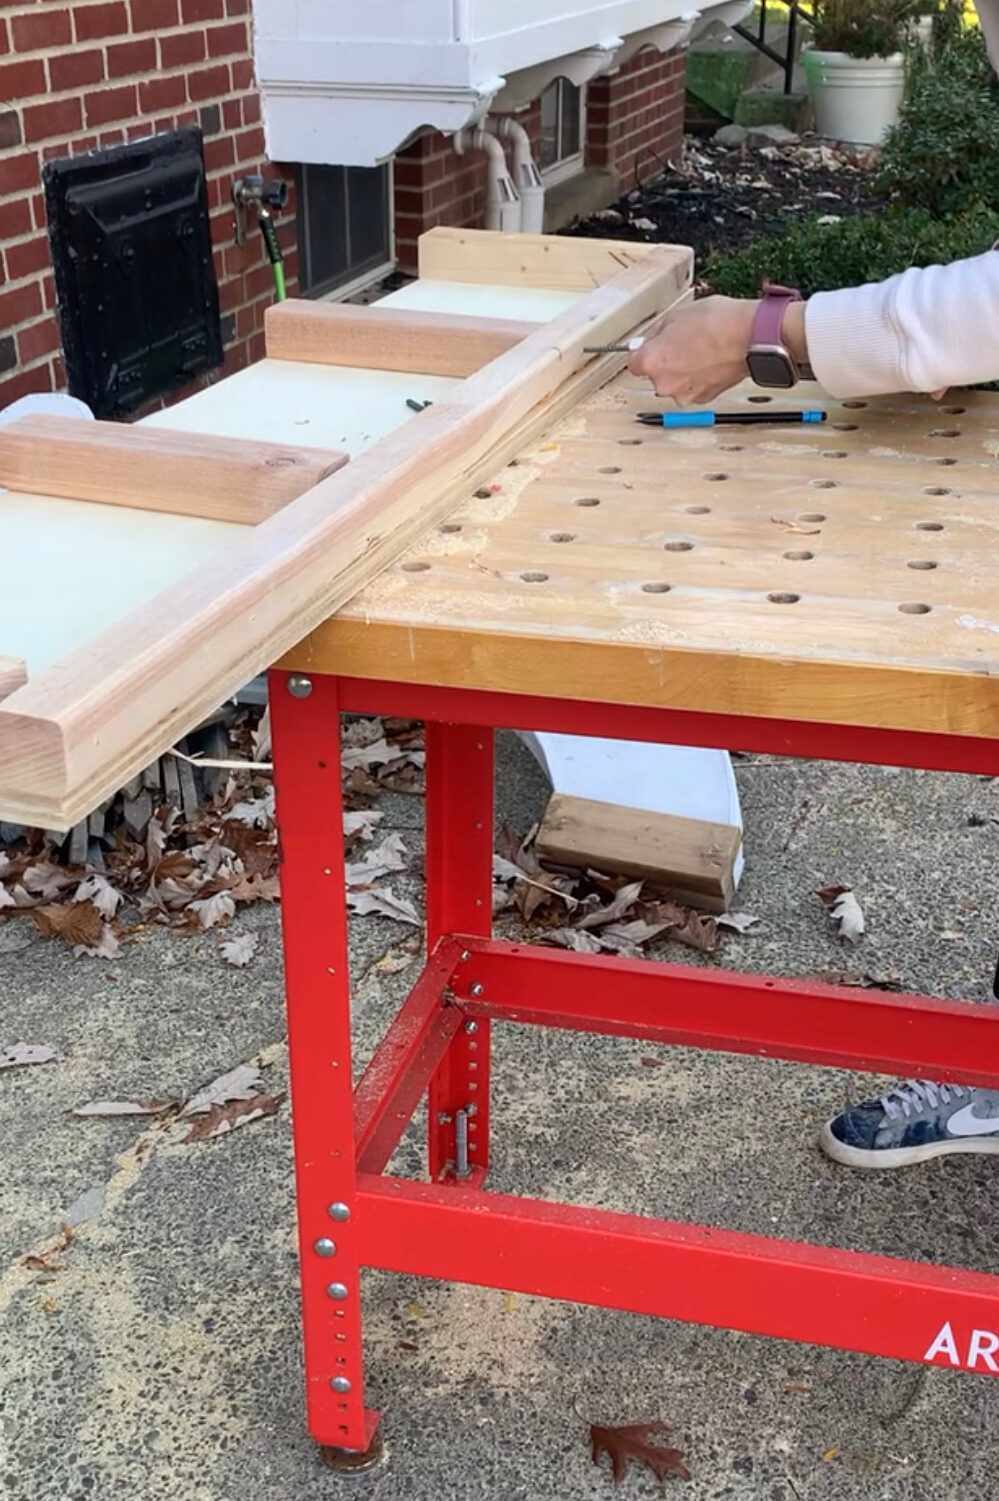
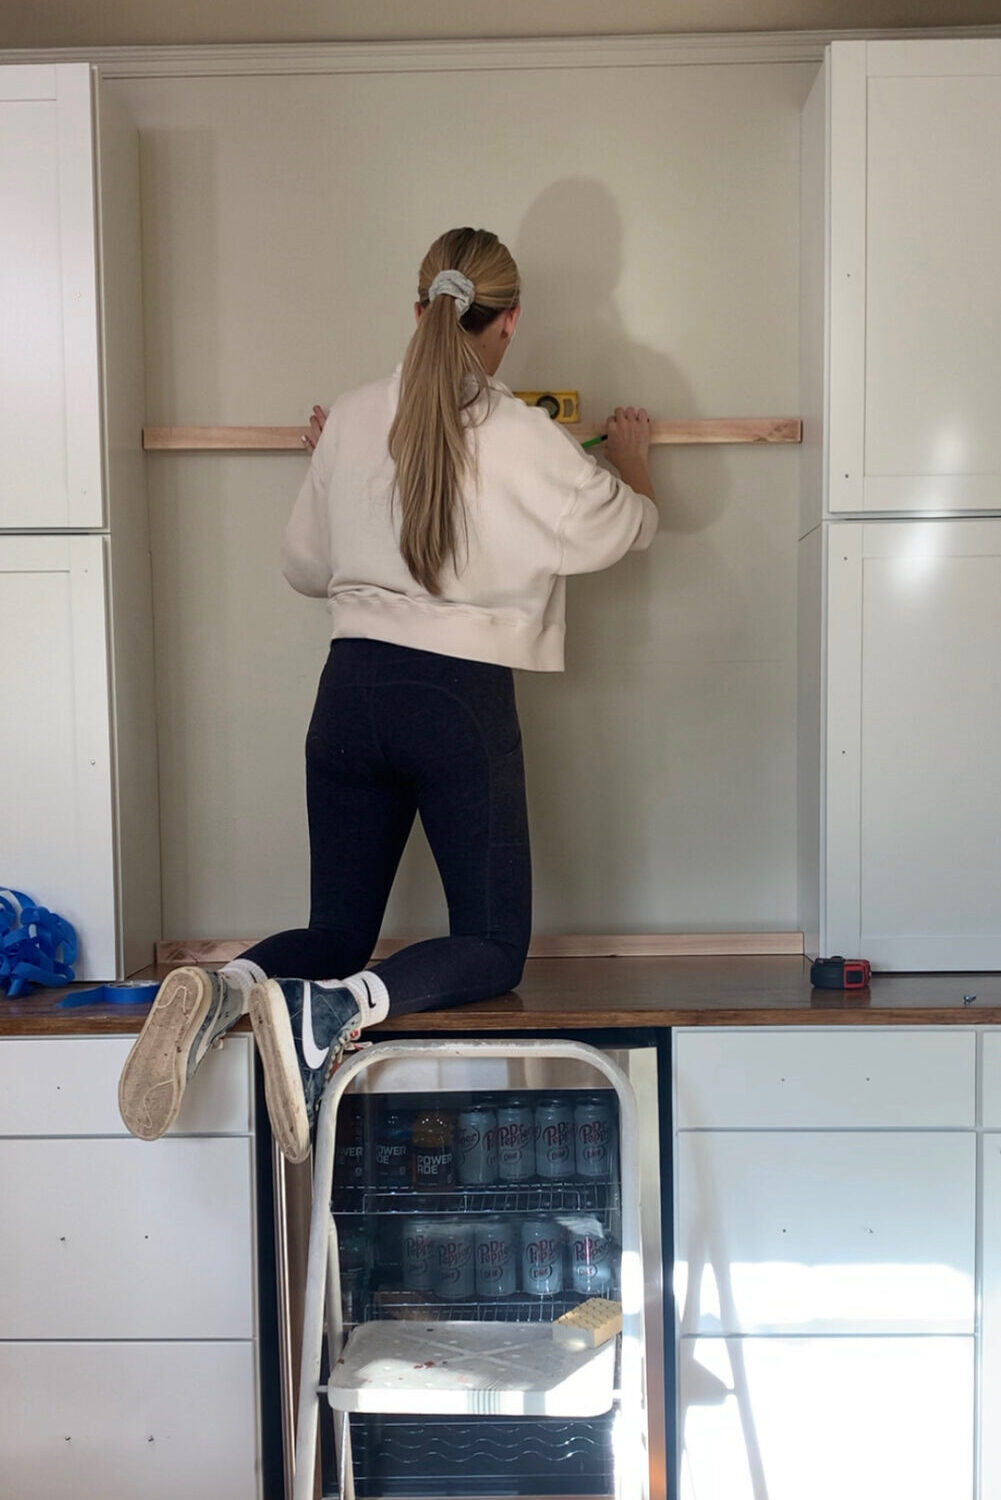
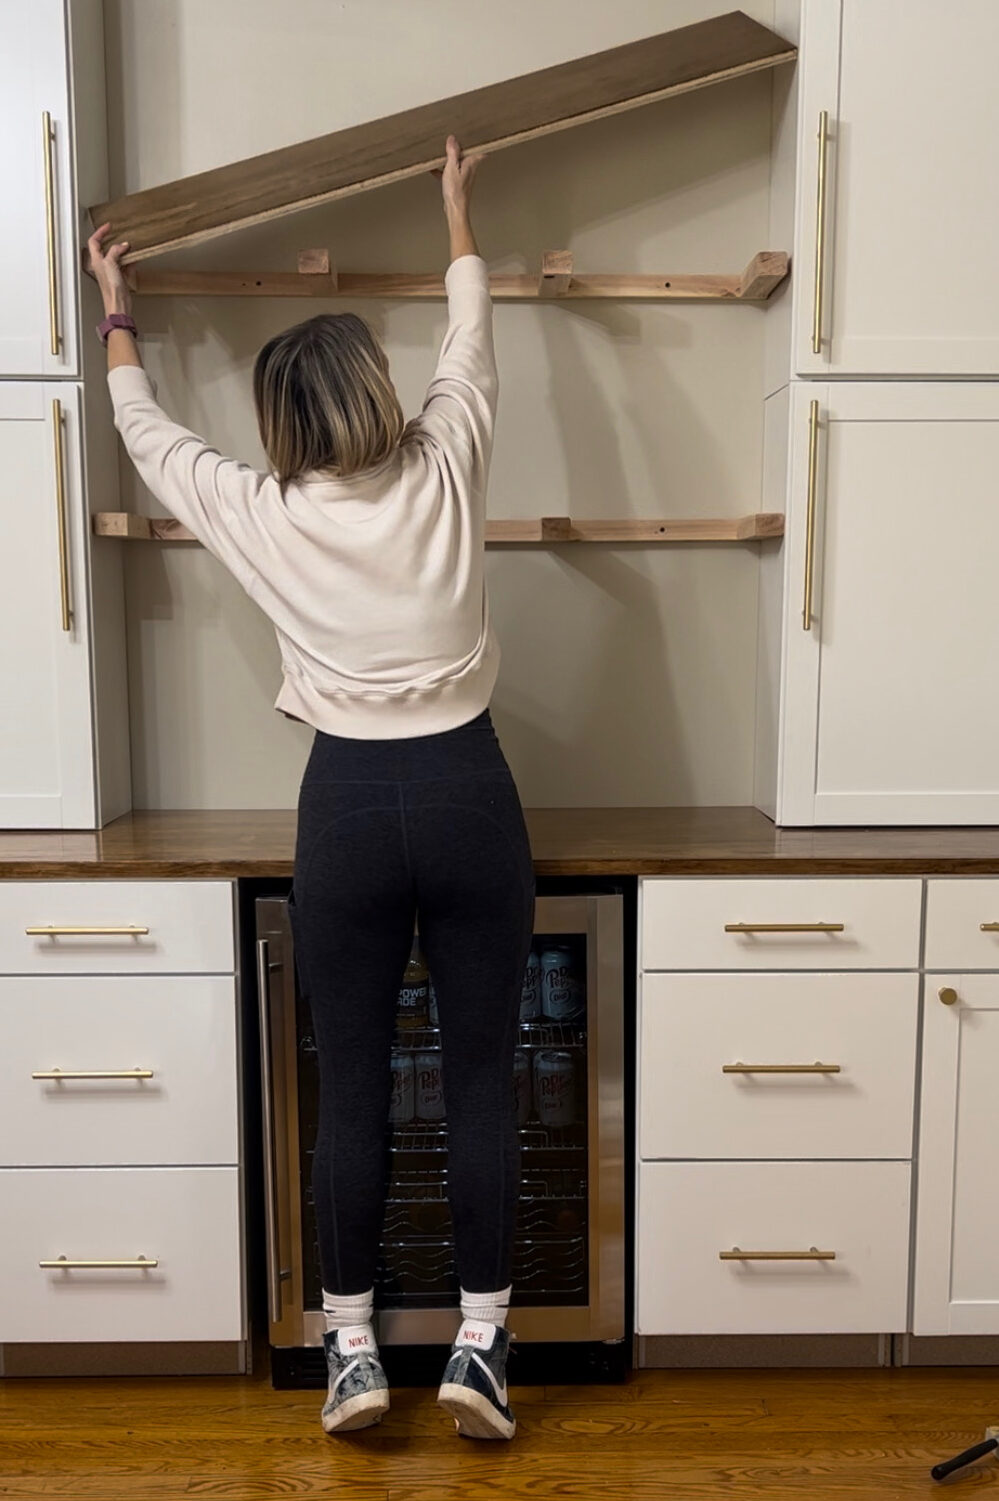
I used one 2×4 and ripped it in half on my table saw. I put it up on the wall where I had taped, then used a level to make sure it was going exactly how I wanted.
*tip* Once I knew it was level, I drew a line on the wall where I wanted it to go. I find it a lot easier to drill into the wall with a line drawn so I can be sure my shelves are level, and I can concentrate on finding the studs so when I drill in the four support pieces that come out of the wall, that I wouldn’t drill into a stud.
The extra four support pieces got laid outside, covered it in the plywood, and then I cut the support pieces so they were the same depth of the plywood. (Remember, take into account any of the back support pieces you used on the wall, and subtract that from the depth of plywood you need to measure.) My depth was 10.5 inches, but the back was 1 and 3.4. So I subtracted that from the depth of my shelf.
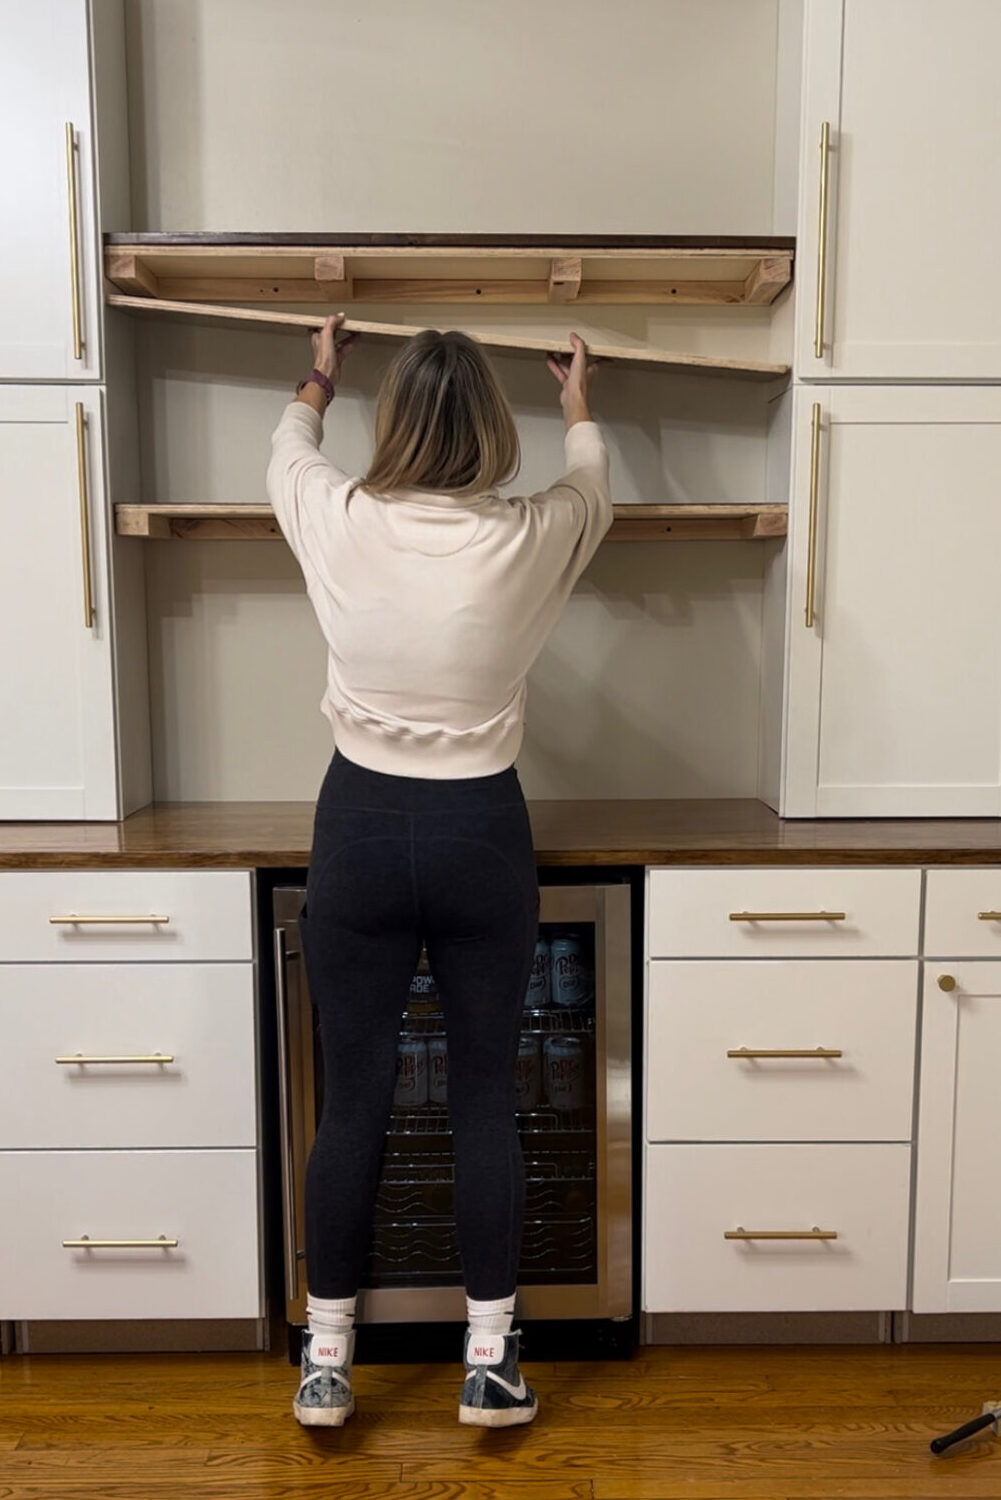
Step 2 – Drill your shelves together, and mount them to the wall
From the back of the long support piece, I drilled 2.5-inch screws into each of the arms of the top and bottom shelves.
That’s where the line comes back in handy. I went to that pre-drawn line, and drilled into the studs that I had marked and placed!
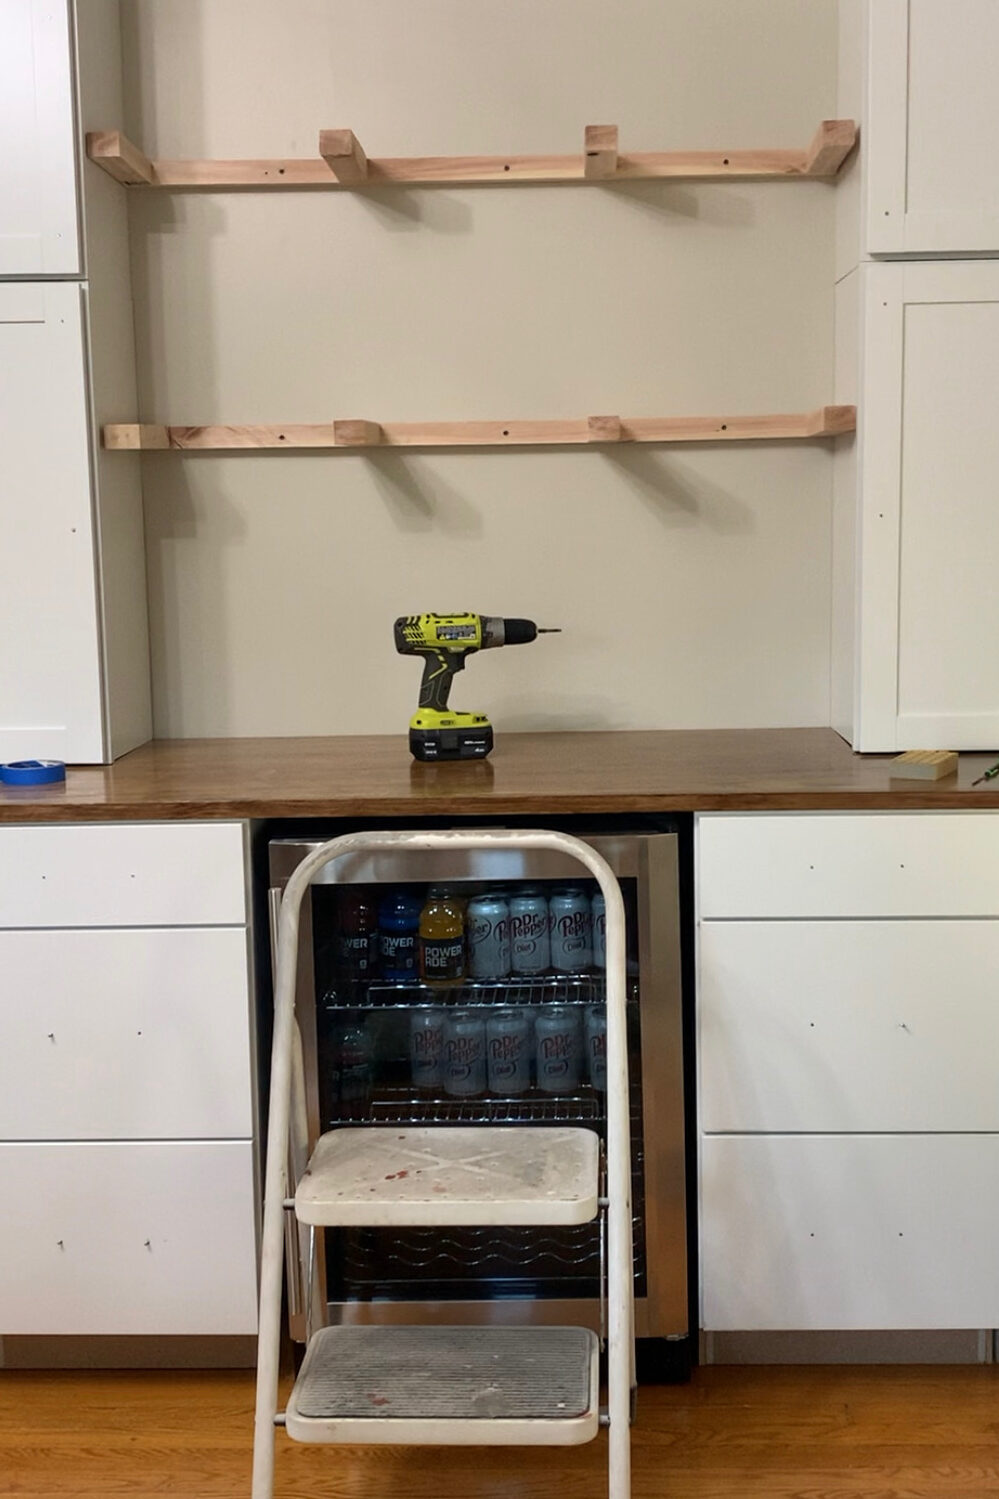
I did go in through the sides of the shelves at the very front of the cabinets. I used a 1-and-a-quarter-inch screw that I attached to the two side arm pieces on the top and bottom shelf. I used screws instead of nails, so that when I go to remove or move these later I can reuse the shelves. Screws always seem to be easier to remove than nails.
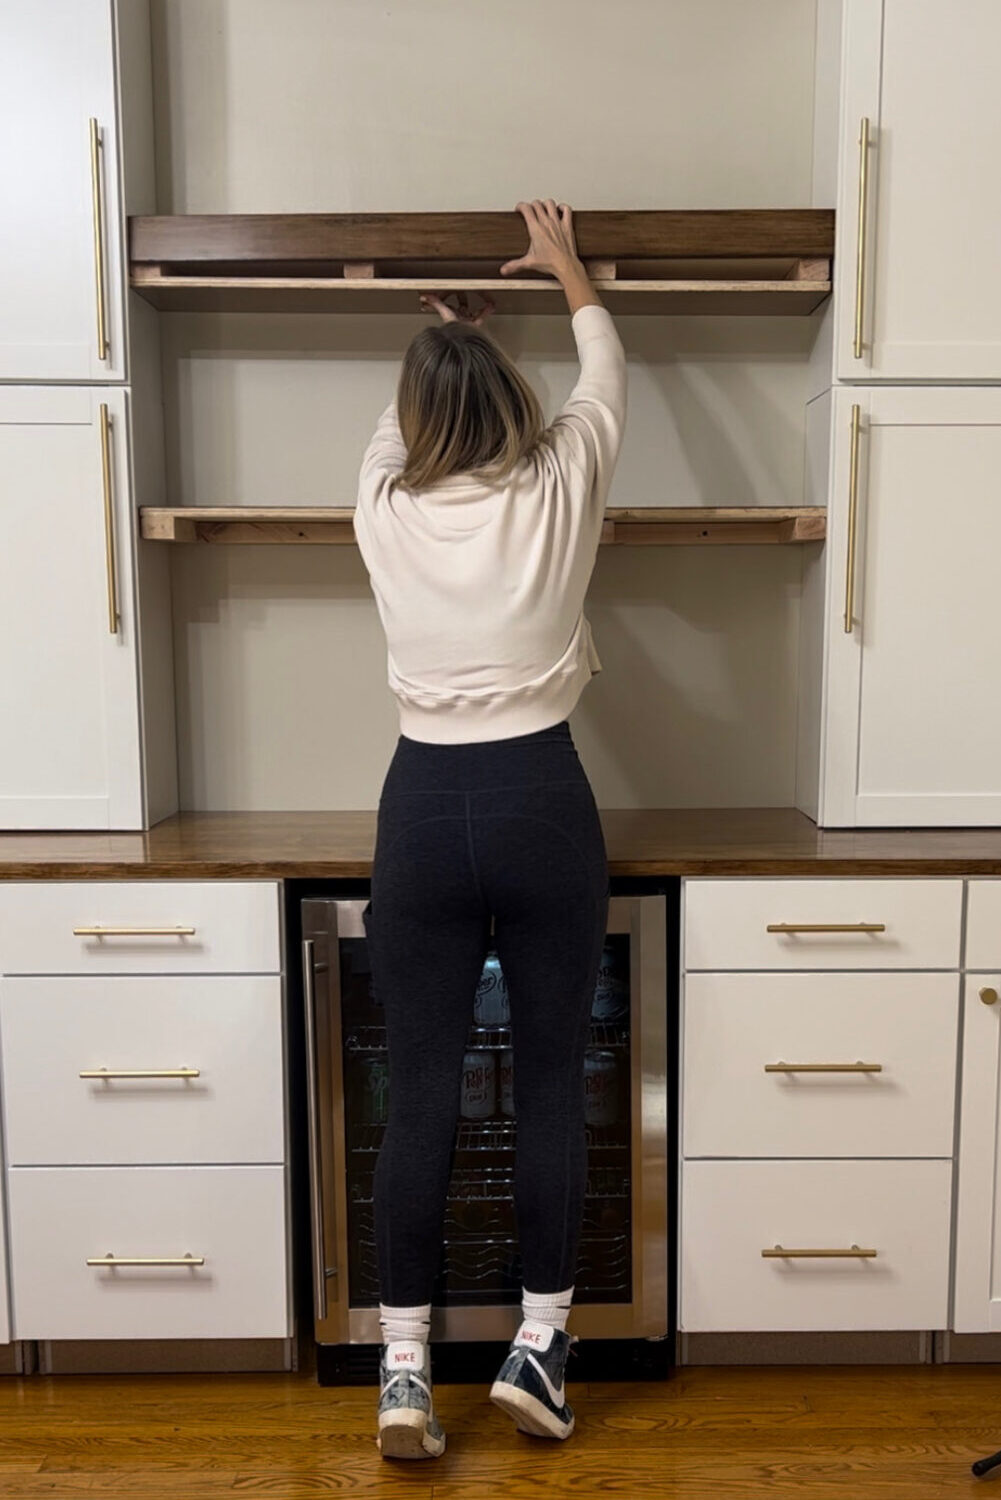
Step 3 – Add your (stained) plywood
I used the same exact stain process on these shelves that I used on the breakfast bar. If you haven’t taken the time to check that post out, please do. You want the stain on the shelves to be the same as your bar, so follow that practice on your shelves.
Then I added the plywood on top! I actually didn’t even need to attach this piece, it fit perfectly. The bottom piece did get a couple of brad nails (1 and a quarter inches), and I attached them right into the arms. I maybe used 5 nails.
I wanted to cover the front pieces of the shelves. I used a 1×4 and measured the 1 piece of plywood and the 2×4 that I had ripped to get the overall height of my “shelf sandwich”. I did have more width on my 1×4 than I needed, so I ripped a bit off.
I didn’t want any holes in the front of it, because it had been stained. So I went through the cabinets, with the same 1 and a quarter in screws, just like I did on the front arms on the ends. I drilled into the face piece just once. Then I used a 23 gauge pin nailed to put one nail in a little piece in the front, so it would be discreet. That way it will be easy to remove later and keep that stain intact.
And just like that… floating shelves. If you want to elevate them even more, add these railings.
The last step (arguably the most fun step…) is adding your decor!
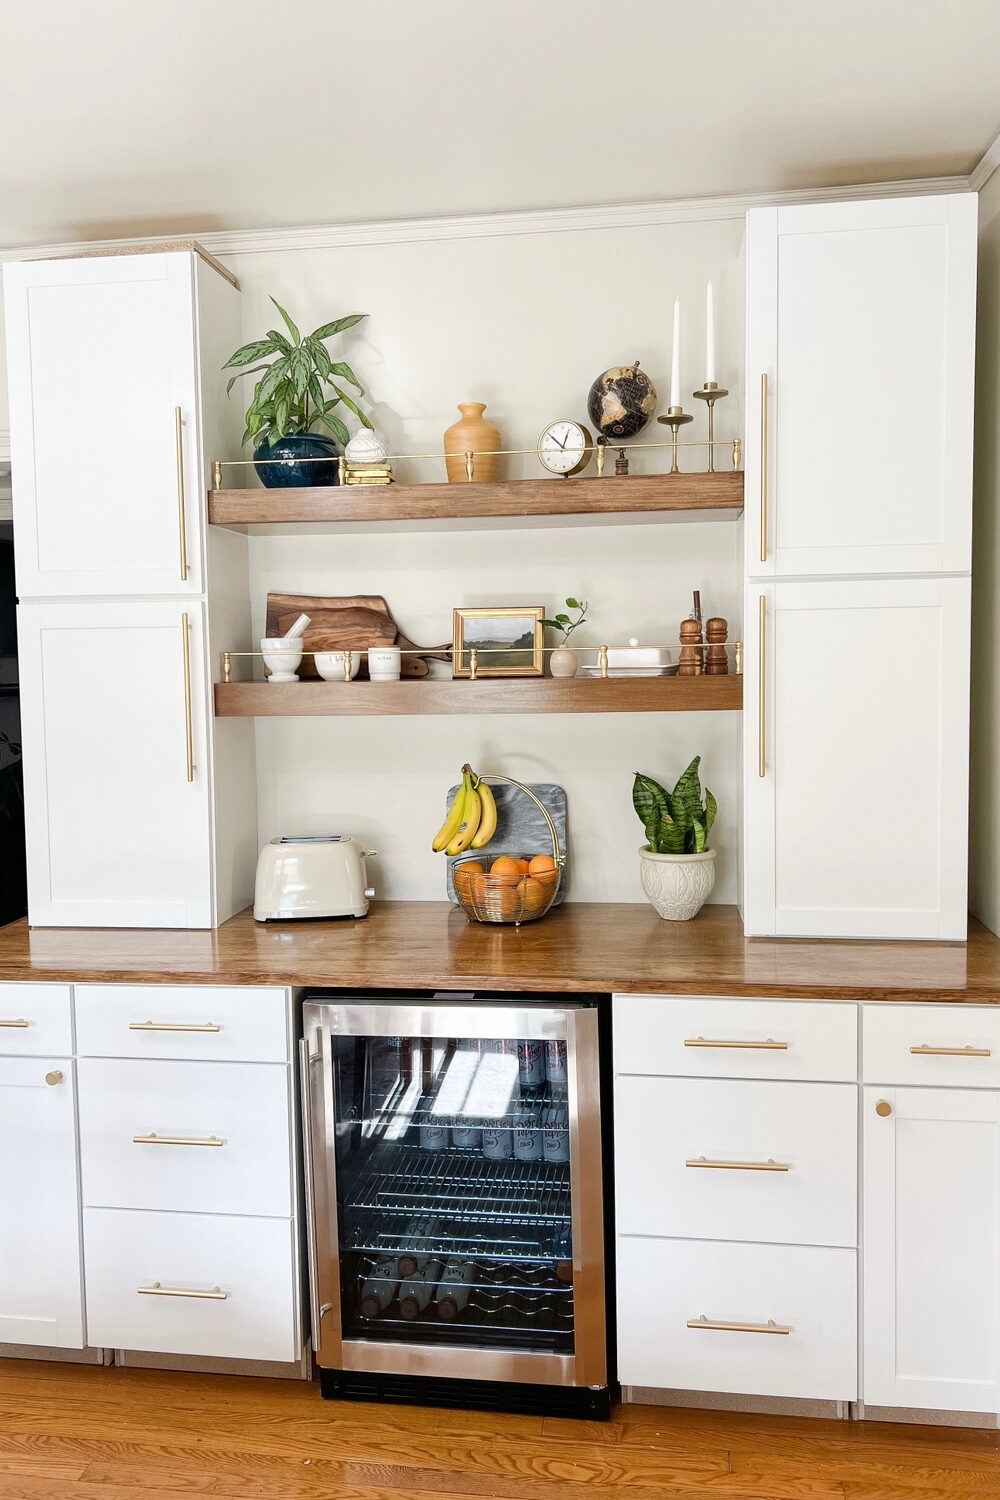 -toaster
–cutting board
–fruit bowl
–succulent plants
–tall votives