If you haven’t seen my video on my Rev-A-Shelf DIY cabinet video… check it out here. I LOVE this project for adding organizational solutions to a small space. And as a renter… this is perfect because I can patch the holes in the wall when I leave, and I can also take the cabinets with me. A temporary solution, but a forever piece of furniture. What more could you need?
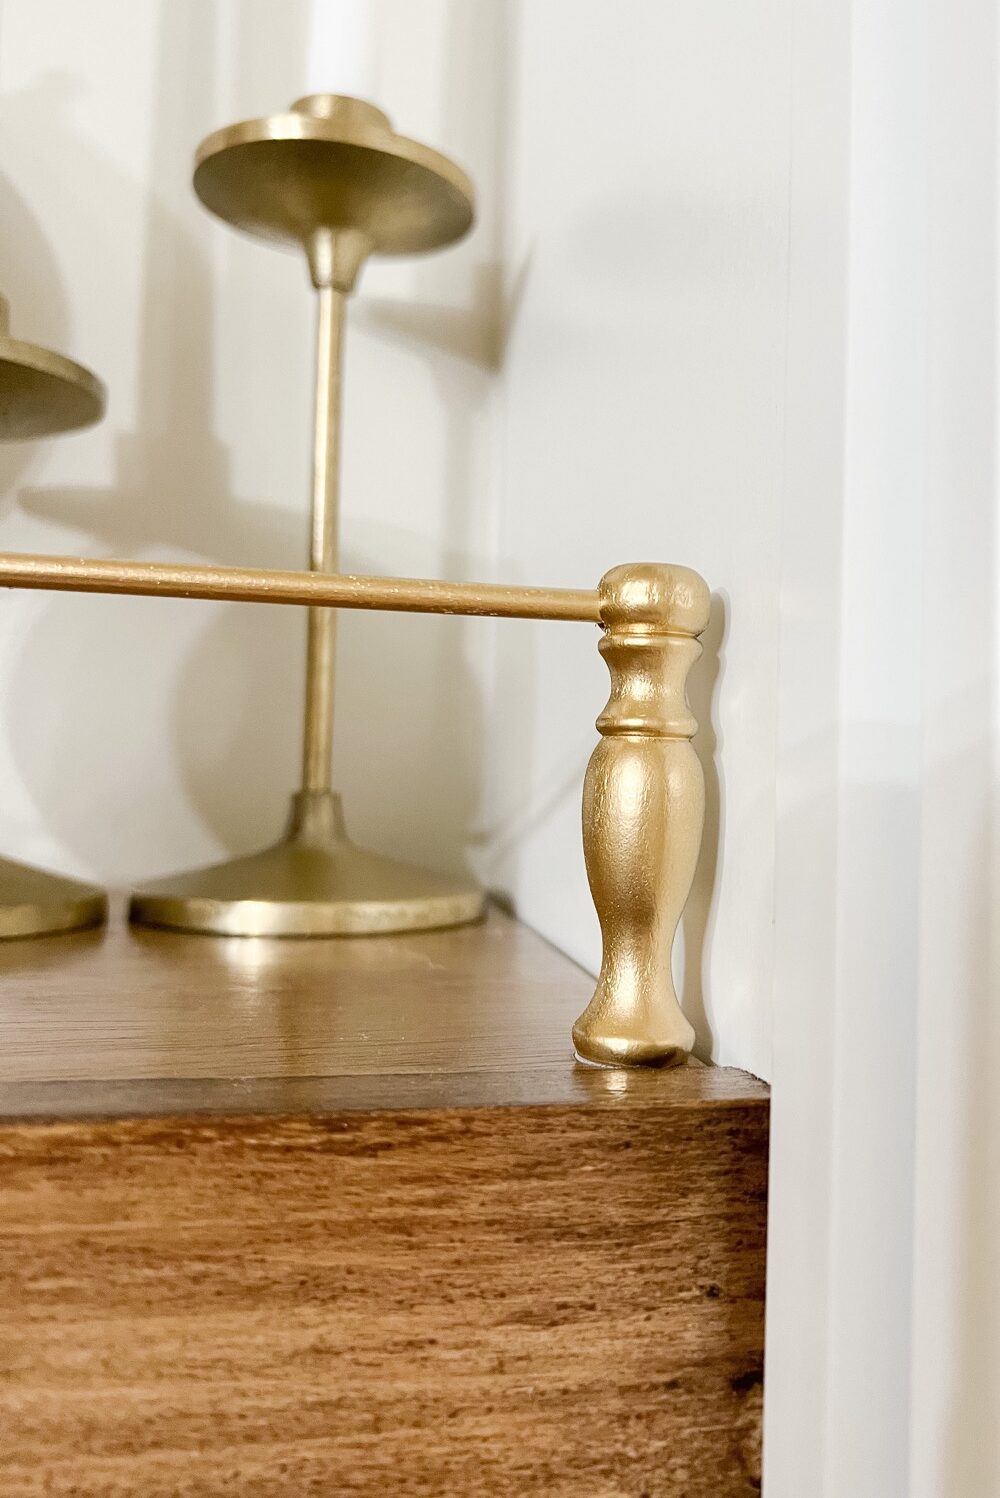
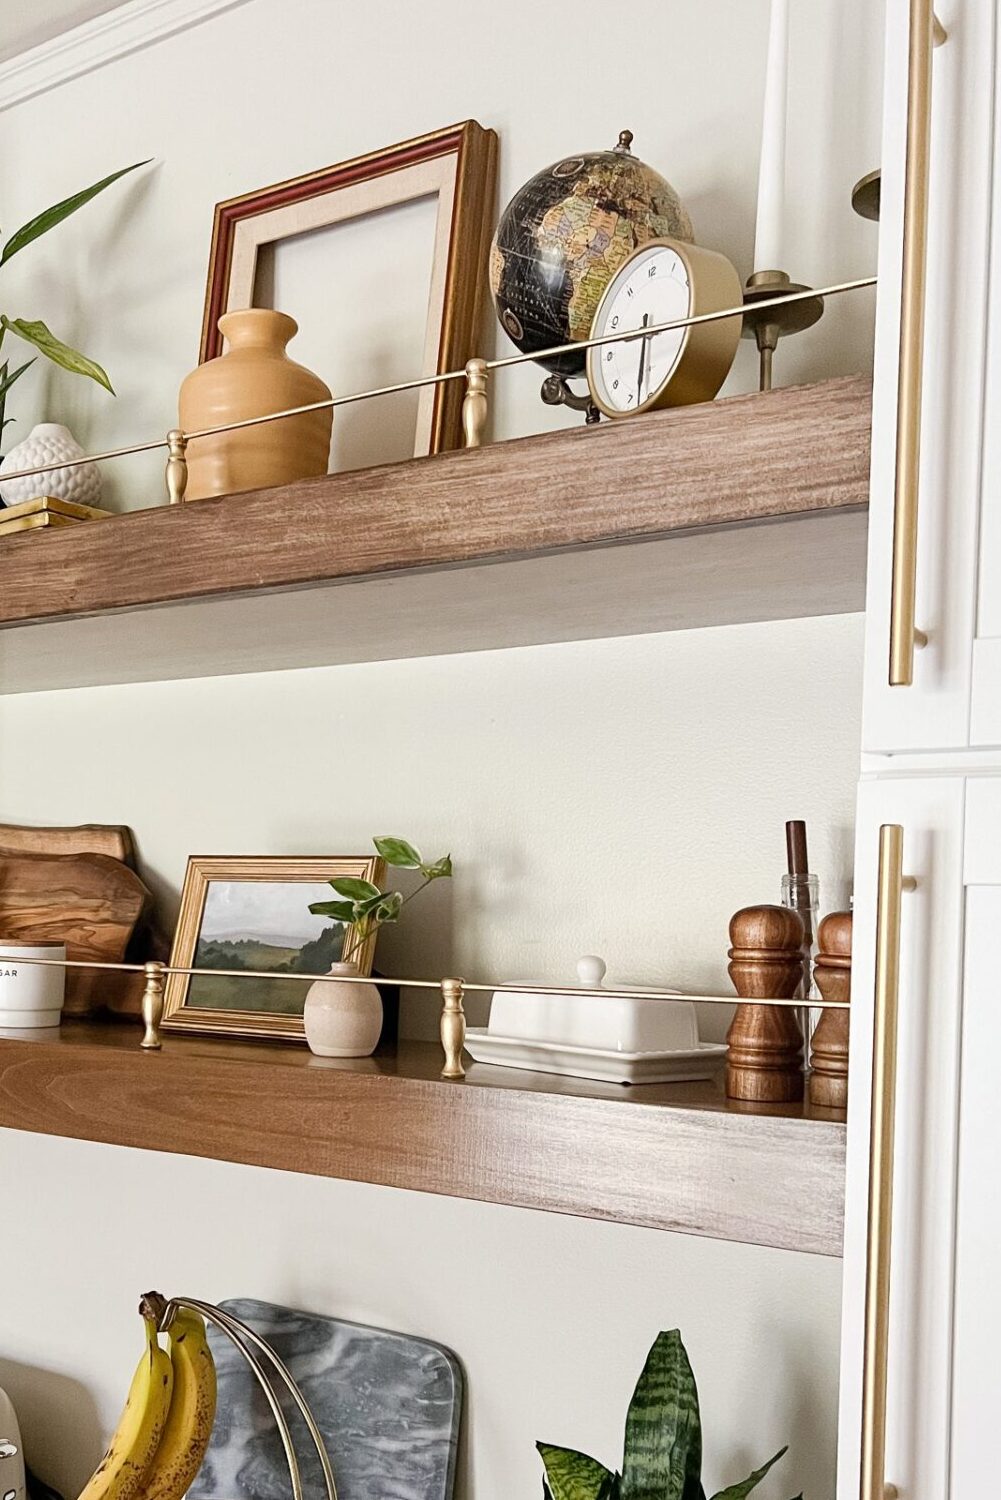
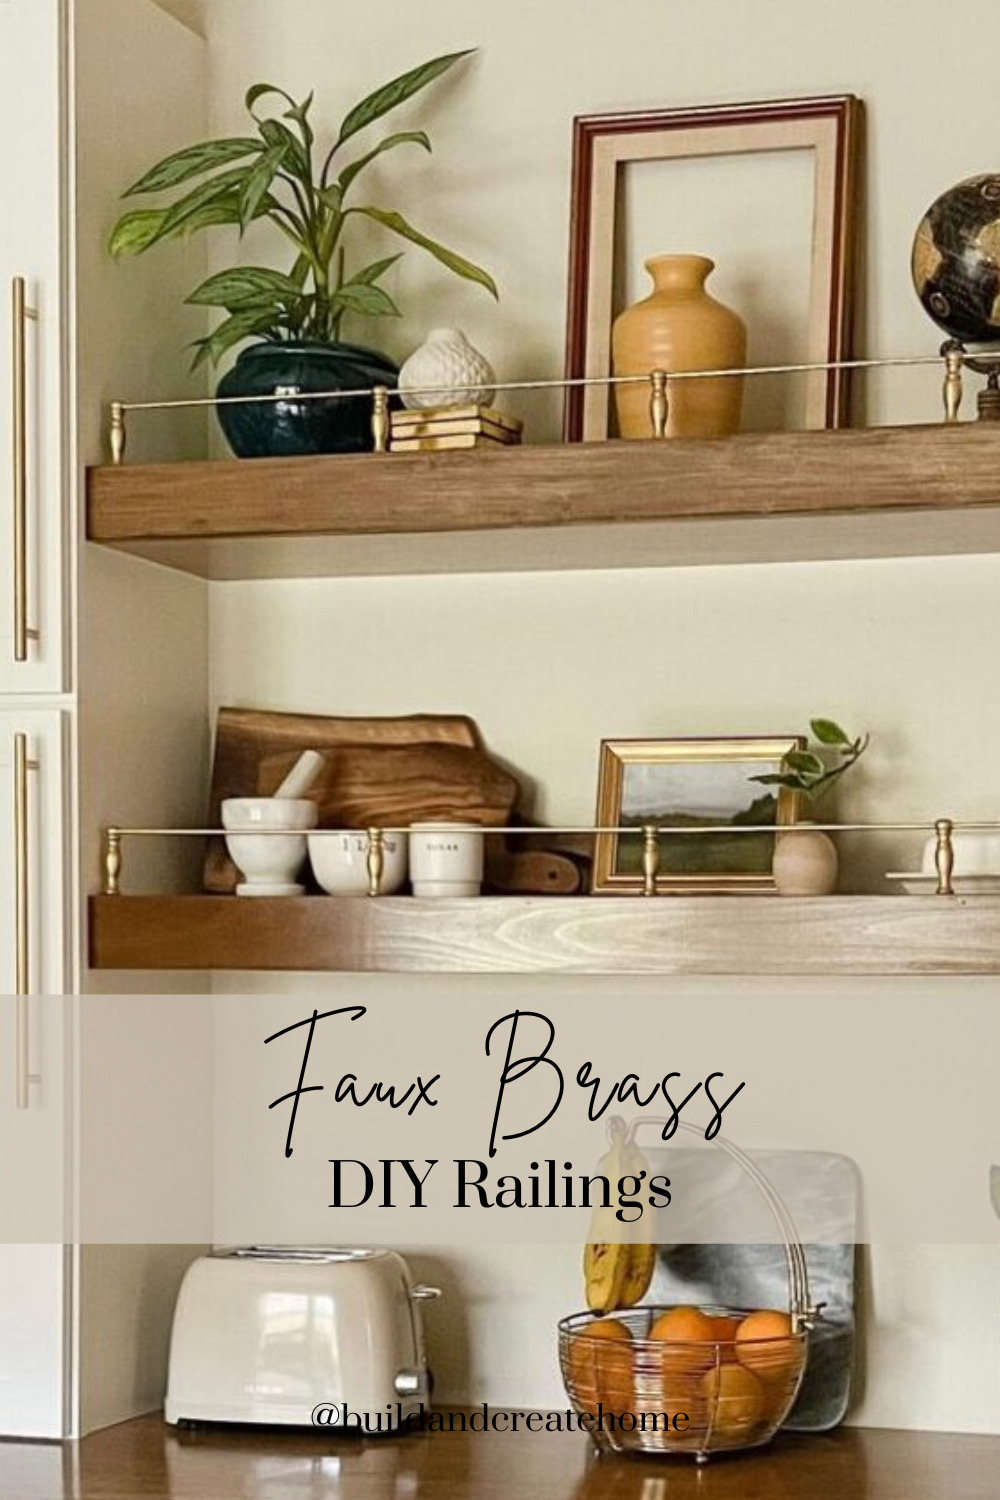
My Rev-a-Shelf breakfast bar was almost ready, but I needed to jazz it up. So I added some DIY Faux Brass Railing to the space between the cabinets, and the floating shelves.
(Those of you holiday lovers, don’t forget we have some Christmas DIYs waiting in the wings. Check out the soda can jingle bells! Or challenge yourself and elevate your tree game with the tree box stand! We’ve got what you need to put the holly in your jolly.)
This post will contain affiliate links- please see my disclosures page if you need any information on that!
Supplies needed to make DIY Faux Brass Railing:
–spindles
–dowels
–spray paint
–krazy glue
Tools needed to make DIY Faux Brass Railing:
–hack saw and miter box
–drill
Step 1- Get your supplies
Do you know how expensive actual brass posts cost?! Anywhere between $8-$12 a POST! And I have 10 posts on my two shelves. Now, if you’ve been following us for a while, you know I love a DIY…. but I love me a CHEAP DIY the most.
My shelves are 47″ and I cut my rail pieces at 11 and 1/8′ each.
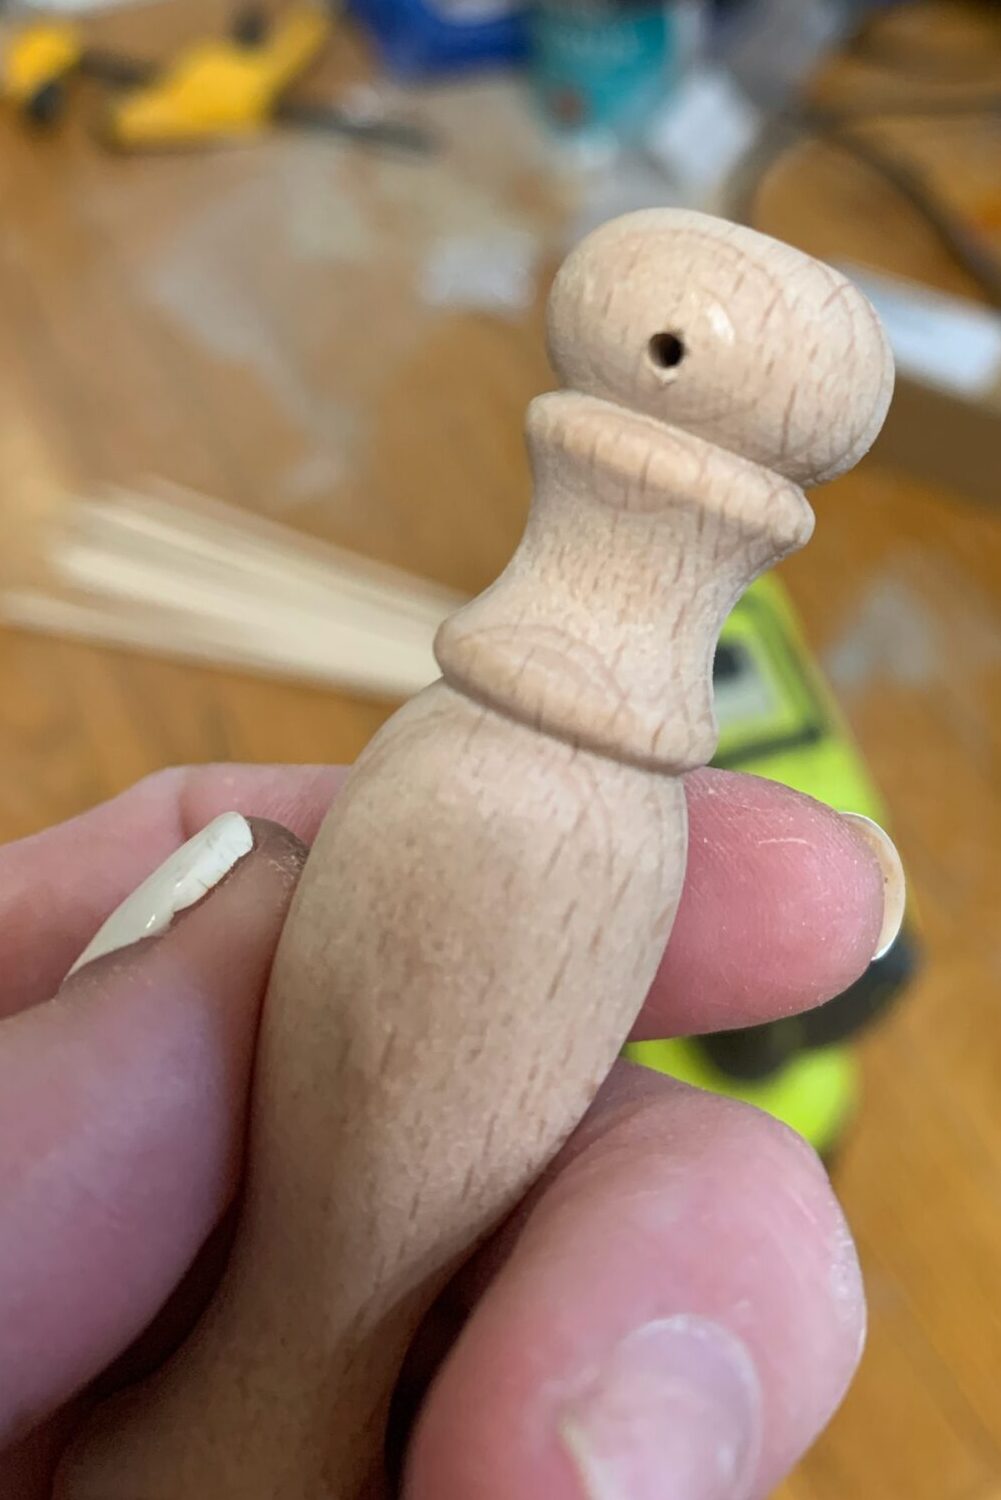
I also bought my spindles knowing that I was going to split a few of them, and made sure to buy a couple of extra ones.
Step 2 – Drill your spindles
I drilled holes in the posts. I started with my smallest drill bits, and then I (CAREFULLY) worked up to the 3/16 width of my spindles.

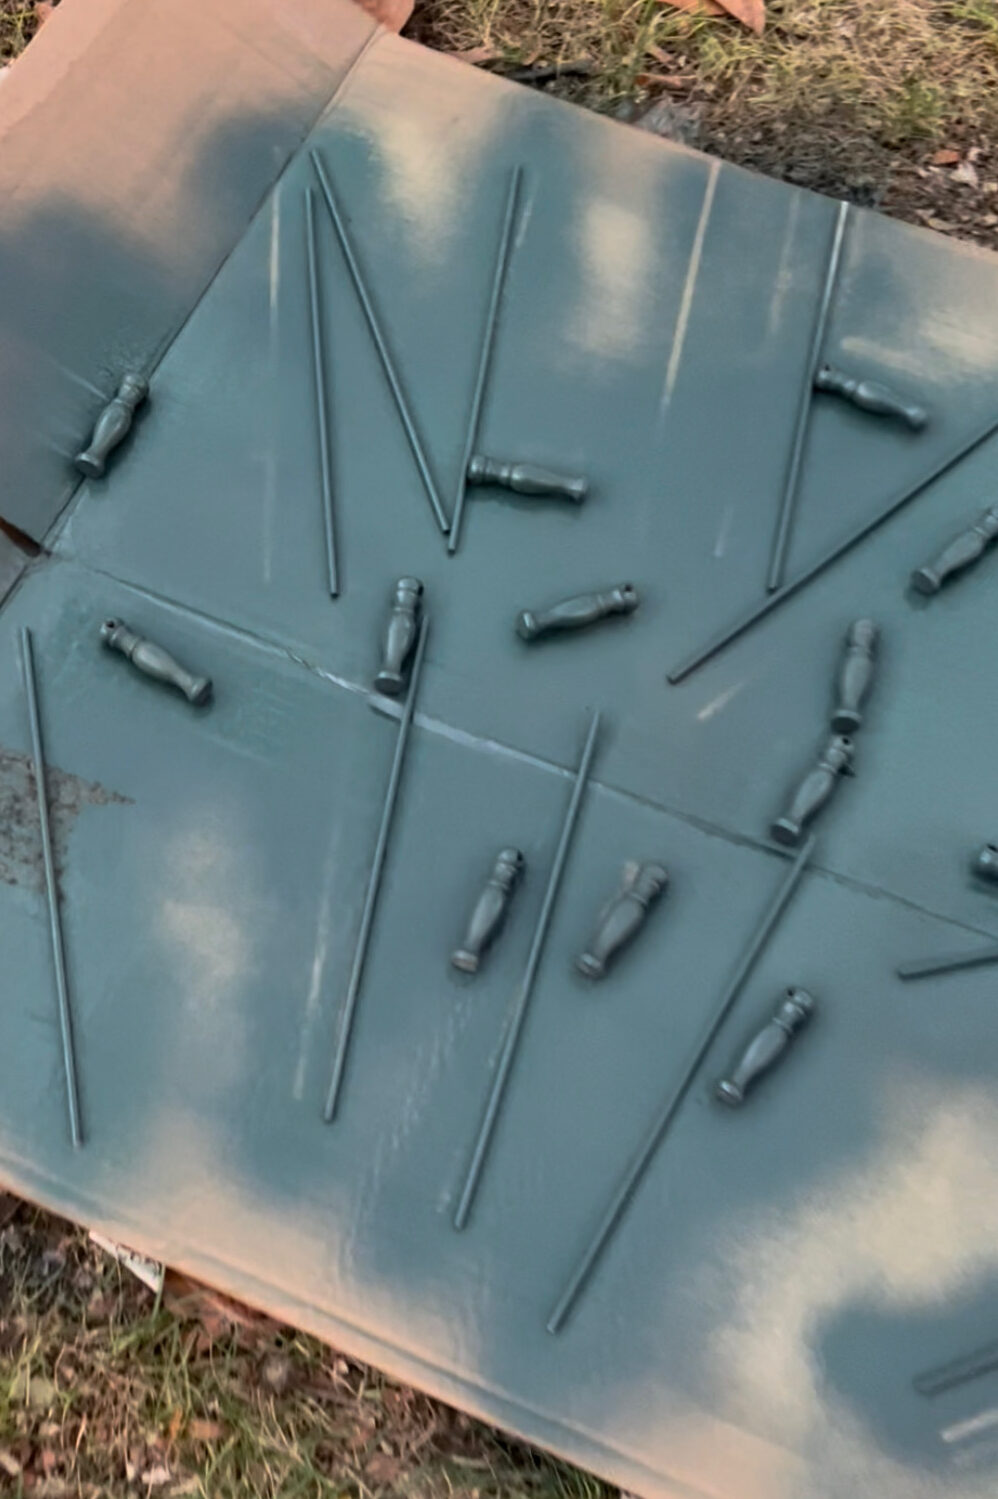
Step 3 – Paint and assemble your faux bronze railing
The bronze doesn’t need to break the bank, and that’s where I love the spray paint option. Lay out your best (I guess if it is your best… it’s kind of your most used. So….worst?) tarp and bronz-ify your spindles. I gave mine a couple of coats of this Rustoleum Metallic Spray Paint.
(ma’am… those are green. This is a post about brass. I know. Little tip- I always prime in black or a dark color before I paint with gold. It really helps the gold stick.
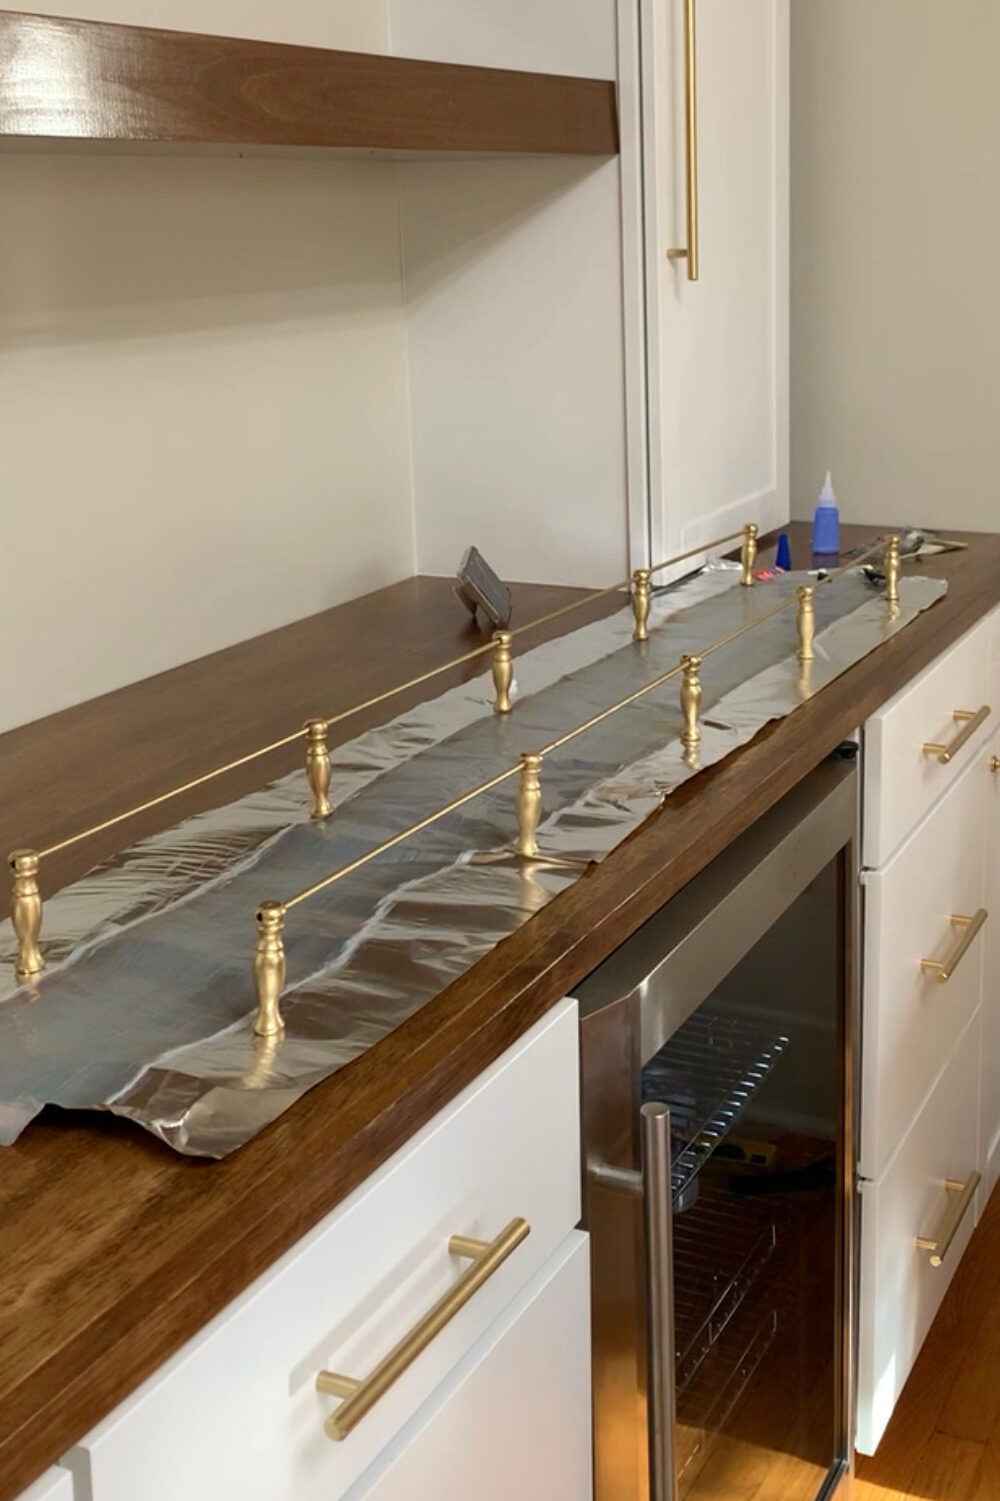
This is when I used my super glue, and if you haven’t used this specific brand of glue, you need to check it out! I glued the spindles to the rod.
Once they were dried and secured to the rod, it was time to glue the rods to the shelves.
*** I want to reiterate that these are decorative railings. Anything that uses this for support won’t be well supported.
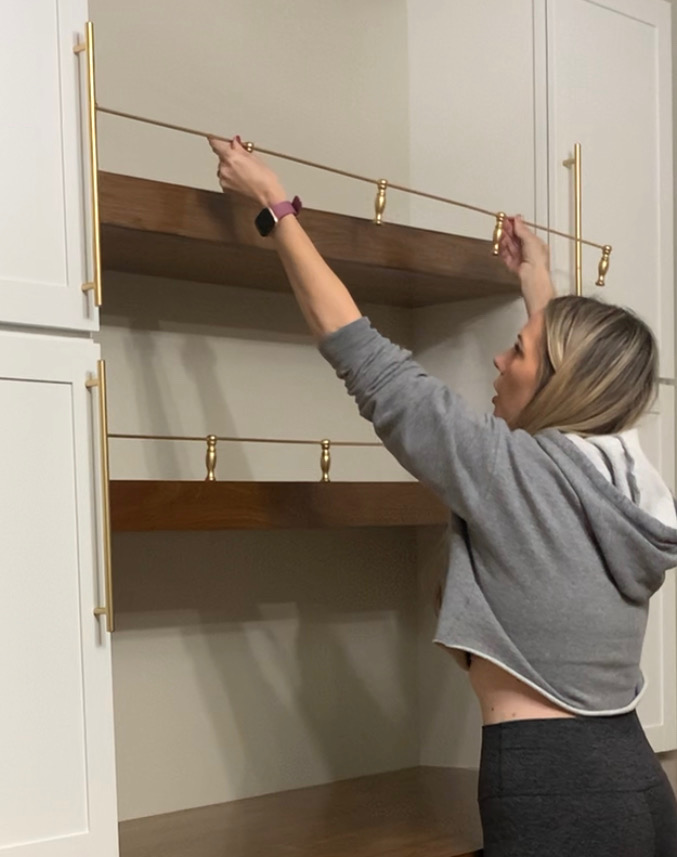
Once your faux bronze rails are on the shelves, make sure they dry completely before you add your decor. Once it’s dry, decorate it to your liking, and then pat yourself on the back. Because you just saved a BUNDLE on “bronze” railing that didn’t break the bank!