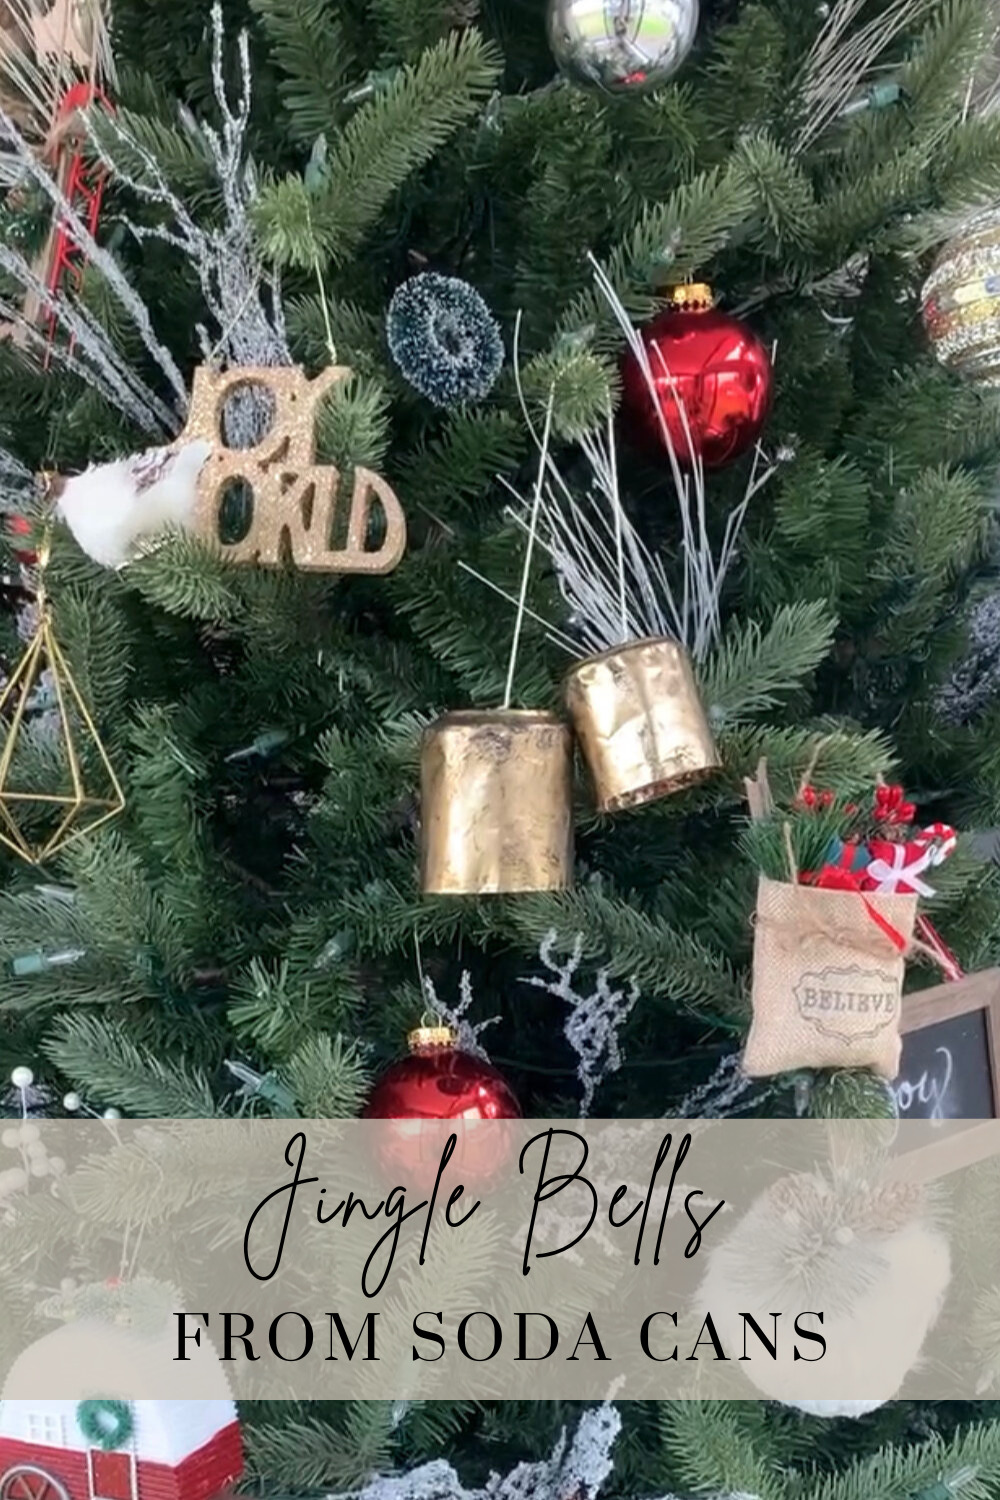
Jingle. All. The. Way!! Jingle Bells are some of the most simple, effective, and identifiable things in the Christmas season. If you’re looking for a SIMPLE, cheap, and easy project that put the jingle back in your bells… this is it!! Jingle Bells from Soda Cans. Cute and simple.
(For another super simple Christmas DIY, please read the bench makeover article. That one is another one that packs a seasonal punch with very little effort!)
This post will contain affiliate links- please see my disclosures page if you need any information on that!
Supplies needed to make Jingle Bells from Soda Cans:
-cans (I used soda cans because my family drinks them! But you could grab cans of green beans or anything from the pantry)
– Beads, bells, beans, whatever you want to use to make your bells jingle!
–metallic spray paint
–matte black paint
–hot or super glue
-bakers twine/jute rope
Tools needed to make Jingle Bells from Soda Cans:
-hammer
-needle nose plyers
–box cutter
Step 1- Find and cut your soda cans:
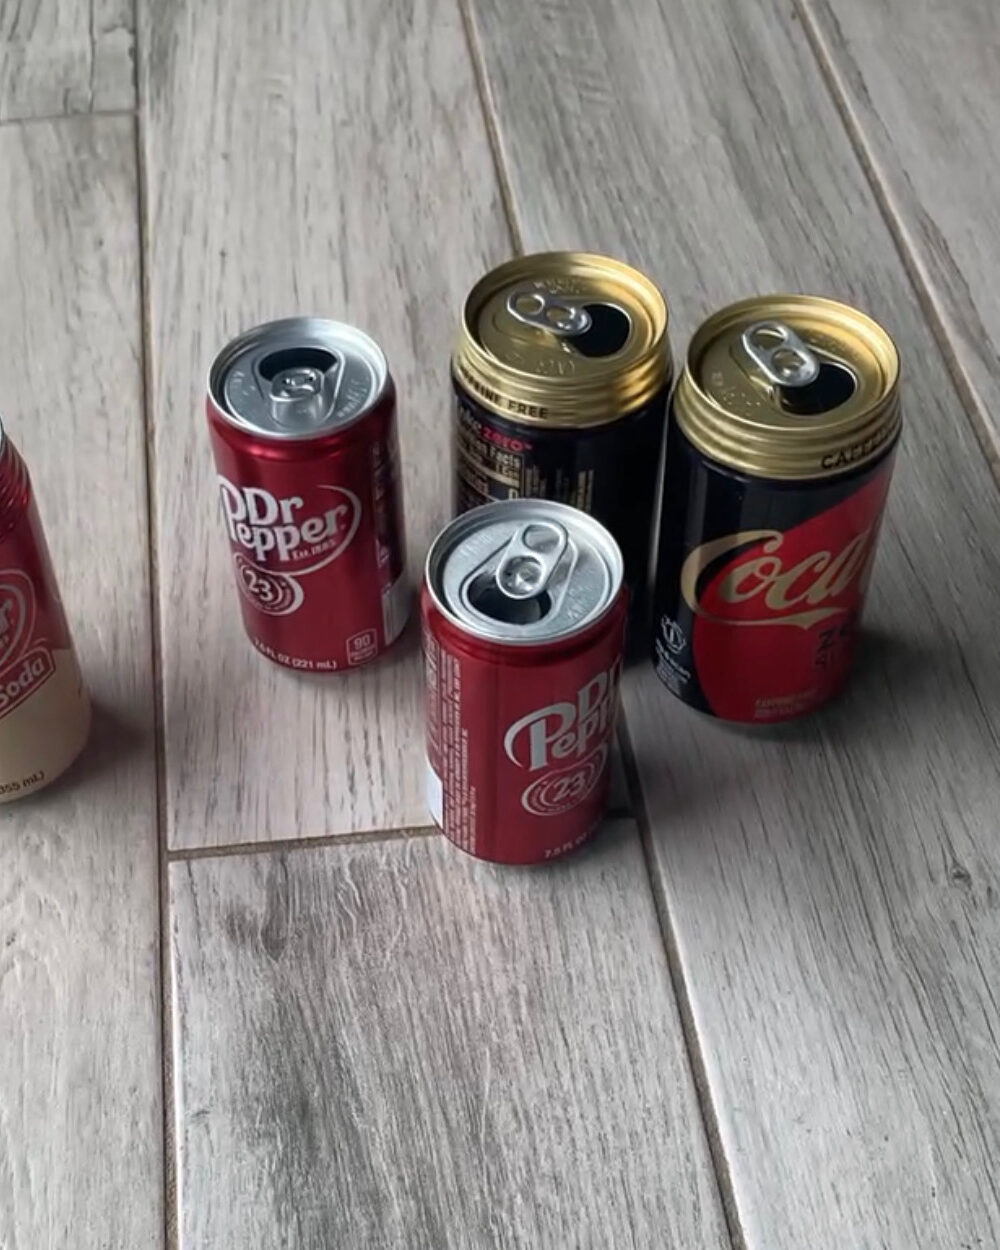
If your family is anything like mine- you have soda cans in your house! Grab at least two to make into jingle bell soda cans!
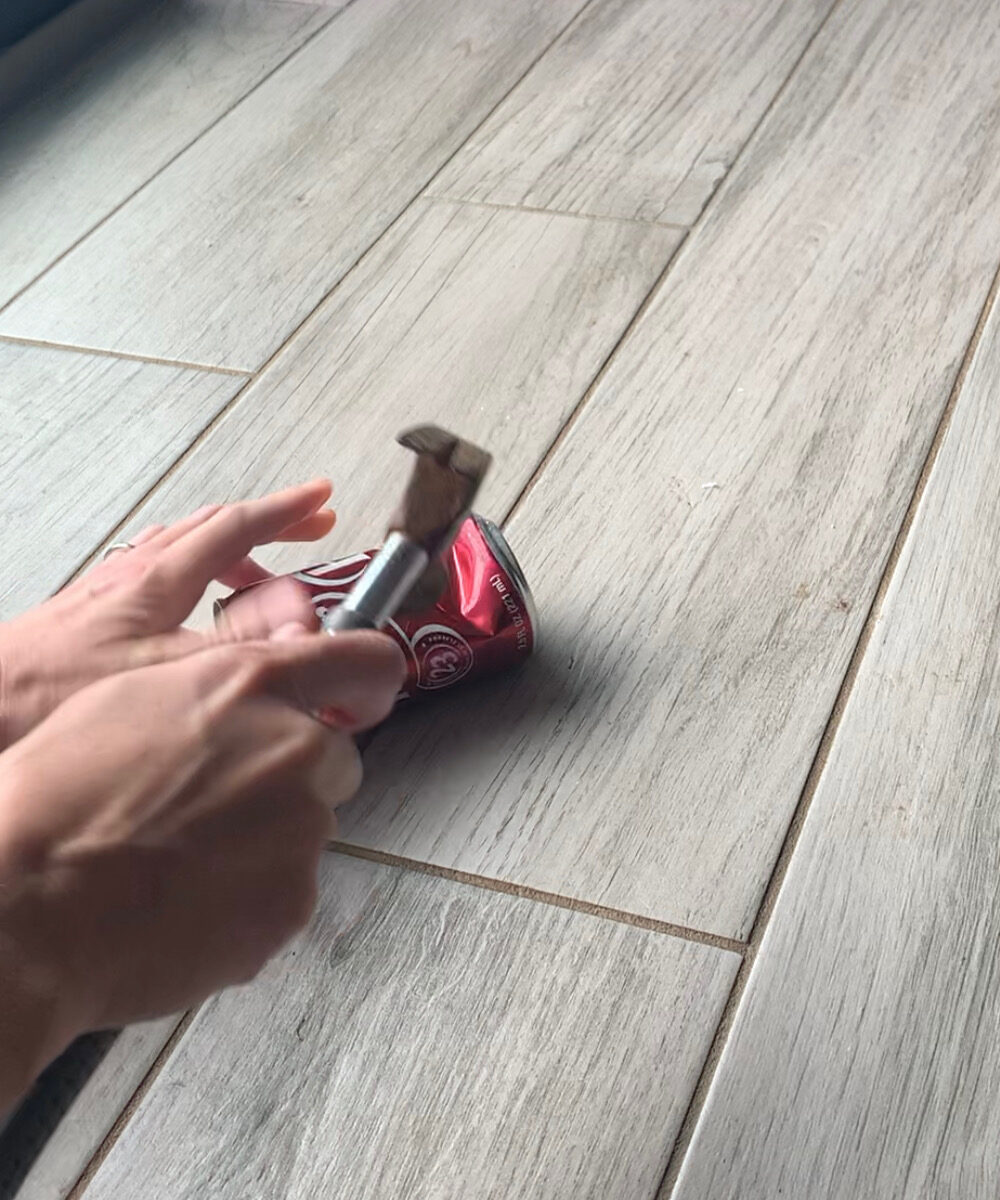
The first thing I did was take a hammer and hit the cans around each side. This was to give my DIY jingle bells a more textured and realistic look. I felt like without that hammering, they were a bit too smooth and shiny. More of a weathered look on my tree is the vibe.
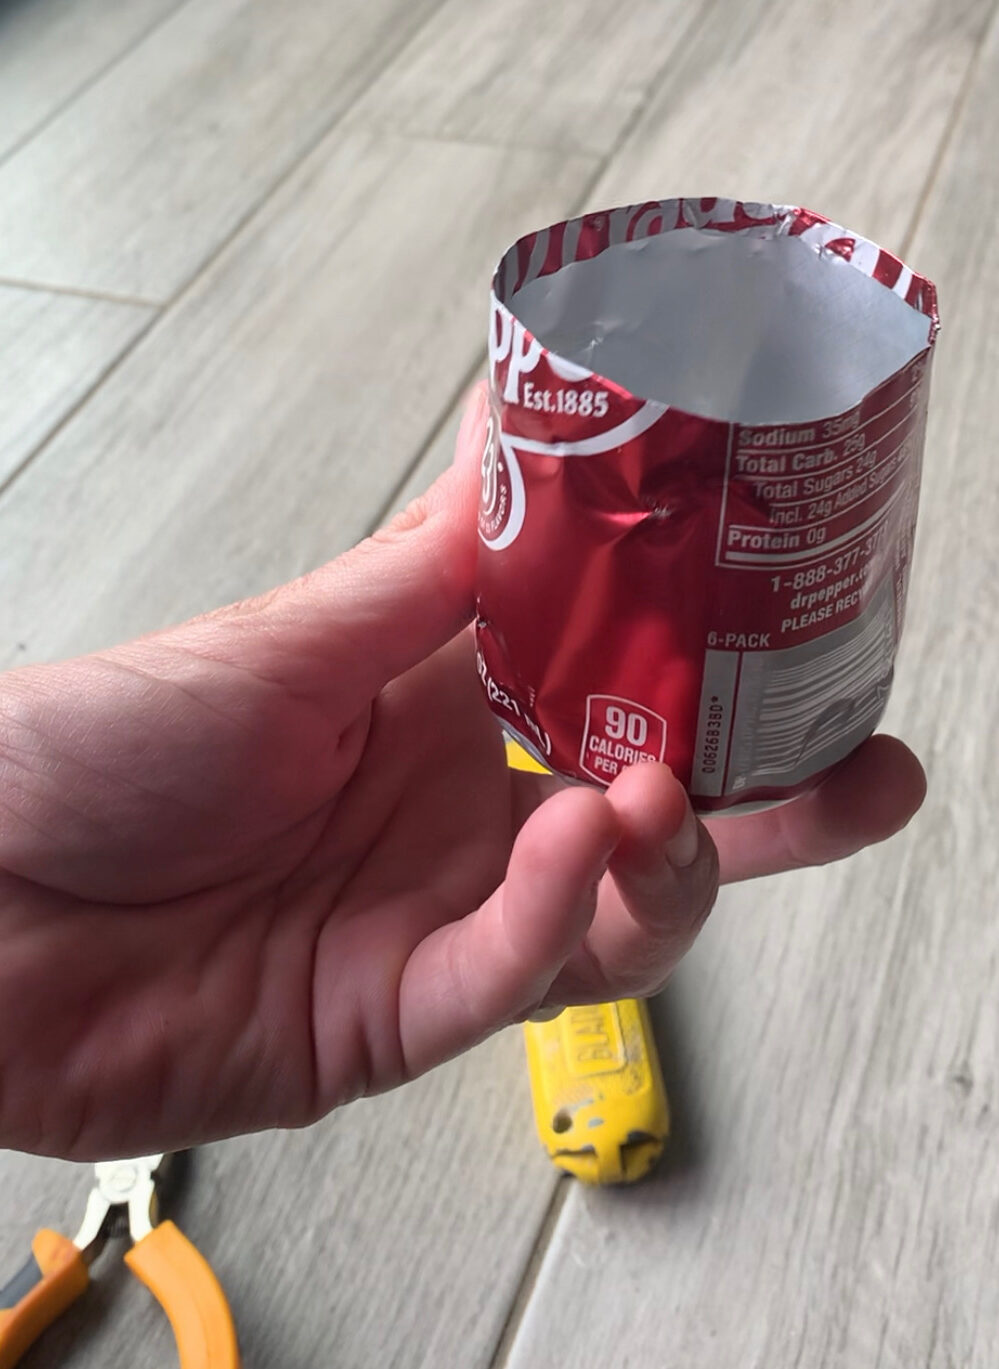
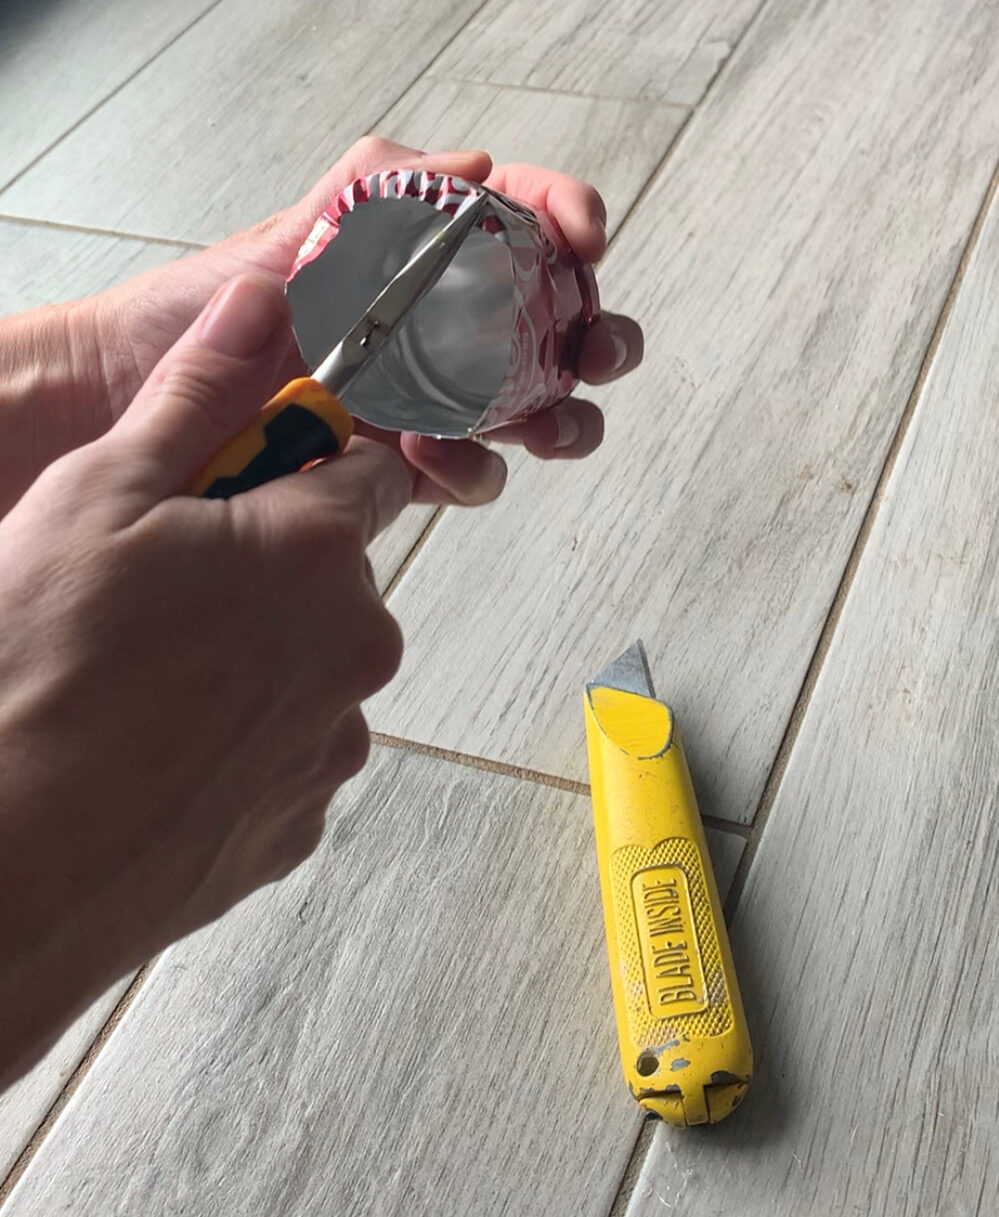
Step 2 – CAREFULLY cut the soda cans:
Ok… this is going to be a classic do as I say and not as I do situation. I didn’t wear gloves to cut my soda cans, and I am going to strongly encourage you to put gloves on. The edges of these cans are SUPER sharp when you cut them with your boxcutter. Wear gloves, and please be super careful!
Disclaimer done. So, I laid it down on its side and used my boxcutter to CAREFULLY cut about one-fourth of the way down on the can. Then I took my needle nose players and bent the top of the can down so that it was folded over.
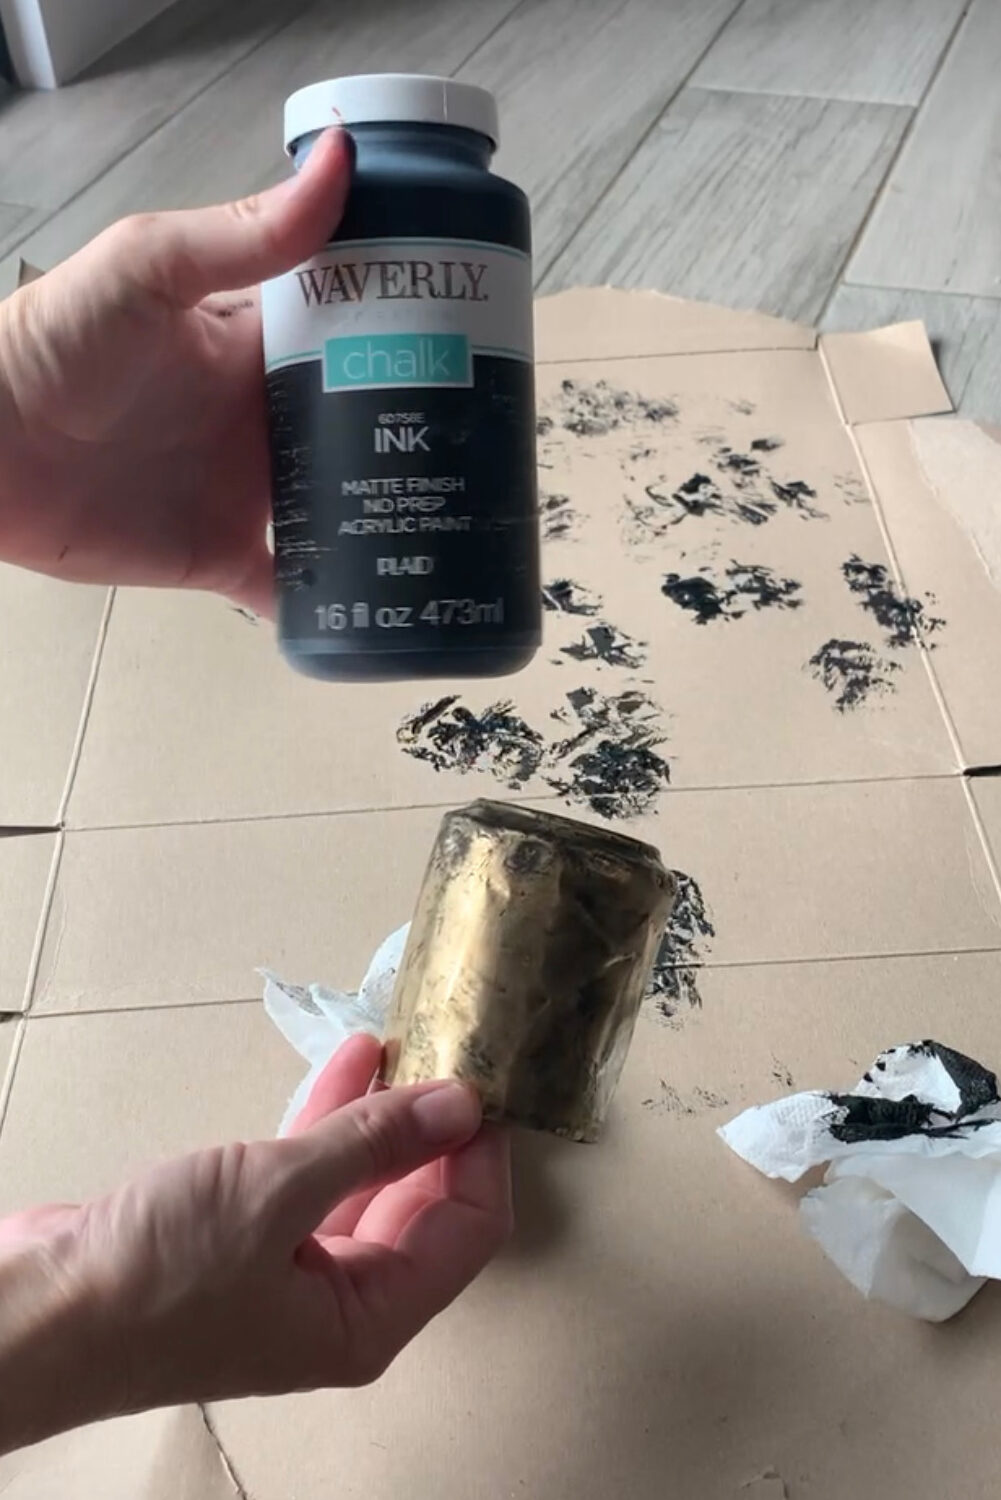
Step 3 – Paint and assemble your jingle bell
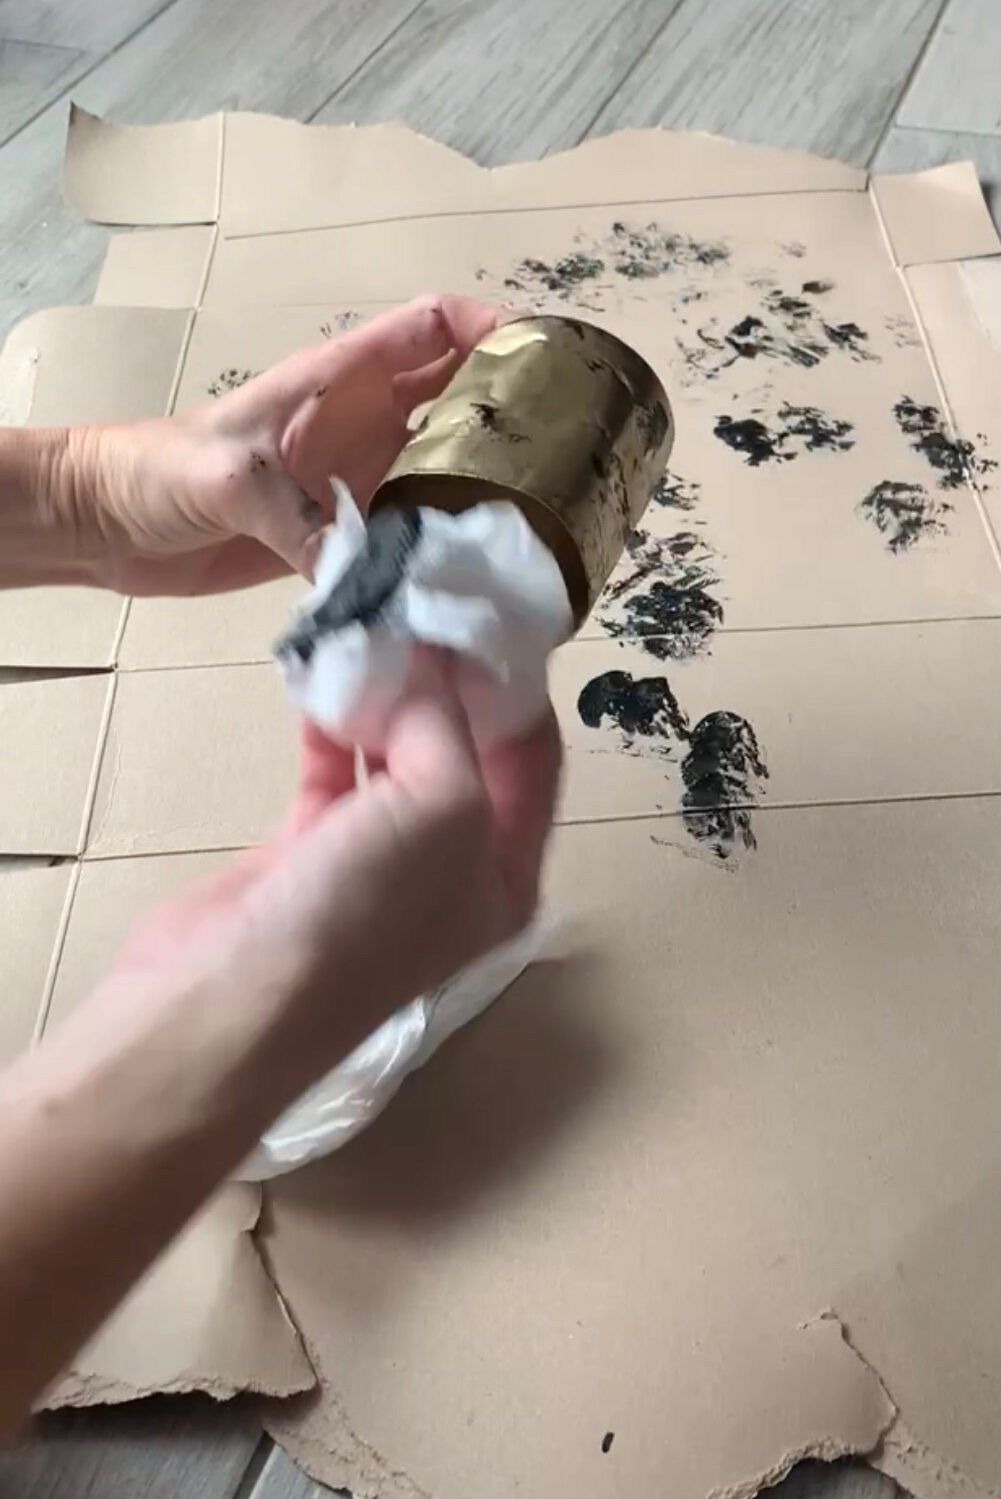
I spray-painted the bell with metallic spray. To me.. this look is perfection. But like I mentioned above… I like the bells to look a bit more weathered. So after I sprayed them and they were dry, I used a paper towel to blot on matte black chalk paint. I wiped off any excess paint to leave this black SUPER subtle.
*Alternative: Remember… these are your bells. This is your take on the project. If you want them to be red and green, gold, matte black… whatever! Please experiment with color… and PLEASE tag me. You know how much I love to see the different takes you have on these projects!
Once your bells are spray painted, that’s when I made the inside of my bell. (I would love to have a classy name for this. The jingly part? The jingler? Let’s call it that, for a couple of reasons. It’s adorable and because I don’t have anything better to call it!)
For my jingler (haha!) I did a bead on a piece of jute. You could use baker’s twine, a ribbon, fishing string… whatever you have lying around. (Remember this is an EASY DIY!)

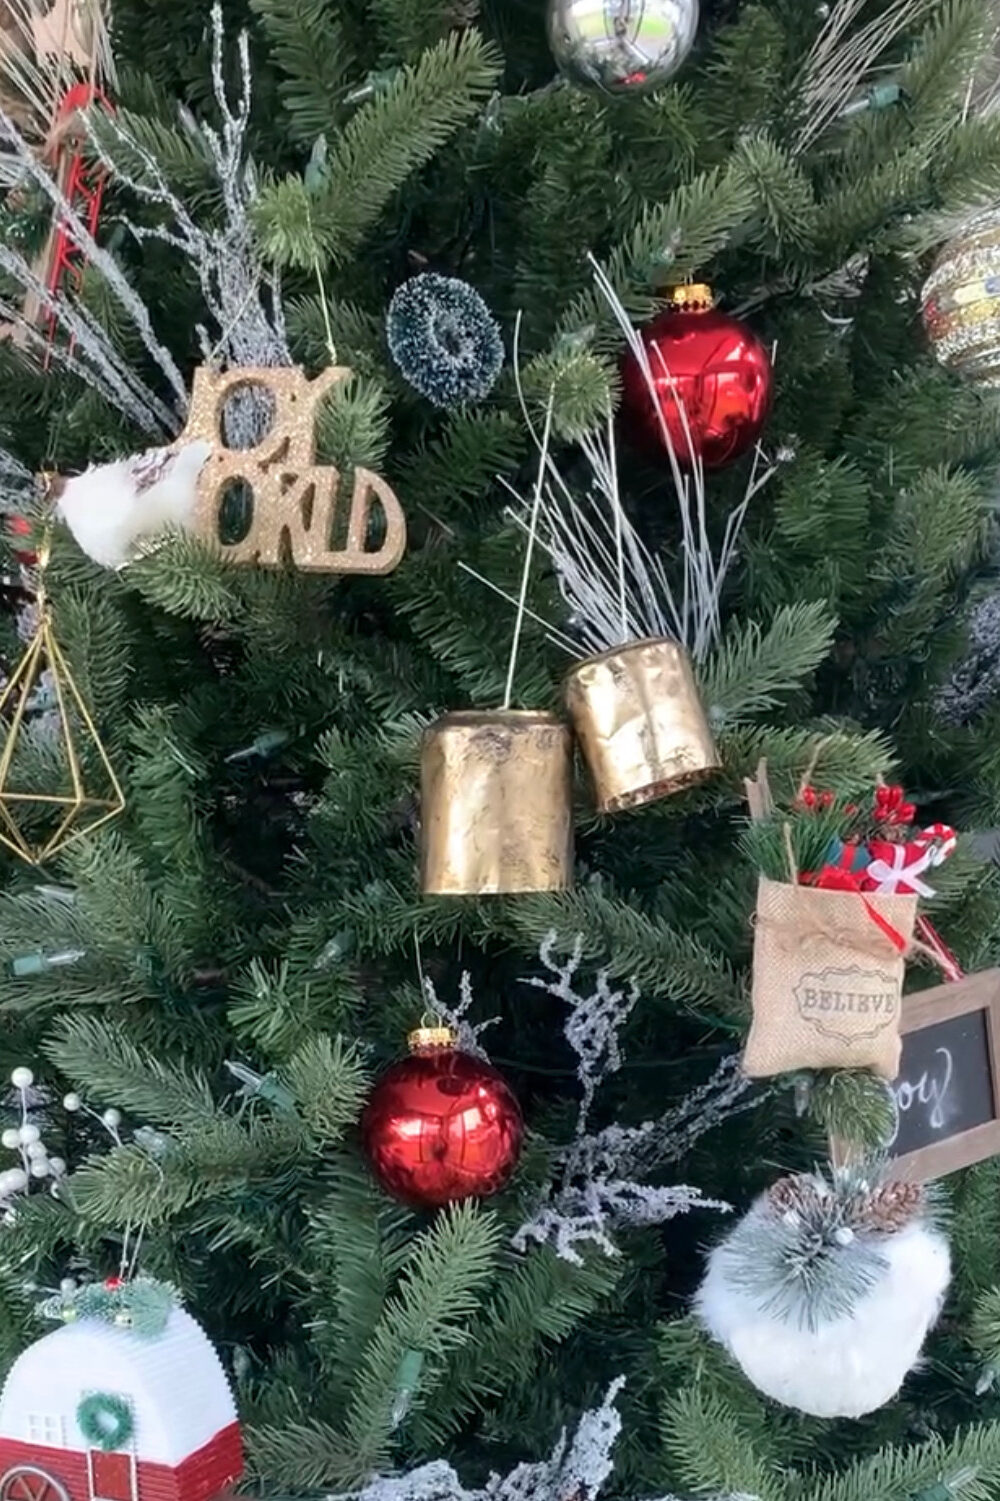
Step 4 – Add your topper, and decide where your Jingle Bell Soda Cans are going:
The favorite place that I have put mine was in the middle of that wreath. You can use twine, ribbon, or jute to attach the bells to that. Mine has ribbons that connect it to the wreath. But I had to make more and put some on my tree! I absolutely love how they came out and for this DIY, you get so much bang for very little buck. It’s a Christmas miracle!!
Do you want the jingle bells without the work? Check these out!
Want more Christmas Crafts? Check these out: