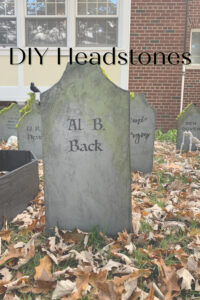
If you’re looking to add the perfect touch of humor to your Halloween, this DIY is perfect. It is a great blend of spooky to fit the season, and adaptable to fit your humor.
I love this one because I was able to get my daughter involved in part of the process. Any DIY that brings in my family… but in a way that doesn’t make my life harder… moves up on the priority list.
Want the creepiest yard on the block? Let’s go!
This post contains affiliate links. Please visit my disclosure page if you would like more information and thank you for your support.
Supplies needed for your DIY Headstone Cemetery:
– 1 sheet OSB (oriented strand board)
-Grey, black, and green outdoor paint
-A dropcloth
– Wooden Garden Stakes
–Fake Sticky Moss
-Accent pieces (blackbirds, skulls, spiders, anything you want to make it your own!)
Tools needed for your DIY Headstone Cemetery:
-Jigsaw (I love this one… and if you need a new blade set this is a great pack. I use the smallest size to make more detailed curves.)
-Circular Saw (this is my go to)
-Hammer for putting in wooden stakes
–Sponge brushes
-Brad nailer and 1.25′ nails / or a Drill and screws (this will be at attaching the headstones to their posts)
Step 1 – Start designing
If you’re one who tends to jump into a DIY without much planning, this first step may be hard to swallow. I used grid paper to map out the size and shape of my headstones before I even touched my OSB. I really suggest mapping it out so that you can get the most “bang” for your buck out of one board. (You know I always aim to get you the cheapest option… and who wants to buy more than one board if they don’t have to?!)
Once I knew I could fit about 20 rectangles out of my board, I cut them out of my OSB using my jigsaw and circular saw. Love this outdoor DIY because once I was cut, there was no sanding or finishing needed.
Step 2 – Paint, Paint, Paint
I used outdoor paint to paint everything grey… you’re not tied to my color pallet if you want headstones of a different color. But I think the light grey made it easier to add the names in the next step.
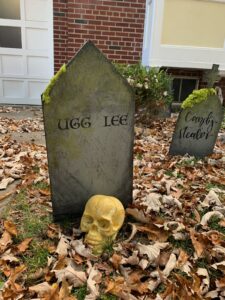
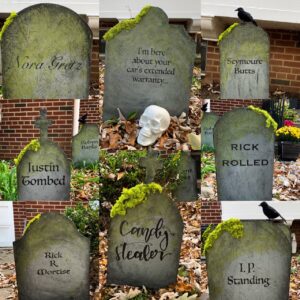
It’s so helpful at this point if you have a teenager for hire like I did because I paid my daughter to paint hilarious names on each of the headstones. We were cracking up when we were brainstorming, and it honestly might have been the best part of the project!
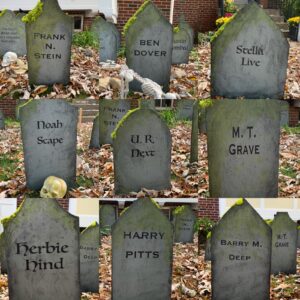
Need ideas? Here are some of our graveyard residents:
- Frank N. Stein
- Barry M. Deep
- Anita Hand
- U. R Next
- “I’m just here to talk about your car’s extended warranty”
**ALTERNATIVE – If you want to add a personalized touch, you can add names that mean something to your family or your neighborhood. We just got a kick out of the “funny” names… but add your own spin on this! (And be sure to tag me on FB or Instagram if you do, I love seeing what you all come up with!)
Step 3 – Assemble and Stake
Now it’s time to take those stakes and decide how far into the ground you want them to go (I measured and marked them ahead of time). Pace out the yard and decide where you want them to go, and start hammering them in! Once they were in, I spaced out the headstones and attached them to the stakes.
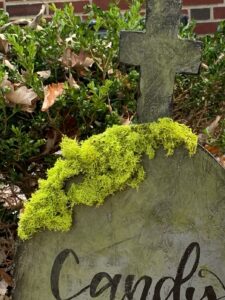
Stepping back to look at them, I decided they needed a little bit more dimension, so I took some of that green and black outdoor paint and sponged it on. I tried to make the outter rim of the headstone the heaviest with paint, so as not to draw the eye away from the center and to create a more realistic look of moss and grass.
To add depth and texture, I cut out some of this sticky moss and attached it to the sides.
** If you’re feeling exceptionally adventurous, you can add plastic birds, spiders or ghouls to the headstones! Make it your own! **
Trick-or-treaters loved it, and so did their parents! We got so many great suggestions on names we could use, and I can’t wait to add more to it this year!