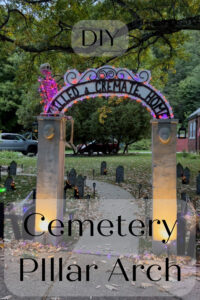
I just want to prep you right out of the gate, this wasn’t my easiest DIY. But I promise if you stick with it… the effect is AMAZING and well worth the effort. This arch sits perfectly on top of my DIY cemetery pillars and gives my cemetery a spookily life-like feel.
This post is affiliated with a paid partnership with OOK Hardware. and contains affiliate links. Please visit my disclosure page if you would like more information and thank you for your support.
Supplies needed for your DIY Cemetary Pillars:
– Plywood
–3/8 inch tubing
–14 gauge wire
-black hot glue
-Rust spray paint
-mortar
-2×2 wood
Tools needed for your DIY Casket:
–Jigsaw
-screws
Step 1: Plan it out
One of my favorite tools I own is my grid paper. So before I even touched a saw, a drill, or my spray paint, I was taking my design to paper. Decide what you want your arch to read, and get it sketched out so you have a good idea of spacing. I am adding mine below so you have a jumping-off point.
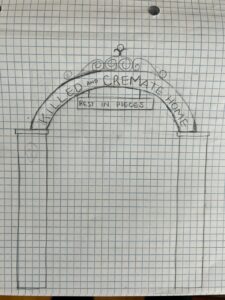
You need to decide on a phrase or some wording to go on your arch. This was where I decided to name my entire cemetery “Killed and Cremate Home”- a fun spin-off of Build and Create. Once I decided what I wanted to name it, I sketched the letters onto my plywood and got ready to cut.
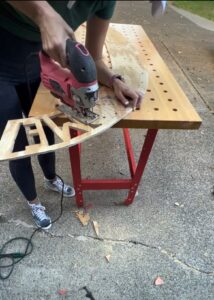
Step 2 – Cut it out
I used my jigsaw to cut out all of the letters in Killed and Cremate home, then laid down my trusty tarp, and sprayed painted it black. This was probably the most time-consuming part of the project, but if you have a clever cemetery name and a steady hand, it probably won’t take you too long.
**ALTERNATIVE – Remember your arch doesn’t have to be as wordy as mine. Short and sweet works too, and saves you lots of time. If you don’t want to cut each letter, maybe you do some lettering on the arch with black paint. If you decide to take this approach, please share it with me on Facebook or Instagram, I’d love to know how they turn out!
Step 3 – Ironwork
I came up with a pretty clever (if I do say so myself) way of making faux ironwork on top of my arch. I got some 3/8 inch tubing and some 14 gauge wire, then I fed the wire through the tubing. Note- I was wearing gloves!! Be careful, these wires can be pretty sharp.
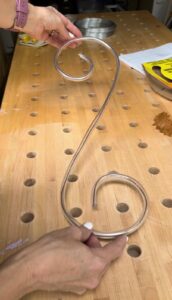
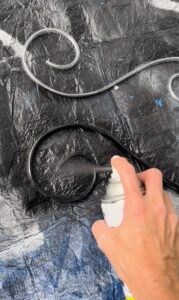
Once I had fed it through, I was able to twist and manipulate the tubing into shapes of the scroll, then headed back to the tarp and turned them black. Using a LOT of black hot glue, I attached the scrolls to the top of my arch.
One thing I did think about after the fact was that you could potentially use black zip ties to attach the arch to the scrollwork.

Step 4: Assemble
I used 2x2s cut into 9 and 12 inches to make a topper for my pillars. I screwed them together, with a slot at the top so the arch would just slide on. It was the same size as the pillars, which made attaching it pretty easy. Once it was attached, I added mortar as I used on the pillars, so that it would blend and match the pillars in style. Then I slide my arch in and added the finishing touches.
The next step was to add rust-colored spray paint to the scrolling and my arch. I got these great lanterns to hang from the side, lights to drape through it and I HAD to hang a skeleton on top! I even got this timer, so I don’t have to mess with turning things on or off. And the finishing touch? These lights shine up on it at night from the ground!


To say I love this would be such an understatement. I can’t help but feel like it totally completed my cemetery, and I can’t wait to see what you all put on your arches!