You saw how I renovated the husband’s closet in this military family, so next up, a $150.00 Closet Makeover- Military wife edition.

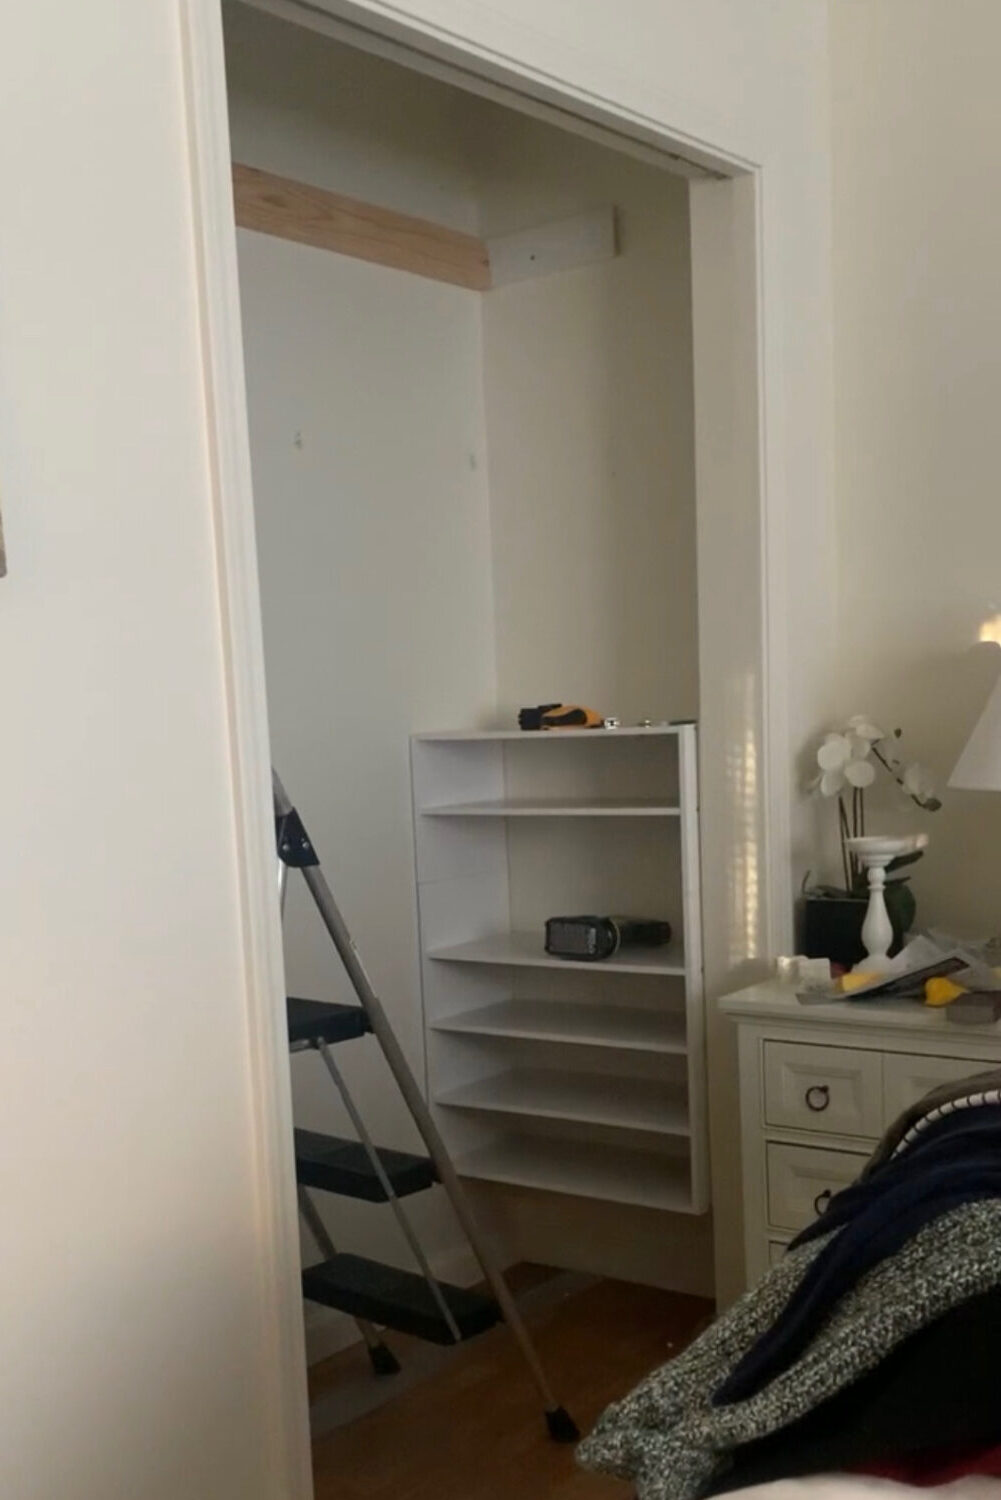
This closet was in the primary bedroom, only 2 feet deep and 5 feet wide. So small for a shared closet! Mama needed more space, so her husband was sent to the hall.
Materials needed for a Military Closet Makeover:
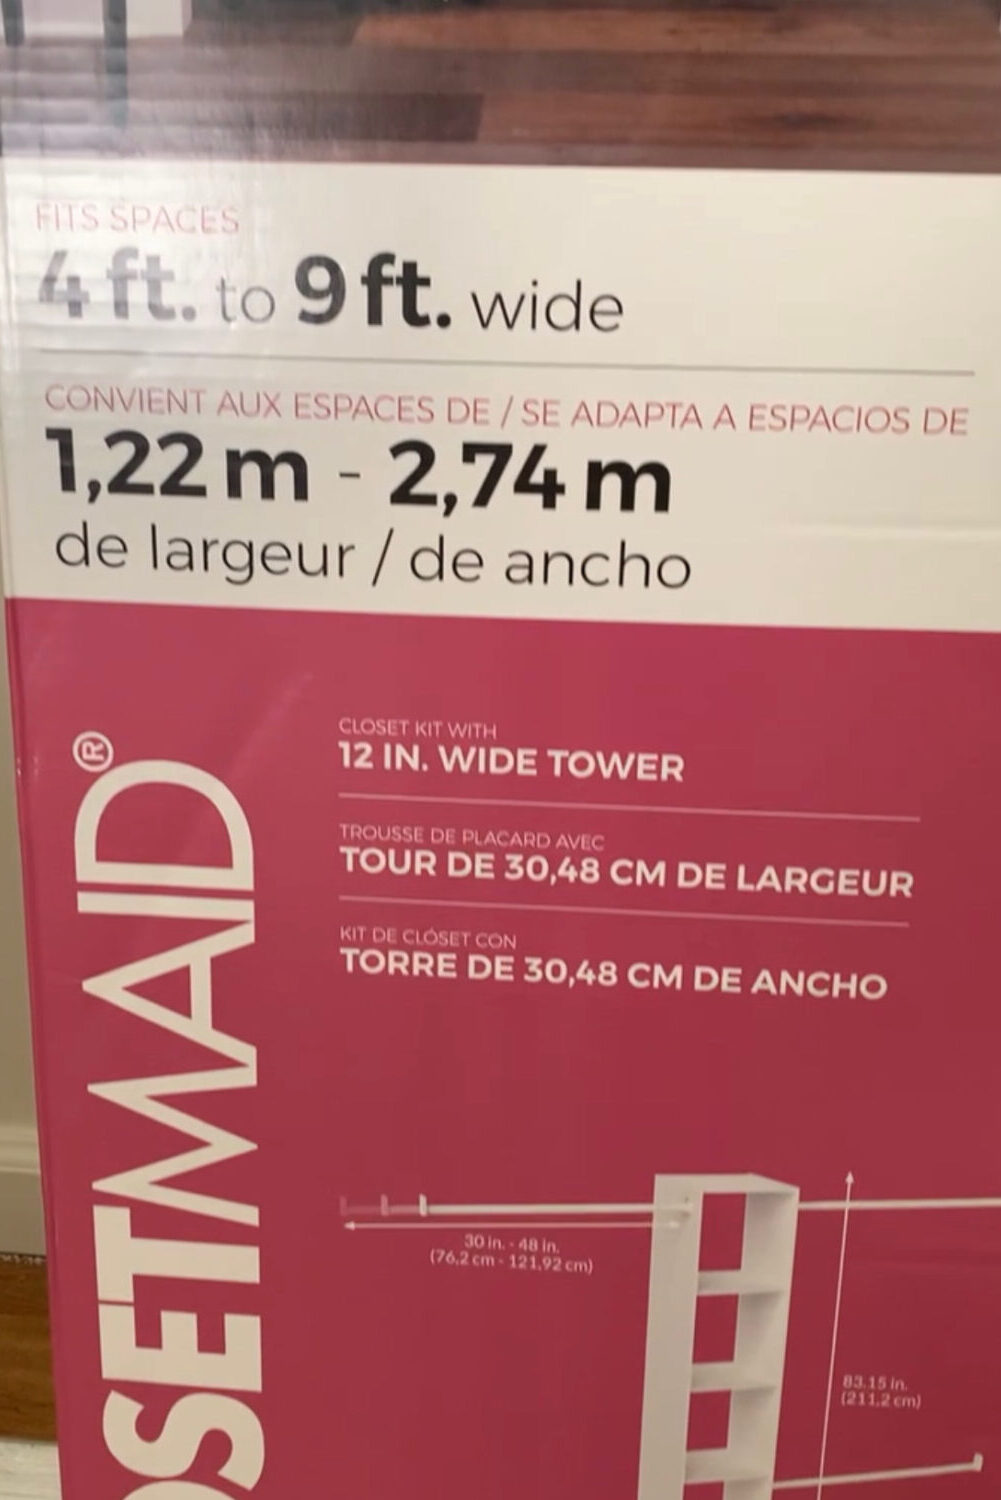
–Shelving unit (I lucked out and found my closet units on base, saving a lot of money. I got them from Military Exchange for 89.00- and I found it here for 99! You need to measure the space you need and buy accordingly. I will link some options at the bottom of this page for similar units)
-1×12 narrow shelf
-1×4 (approx 10 ft)
-white paint (optional)
–shoe rack (24 inches wide- the exact length of the closet depth)
Tools Needed for a Military Closet Makeover:
-drill
-saw- for cutting 1×4 (if you don’t have access to a saw, your local hardware store will cut your 1×4 for you)
*This post contains affiliate links. Please see the disclosures page for any concerns)
Step 1: Organize the closet
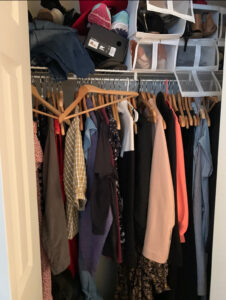
No shade, mom. We keep everything for everyone. For years. So if your closet looks like this “before,”… same.
Once we got the items pared down to just the essentials, we started eyeballing what we had left and what potential closet they would be stored in. That cleared out space and gave me a better idea of what storage would be needed in future closet makeovers.
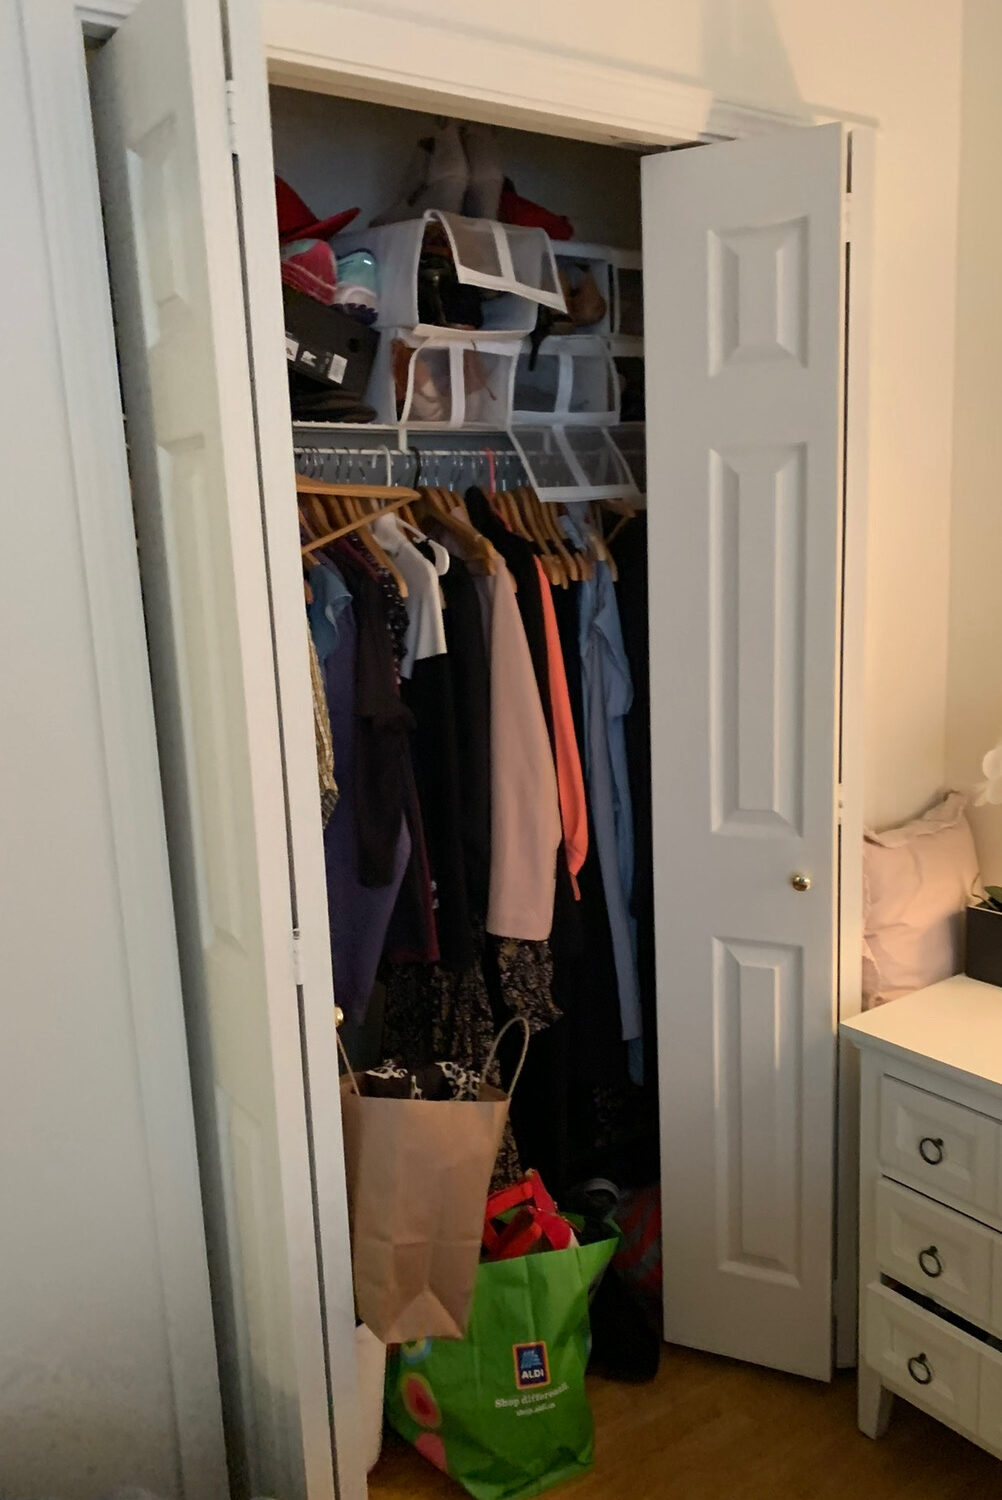
This mama knew how easily it can happen to shove things into the closet and store them for everyone. So we decided to remove the closet doors and keep them in storage. She wanted a beautiful set up that she was incentivized to keep clean, so we went for an open concept!
Step 2: Measure and find closet units
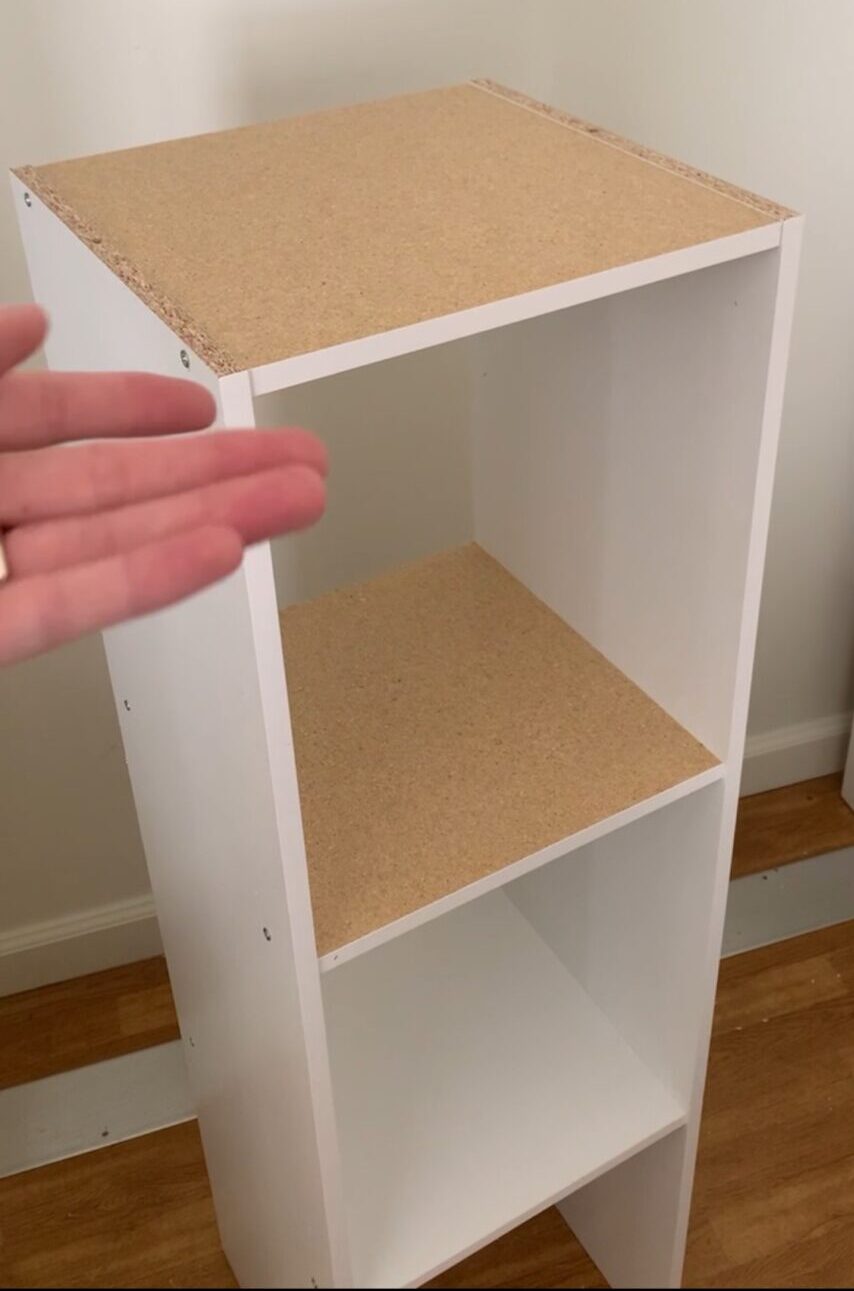
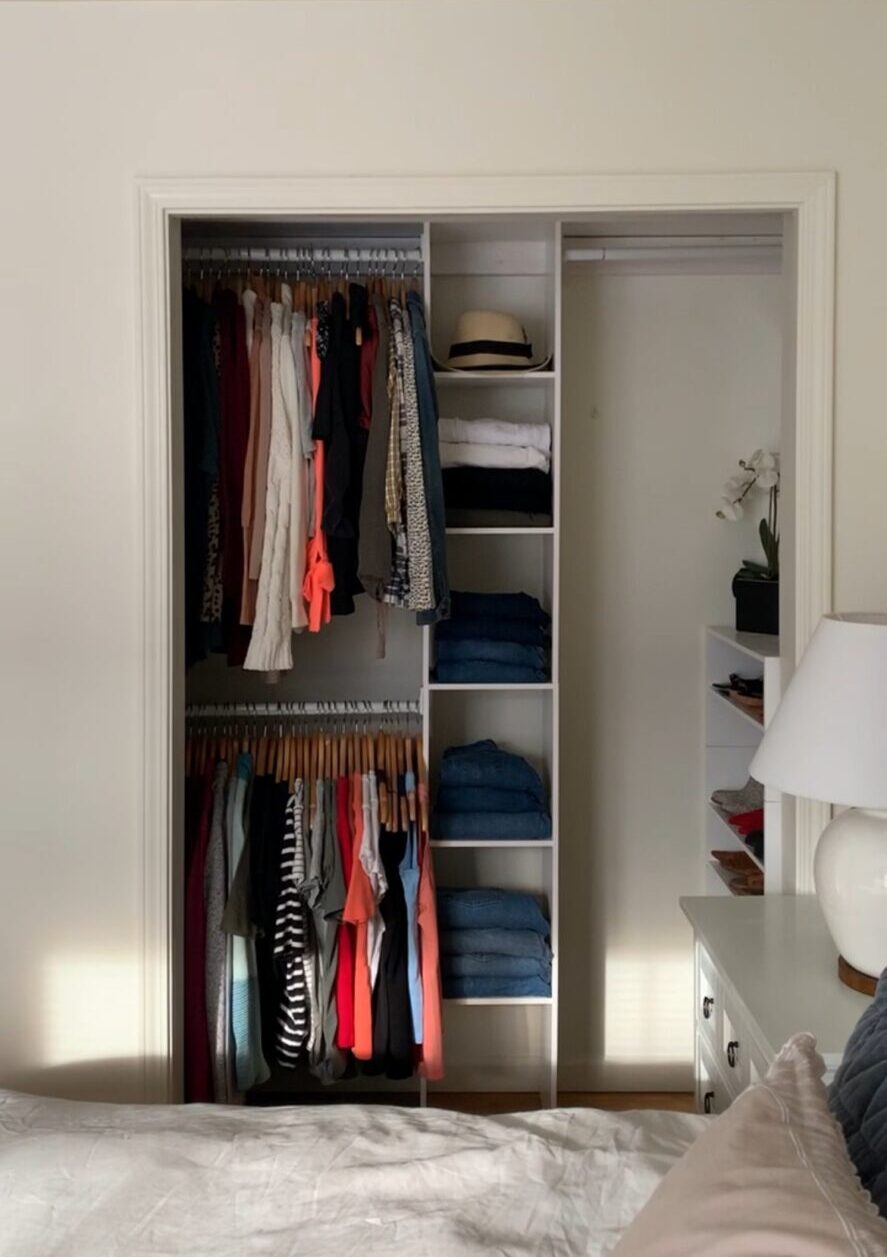
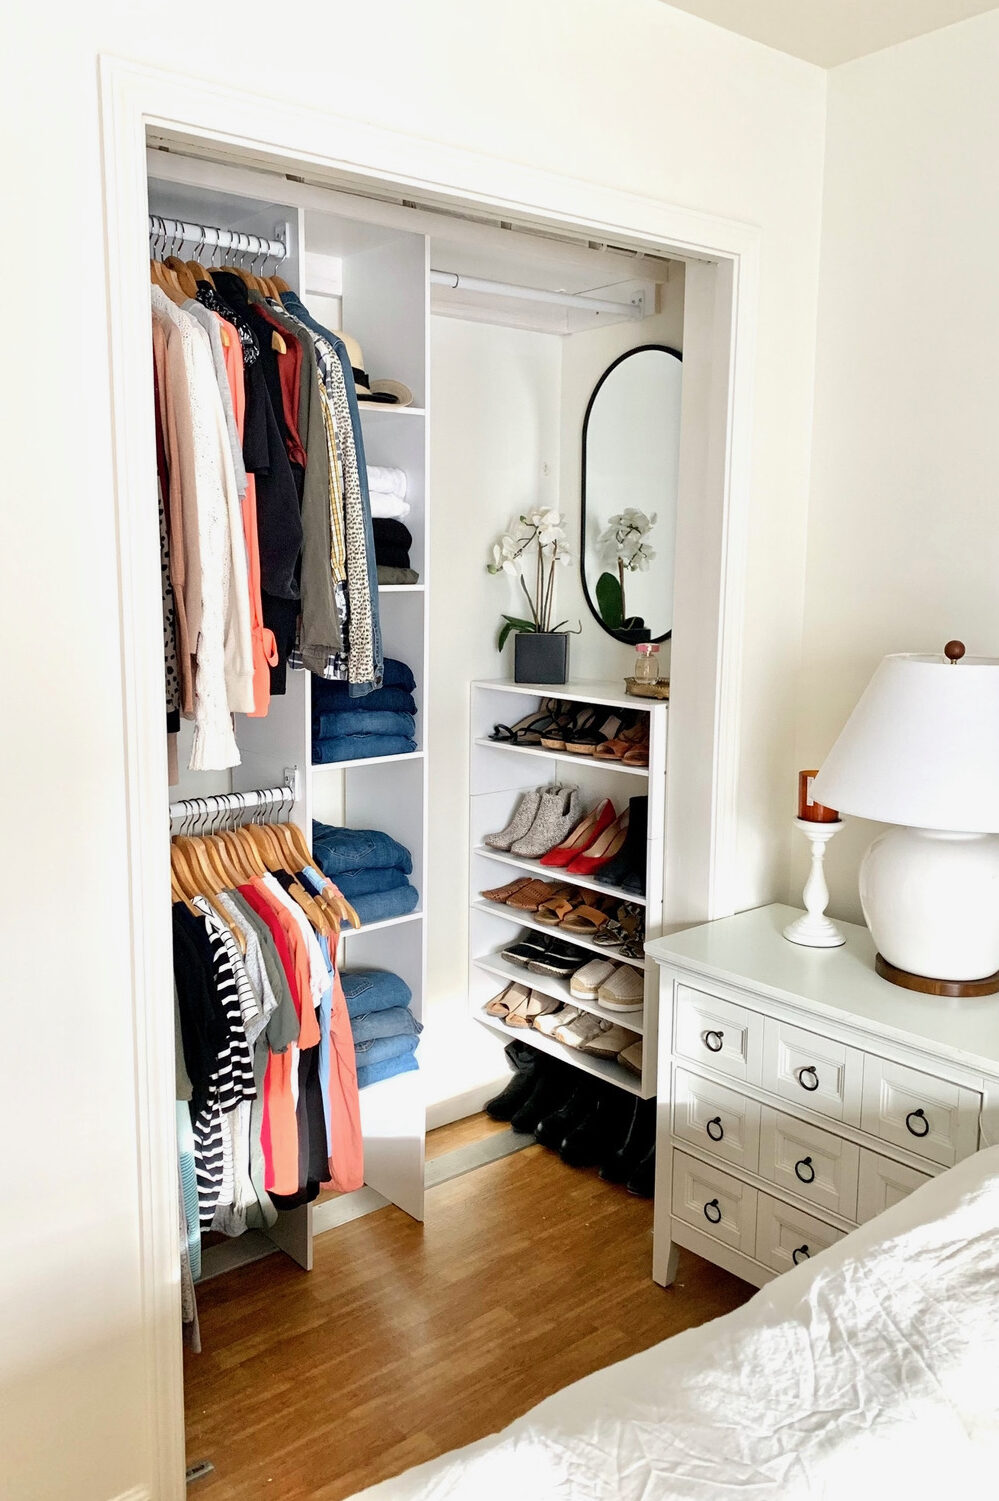
The primary closet was *small*, as I mentioned. So I found Closet Maid shelves that would fit that space. I unscrewed the wire rack I knew I would not be using and got to work assembling the shelving unit and placing that inside the closet. The unit I found was 1 foot wide, and I put it right in the center, which gave me two feet on each side. On one side, I did the double hanging, which would take care of all her hanging clothes.
Reminder: This unit was bought on base. But here are some units that are available elsewhere and are similarly priced, and you can look for one that best fits your space.
- closet maid tracks
- closet maid shelves and bars
- closet maid stackable shelves
- closet maid track wire system
- closet maid wood closet organizer
*When I put together the shelving, notice how I turned the top two pieces upside down. Because only one side is painted, I wanted the painted side to be visible when looking up at the shelves. Unless you are over 7 feet tall, you won’t see the unfinished tops of these shelves.*
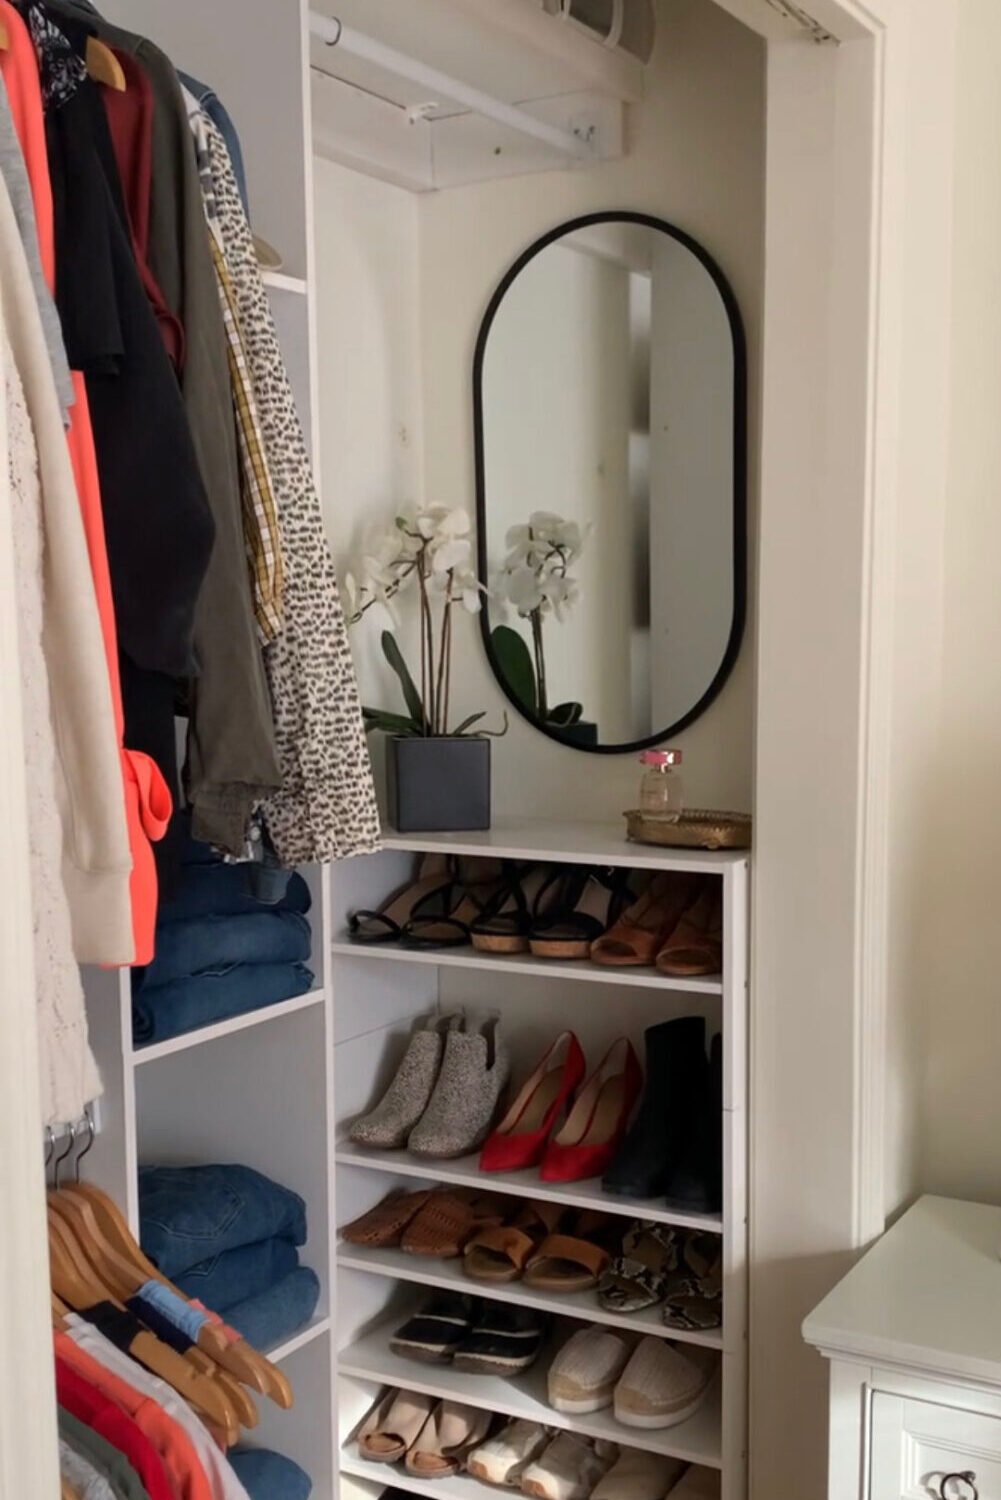
Step 3: Adding a top shelf for closet storage
Shoes. Am I right? We needed extra storage for the shoes in this closet, so I added a top shelf. This is where the 1×4 and melamine. This is a type of wood that is already treated and laminated. It went on top of our units. But I needed to be sure it was secure. So I got 1×4 and cut them to fit each wall in the closet.
I made sure they were screwed into studs. This is the support for this piece. Very important.
Speaking of shoes, we decided to use a shoe rack on the right side. (The one listed under materials is what I used from Lowes. You need to measure your space, and if you find you need another size, here are some options)
If you notice, I made one of the racks taller than the rest on her shoe rack. That is so her taller boots and heels have a place to go. I did that by flipping the second Closet Maid shoe rack upside down on top of the first when I installed it.
Once the 1×4 boards were in the wall, I attached the shelf to that and wanted to ensure it was secured to hold the shoe storage she needed!
I accessorized her shelf with a mirrored tray like this to hold some perfume, a mirror, and other knick-knacks she wanted on display. You could use dried flowers, have pictures displayed, or an elegant or funny quote about getting dressed.
Looking for other makeover inspiration? Try: