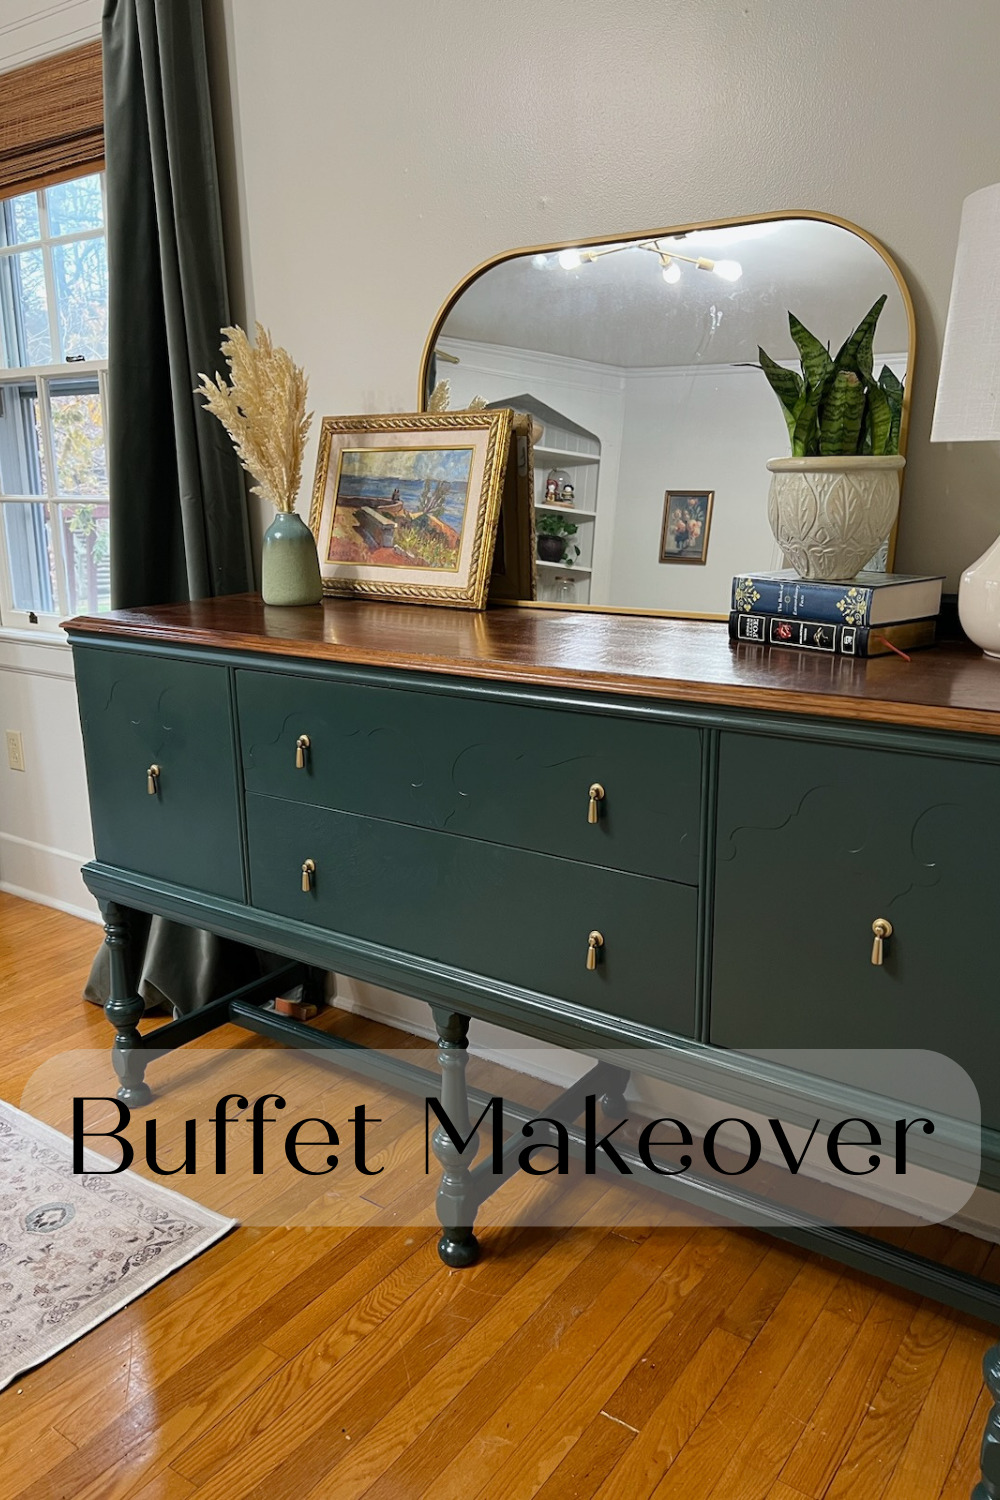
If there is something I love, it’s a DIY. The icing on the cake? A cheap DIY!! I found the perfect marriage in those things with this Buffet Makeover. I found the buffet in really good shape on Facebook Marketplace for only like 150.00, and that is a STEAL. To then turn it into this gorgeous piece… priceless.
(Those of you holiday lovers, don’t forget we have some Christmas DIYs waiting in the wings. Check out the soda can jingle bells! Or challenge yourself and elevate your tree game with the tree box stand! We’ve got what you need to put the holly in your jolly.)
This post will contain affiliate links- please see my disclosures page if you need any information on that!
Supplies needed for a Buffet Makeover:
-buffet (I would look for one secondhand so you can make this cheaper! As I mentioned, mine is from Facebook Marketplace!)
–Bondo Putty
–Spray Paint
Tools needed for a Buffet Makeover:
Step 1- Assess the damage to your buffet
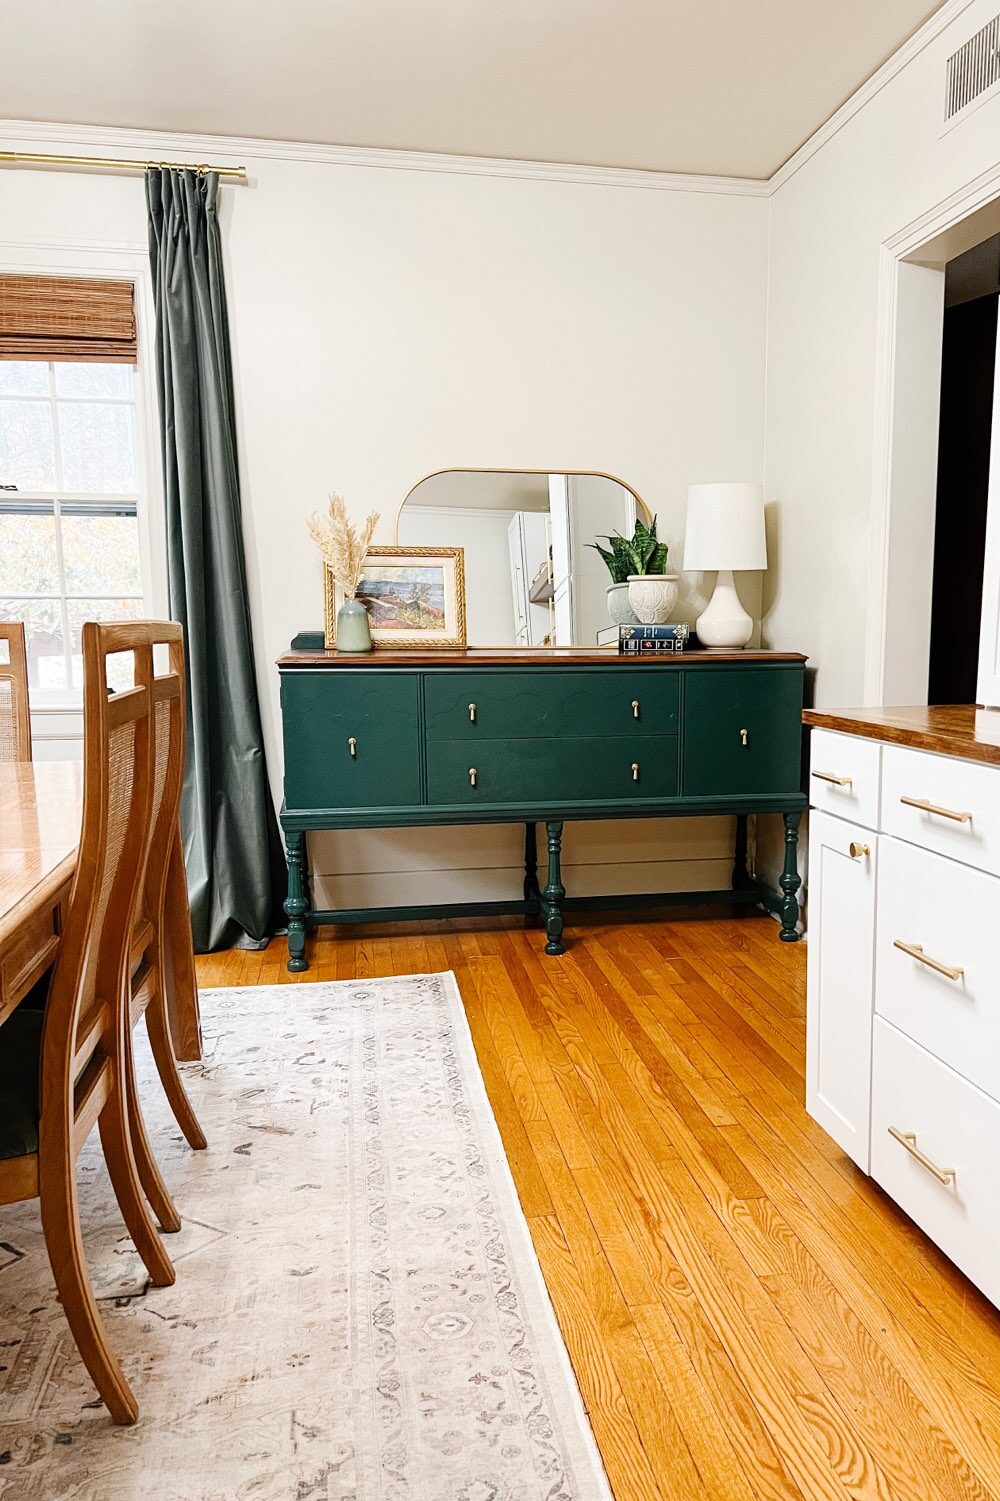
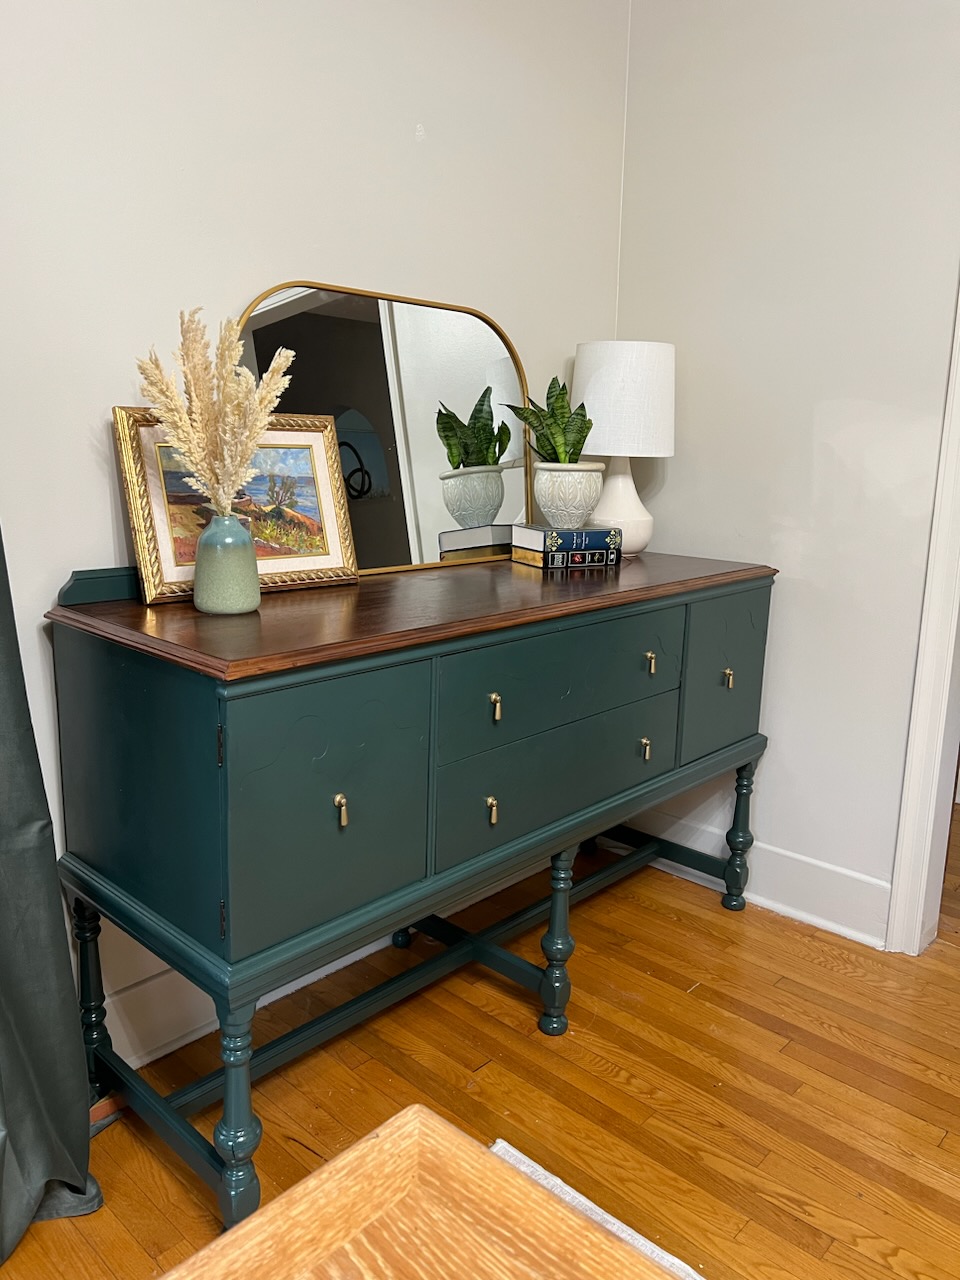
I knew I wanted to give something new life, and I wanted it to match the beautiful breakfast bar that I had just added to the dining room. Ideally, I wanted to keep the beautiful wood look, but the veneer was too chipped to salvage.
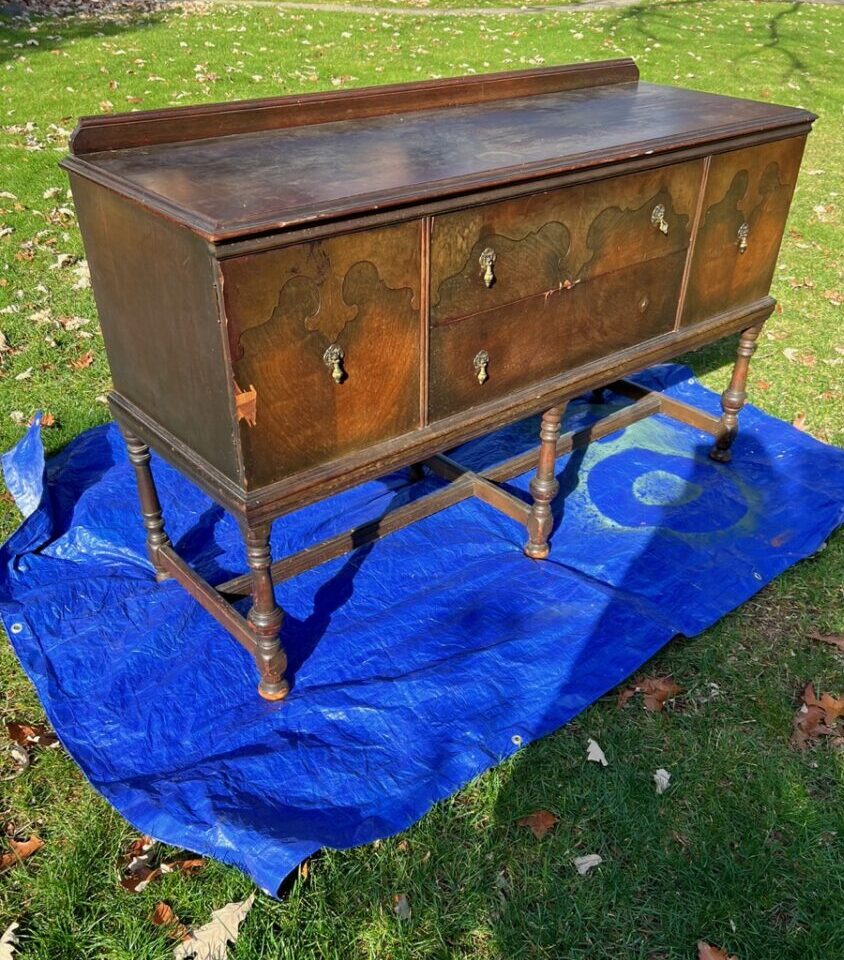
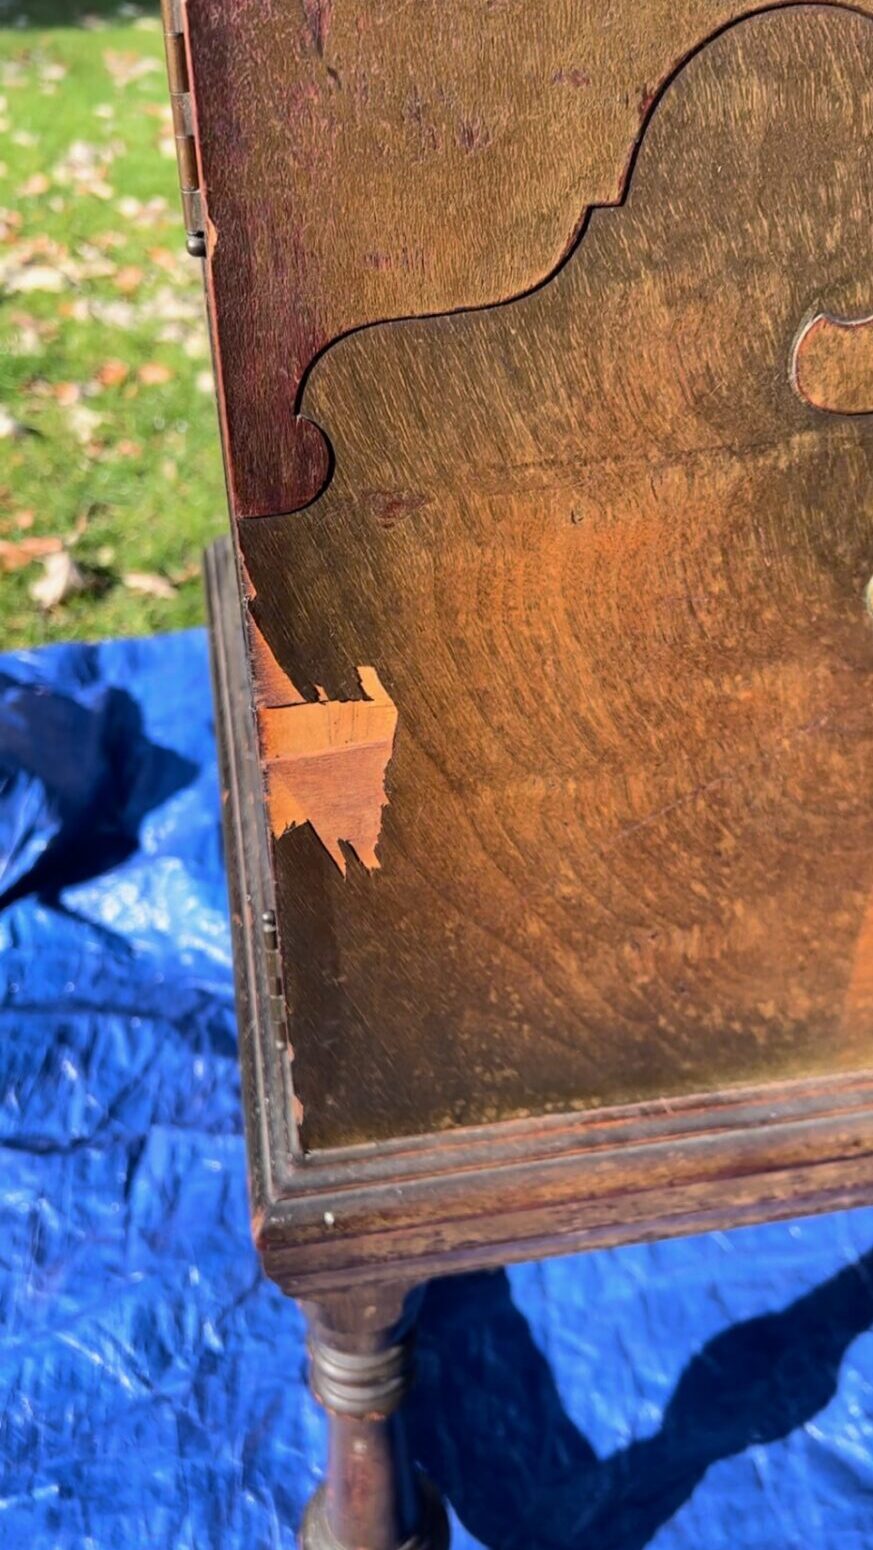 Because of the chips in the wood, I knew I would need to fill it and sand it. I also knew I would need to add some paint. I decided to go with this GORGEOUS green.
Luckily I loved the hardware on the buffet as was. But it was missing ONE antique handle!! I was so sad to not be able to keep this set as is. I was able to get a replacement set from Ikea that is still beautiful, but if anyone knows where I can get a set that looks like this antique set, Let me know! So if you want to put another personalized twist on your buffet makeover, keep the hardware in mind.
You could get some gorgeous options- all will be different depending on what you need for your individual buffet but here are some that I found and LOVE:
Option 1
Option 2
Option 3
Option 4
Option 5
Step 2 – Paint or stain your buffet
As I said, I wanted to keep it wooden, but I had to pivot with some of the chipped veneer. So I found this gorgeous green and got to painting.

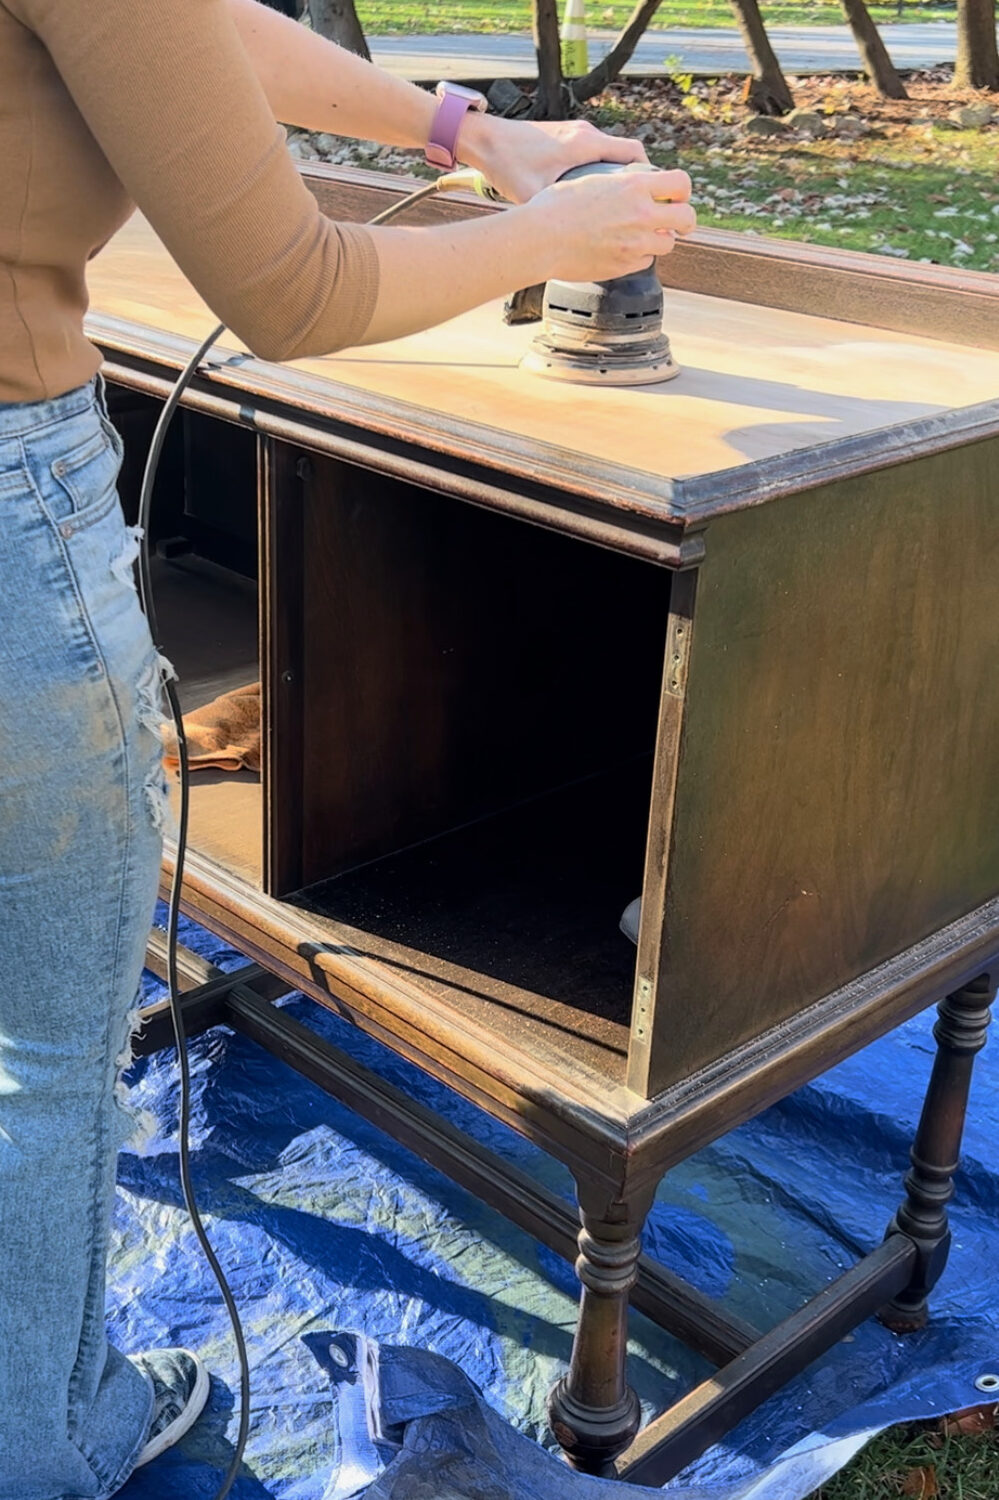
Step 3 – Finish the top of your Buffet
I didn’t want to paint the top of the buffet, I wanted to keep that wooden finish, so I sanded it down and tried to maintain the wood on top as much as I could!
I used this conditioner, and then I used this oil. I didn’t do an actual stain on it because it had such a deep color to it. Lastly, I did 4 coats of this Polycrilic. BE SURE to sand between each layer of poly!!
When it’s all said and done, I got a piece that is so beautiful, was cheap, gave me storage, and is something that is such a conversation piece in my home!