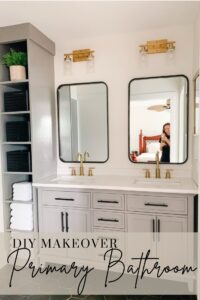
Bathrooms and closets are my love language. I often go back to this DIY Makeover of my Primary Bathroom when we lived in Hawaii, and drool over it. So I wanted to drop some step- by- steps in case you’re looking to spruce up your bathroom and looking for a breakdown for a DIY Makeover of your Primary Bathroom.
*This post contains affiliate links. I may receive a commission on any products you purchase using some of these links. Please see the disclosures page for more information.
DIY Makeover of your Primary Bathroom Supplies:
- Tile Backerboard
- Tile
- Tile adhevsive
- Wall patch
- Sander for walls
- Wood for the Shelves
- A new Vanity (Options similar to mine):
DIY Makeover of your Primary Bathroom Accessories:
Lights:
- 2 Brushed Gold Lights- One Mounted Plate
- 3 Light Brushed Gold with Clear Glass- One Mounted Plate
- 2 Horizontal Brushed Gold Lights- One Mounted Plate
Mirrors:
Framed Artwork:
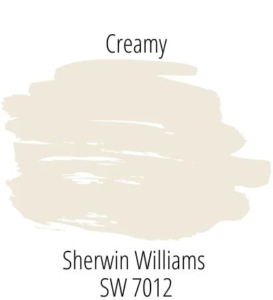
- An Amazing Paint Color! (I used Sherwin Williams Creamy. They have an Amazon Prestige Brand that is color-matched, you can get delivered right to you as well.)

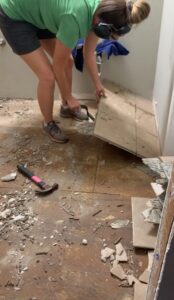
Step 1: Say Goodbye to your bathroom “before”
Nothing I love more than saying goodbye to old tile, and thank goodness it was put on backer board, so the process was quick and painless! I knew I wanted to do new tile, so I ordered the black hex tiles and backer board I needed to use to replace it, and had that ready to go!
These bulky, clunky single vanities were next on the list as they lacked extra storage space and took up some unnecessary room. I wanted to replace them with a double vanity that was all one piece, so we could save some room on the sides of the vanities, as well as add some much-needed covered storage to our sink areas.
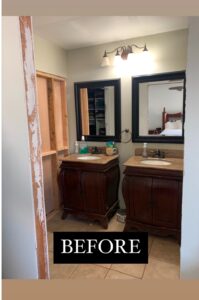
The thing I love the most about closets and bathrooms is being able to find the right organizational tactic to truly use your space wisely. And in a closet or a bathroom- there’s a place for everything. So I decided to take out the double vanities that were a bit too clunky and add one with drawers, which would allow me to build a custom set of shelves to the left. (Graph paper has entered the chat.)

I got to use my woodworking skills to make a custom 7-foot shelf that is nestled in right next to this vanity. (Plans coming soon, I promise!) And then I painted it the same beautiful color as the new vanity I had ordered from Costco! 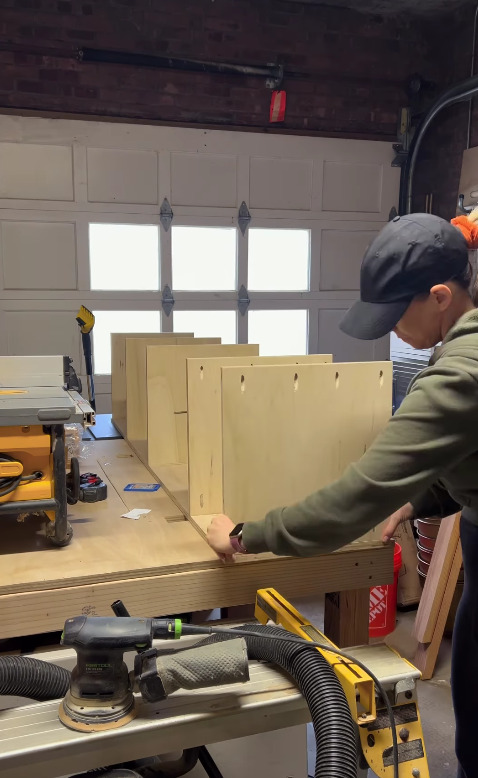
(Again- this is an older project, but here are some vanities that are similar to the one I purchased)
Step 2: Lay down your new tile
I had used this black hex tile before, so I knew I wanted to use it in my DIY Makeover of your Primary Bathroom. I love the way they look with almost any accent color, and against the fresh creamy walls, the black was super complimentary.
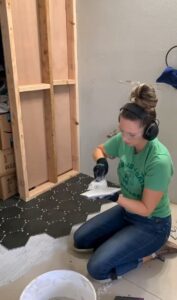
Step 3: Walls: Patch and Paint
Because we had taken the old vanity out, the walls were a bit damaged. The wear and tear on the bathroom in general was showing, so I made sure to prep the walls for the new paint. I patched the space behind the vanities, and the other scratchy spots with a wall patch repair kit, and then I was sure to sand it smooth before I painted it the creamy color I loved!
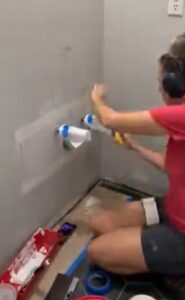
Before I put everything in, I used my tried and true blue tape method- where I measure and mark out the wall with blue painter’s tape. This gives such a helpful visual and ensures you’re not missing anything before the screwing, painting and drilling starts!
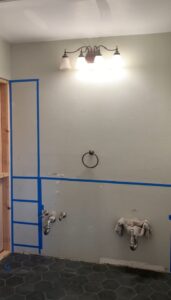
I put in my new vanity, and got to work on the shelves!
Side note- I added new hardware to my sinks. This isn’t a need, but man does new hardware pack an effective punch. It’s an inexpensive way to really change the entire look of your bathroom. I love these options:
Step 4: Adding DIY Storage Shelves to your Primary
I decided to color match my DIY shelves to the vanity we grabbed, but you could give them a built in look with your wall color as well. You know I love to see what you do with my initial designs!
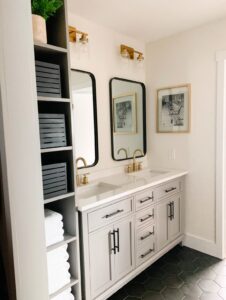
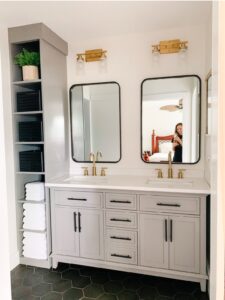
I decided to get new lights to match my gold bathroom hardware- then hung mirrors that complimented the hardware in the vanity! Popping a framed picture on the wall was the perfect way to tie it all together, and voila! A completely new space that combined a lot of DIY with some purchased pieces. This DIY Makeover of your Primary Bathroom is the perfect way to incorporate storage, function, and pleasing visual aesthetics.
Lights:
- 2 Brushed Gold Lights- One Mounted Plate
- 3 Light Brushed Gold with Clear Glass- One Mounted Plate
- 2 Horizontal Brushed Gold Lights- One Mounted Plate
Mirrors:
Framed Artwork:
If you’re looking for more closet and bathroom makeovers and renovations, look here!
