When they were younger, my kids once needed angel costumes on two different occasions. (What are the odds, right?!) I needed this Angel Costume Halo Tutorial, but I didn’t have one.
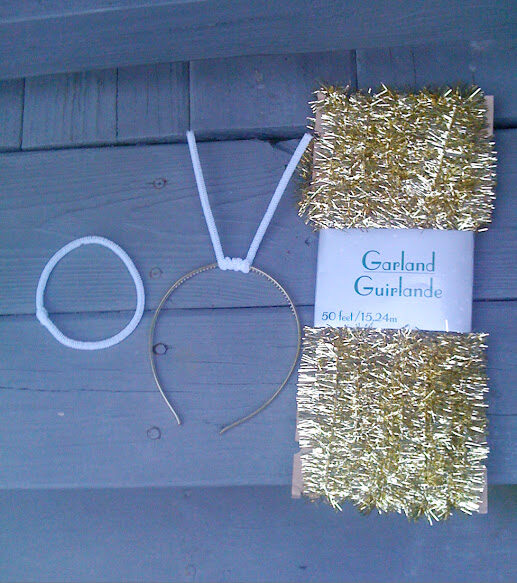
I was short on inspiration and didn’t really know how to get started. But then I was wandering the aisles around the holidays, I came across this gold tinsel garland, and the lights clicked on! Thus, the Angel Costume Halo was born!
SUPPLIES:
(my links are from amazon- but feel free to browse your local store for these items! Like I said, I was walking through the store when I saw these supplies!)
STEP 1:
Wrap one pipe cleaner around the headband, starting in the center. I think I wrapped mine around two or three times on each side.
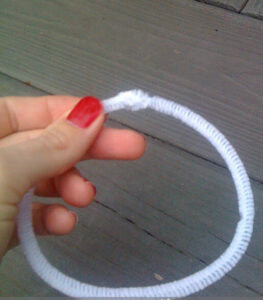
STEP 2:
Make a circle out of the other pipe cleaner and twist the ends together.
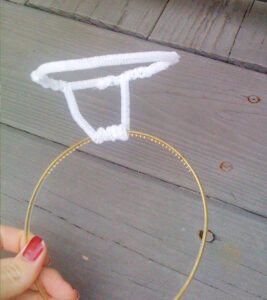
STEP 3:
Place the two prongs of the pipe cleaner through the center of the circle until they are about 1 – 1.5″ high, and then wrap the excess around the circle to attach.
STEP 4:
Wrap the garland around the circle until it is filled in and no white is showing. I found it was easiest to use about 1.5′ pieces at a time, and I think I used about 3. It has a very small wire in it, so it stays attached on its own. You don’t even need glue for this one! Easy peasy. 😉
So I have a confession…my front door was naked last Christmas. Yep. No wreath. I made new stockings for us and new ornaments and tons of homemade gifts for my kids, and I sort of skipped that part.
Honestly, I didn’t even miss it much!
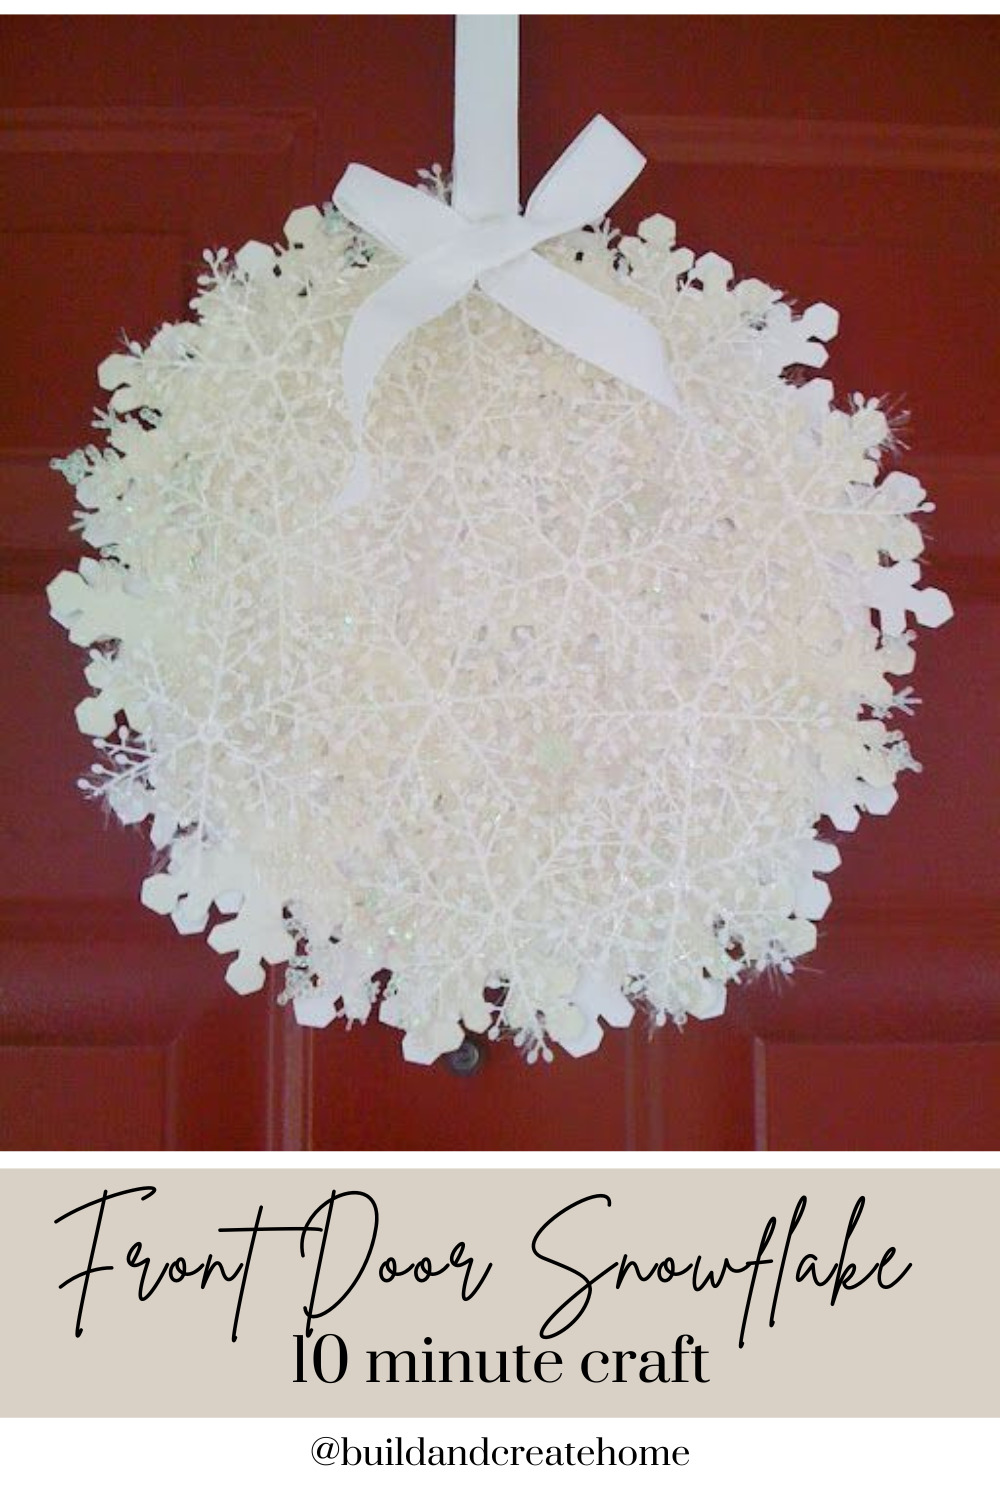
But this year I used most of the same decorations, so I didn’t have that much Christmas crafting to do and have been feeling like I need to do something. So I invented a “wreath”.
Supplies for your 10-minute ornament wreath:
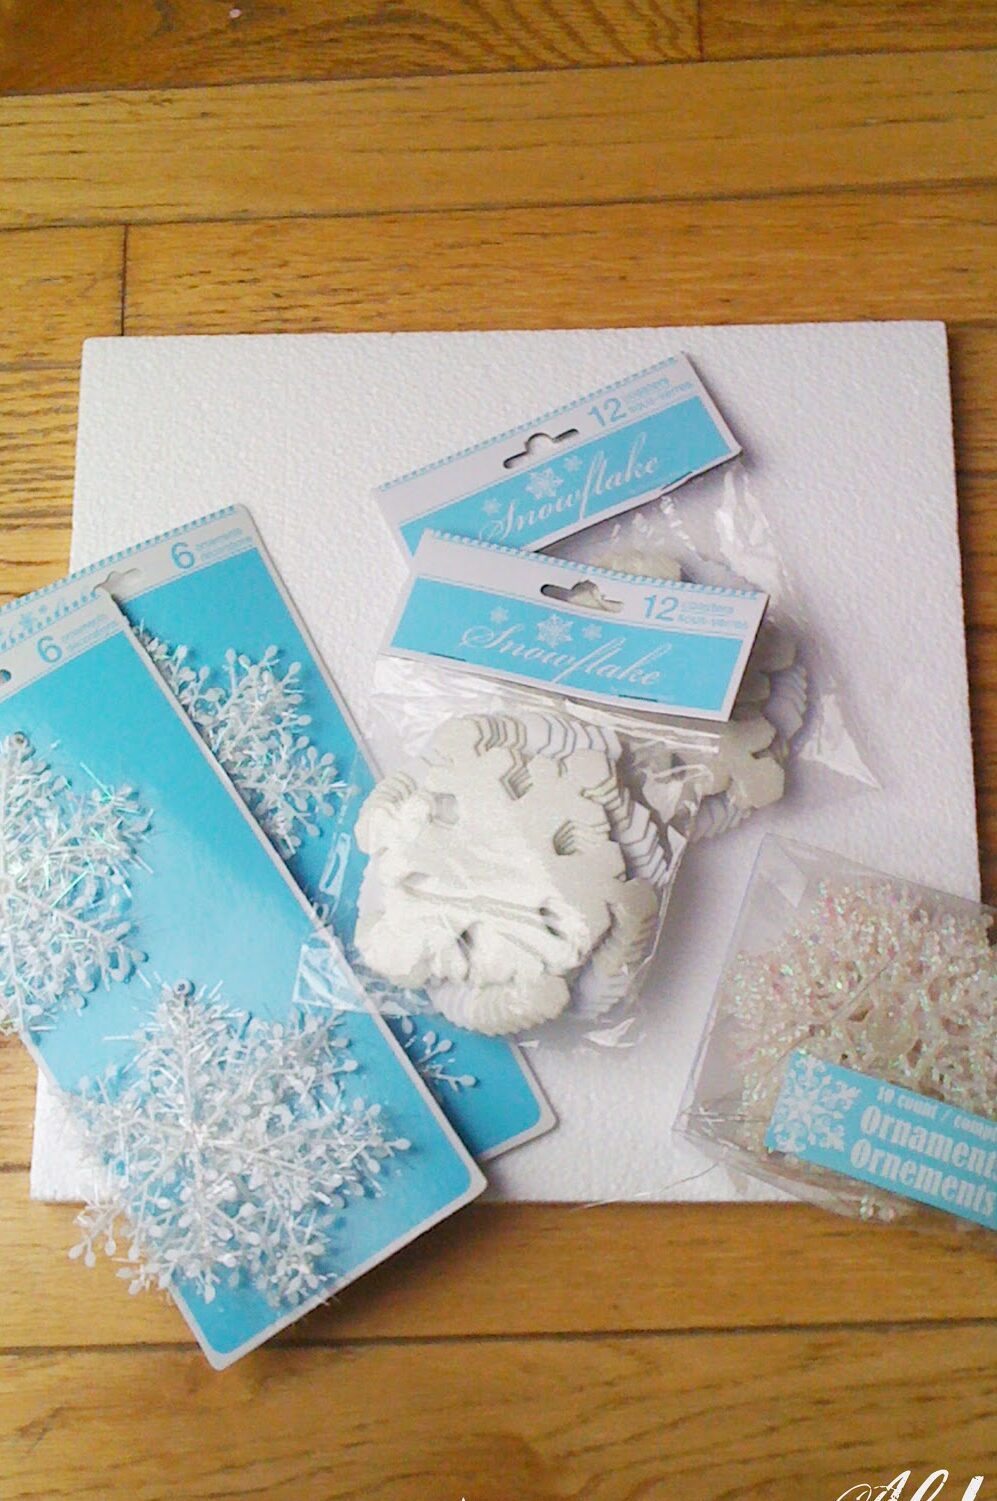
Different flat decorative snowflakes. I got multiple kinds- a plain and a glittery. That way I could layer them
I had no idea exactly what I was setting out to accomplish when I went to Walmart. That day, I just kind of threw stuff in my cart that looked snowflakey and fun.
I bought these different kinds of ornaments. One set was foam with some solid white and some with glitter. When you get the snowflakes, it’s important to get multiple kinds. You’re going to layer your snowflakes together to make you “wreath”, so you want to add the bling and the texture wherever you can!
Steps to making your 10-minute “Wreath”
Step 1:
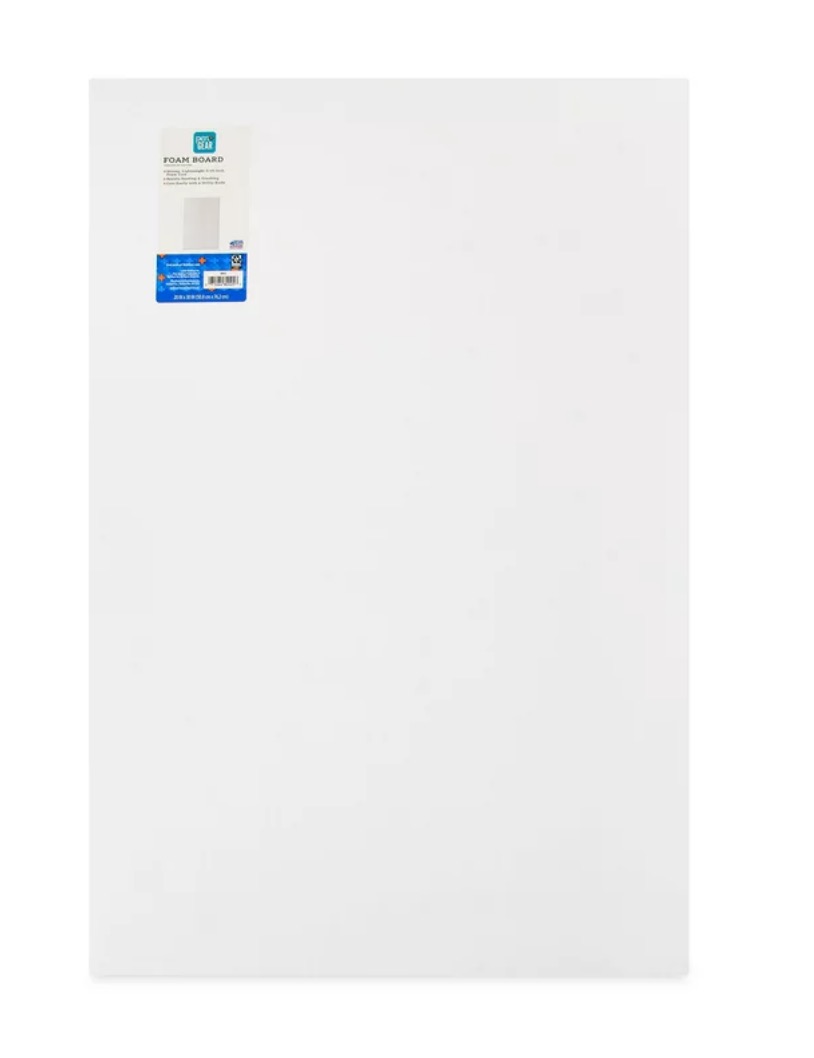
Cut a circle out of a piece of foam board. ( I used a dinner plate to trace mine- so no it doesn’t have to be perfect!). I used this cheap piece for foam board that I found at Walmart!
Here is my haul of snowflake goodness!
STEP 2:
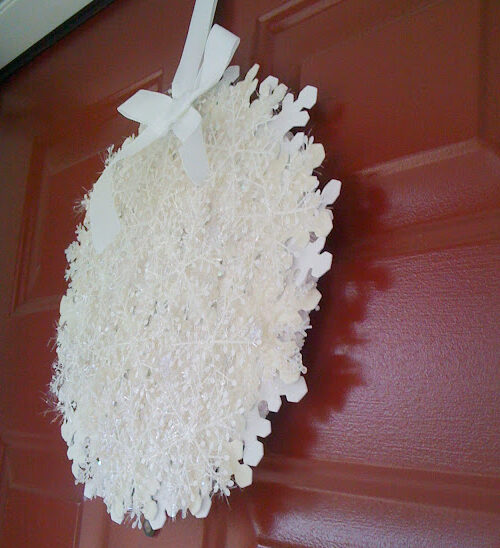
Layer your snowflake ornaments and hot glue them on. I did the solid white foam snowflakes first. Then added all of my glitter foam snowflakes. Lastly, added the plastic glitter ones.
STEP 3:
Find white ribbon laying around (if you’re a craft hoarder like me) or grab some cheap stuff here and tie a bow on. Then BAM- ready to hang and call it a day. 😉
Super easy!
I didn’t mean to make it look like an ornament, but once I got it on the door, I realized that’s what it looks like. It’s cute! And you can’t beat a 10-minute project that only uses cheap supplies!
(Isn’t the red door so perfect for the holidays?! I didn’t paint it, but I love it!)
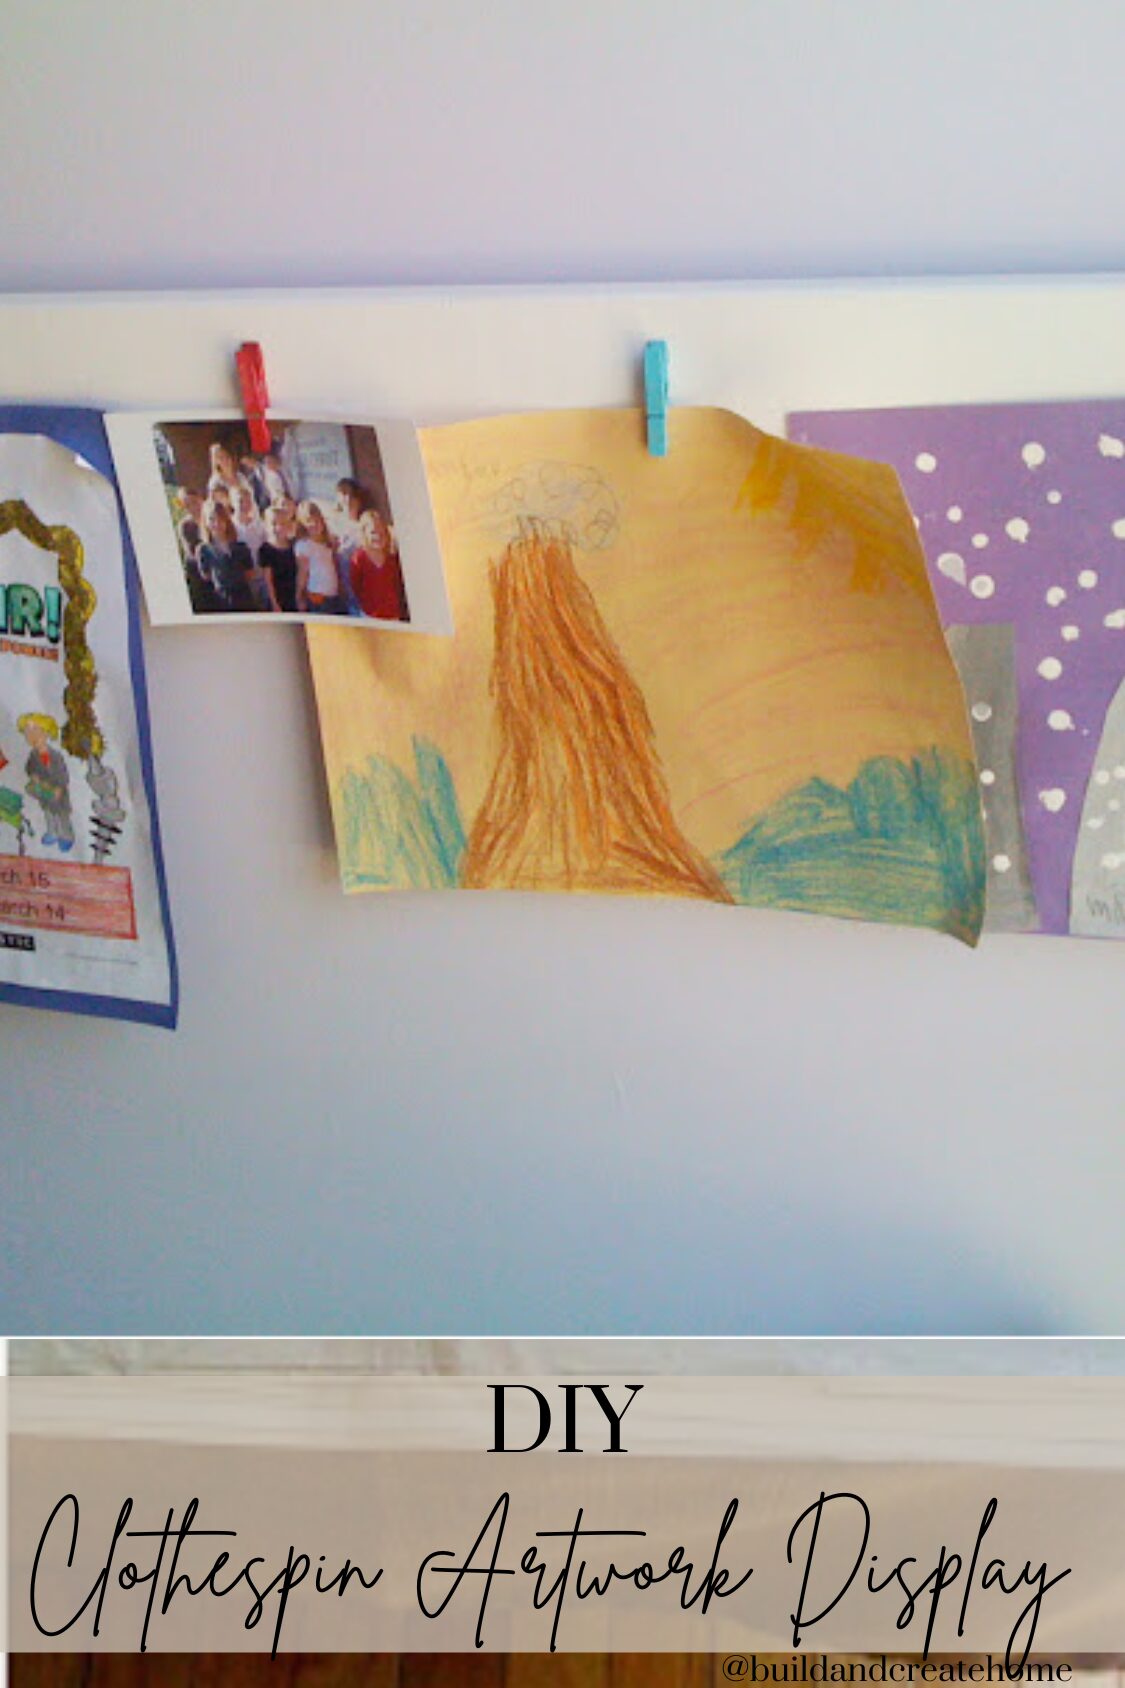
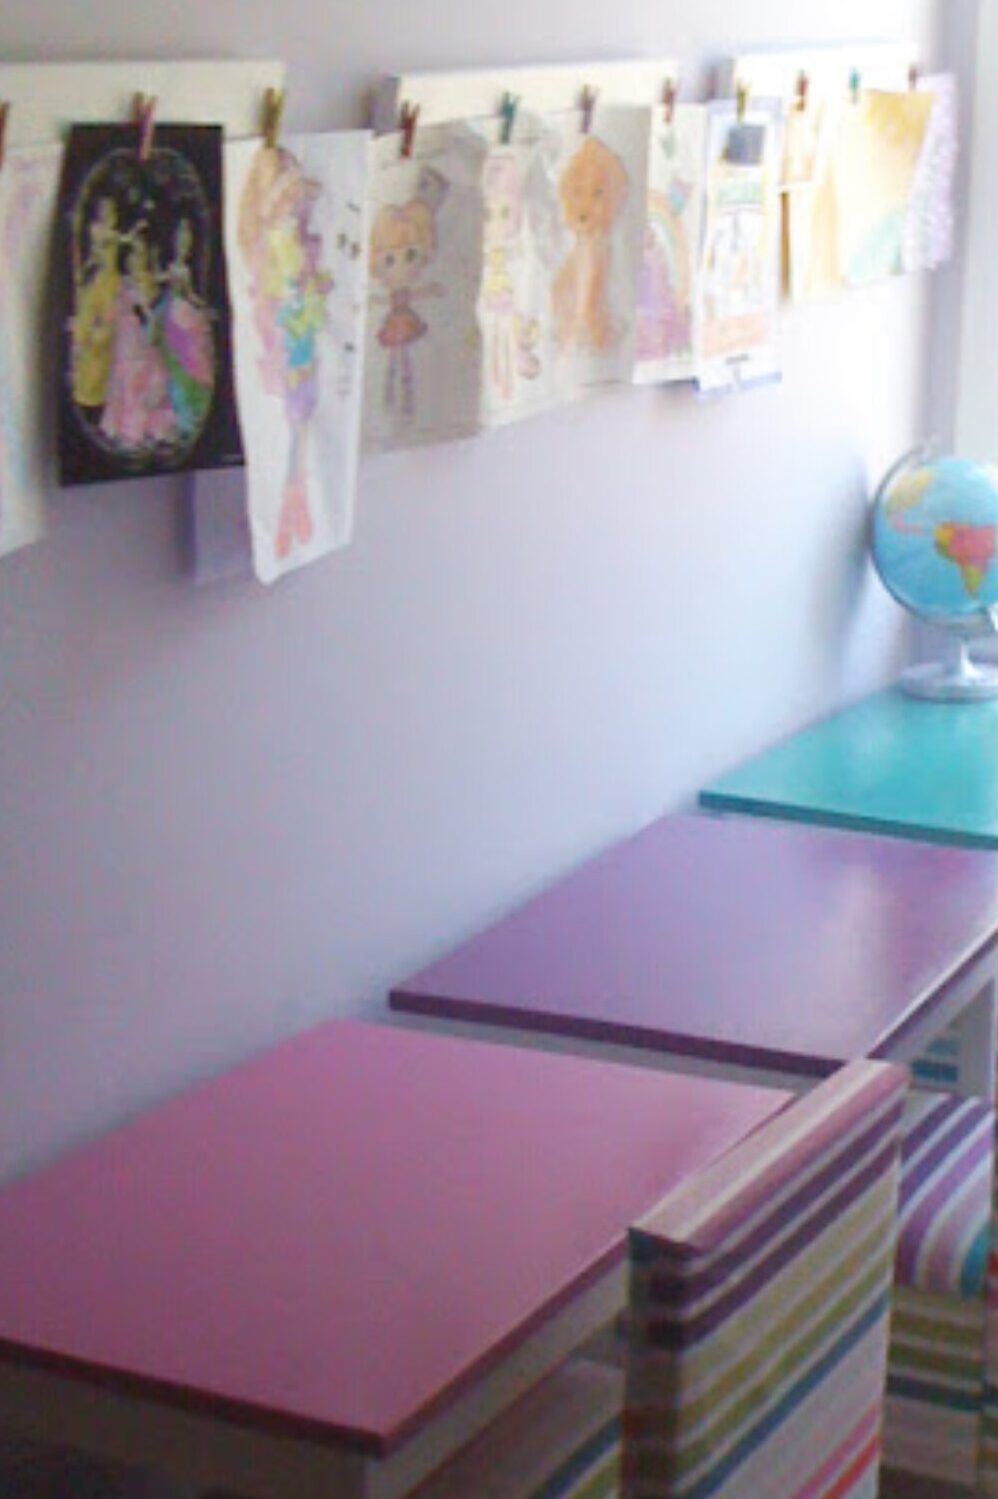
We do LOTS of crafts at my house. My kids have grown up around power tools, paint, and glue sticks. SOOO…I let my kids to crafts that aren’t your typical “kid crafts”. Today we were building and painting with these Artwork Clothespin Hangers.
It was a super easy project, with a long-lasting effect. It’s so fun to use the Artwork Clothespin Hangers to keep special work up, and even seasonal paintings and handprint art.
We just cut 1×4 boards to 21″. Hot glued on some painted clothespins. And screwed some wall hangers onto the back.
(If I were doing it on my own, it would have taken about 5 minutes to do all three. Luckily I had my “helpers”, so we got it done in about 2 hours. Ha!)
You can find small clothespins HERE
And the picture hangers HERE
I let my kids be involved in everything! Starting with cutting the wood (with a handsaw and miter box, I hold one end of the saw, and they hold the other). Then they picked out the paint colors, and finally, painting the clothespins. They do the measuring and marking where the screws need to go, and hammer nails into the walls. Yes, I’m brave.
But you should see their faces when they show their artwork walls to their friends and say, “I MADE that!” Totally worth the extra effort it takes on my part to allow them to be involved. 🙂
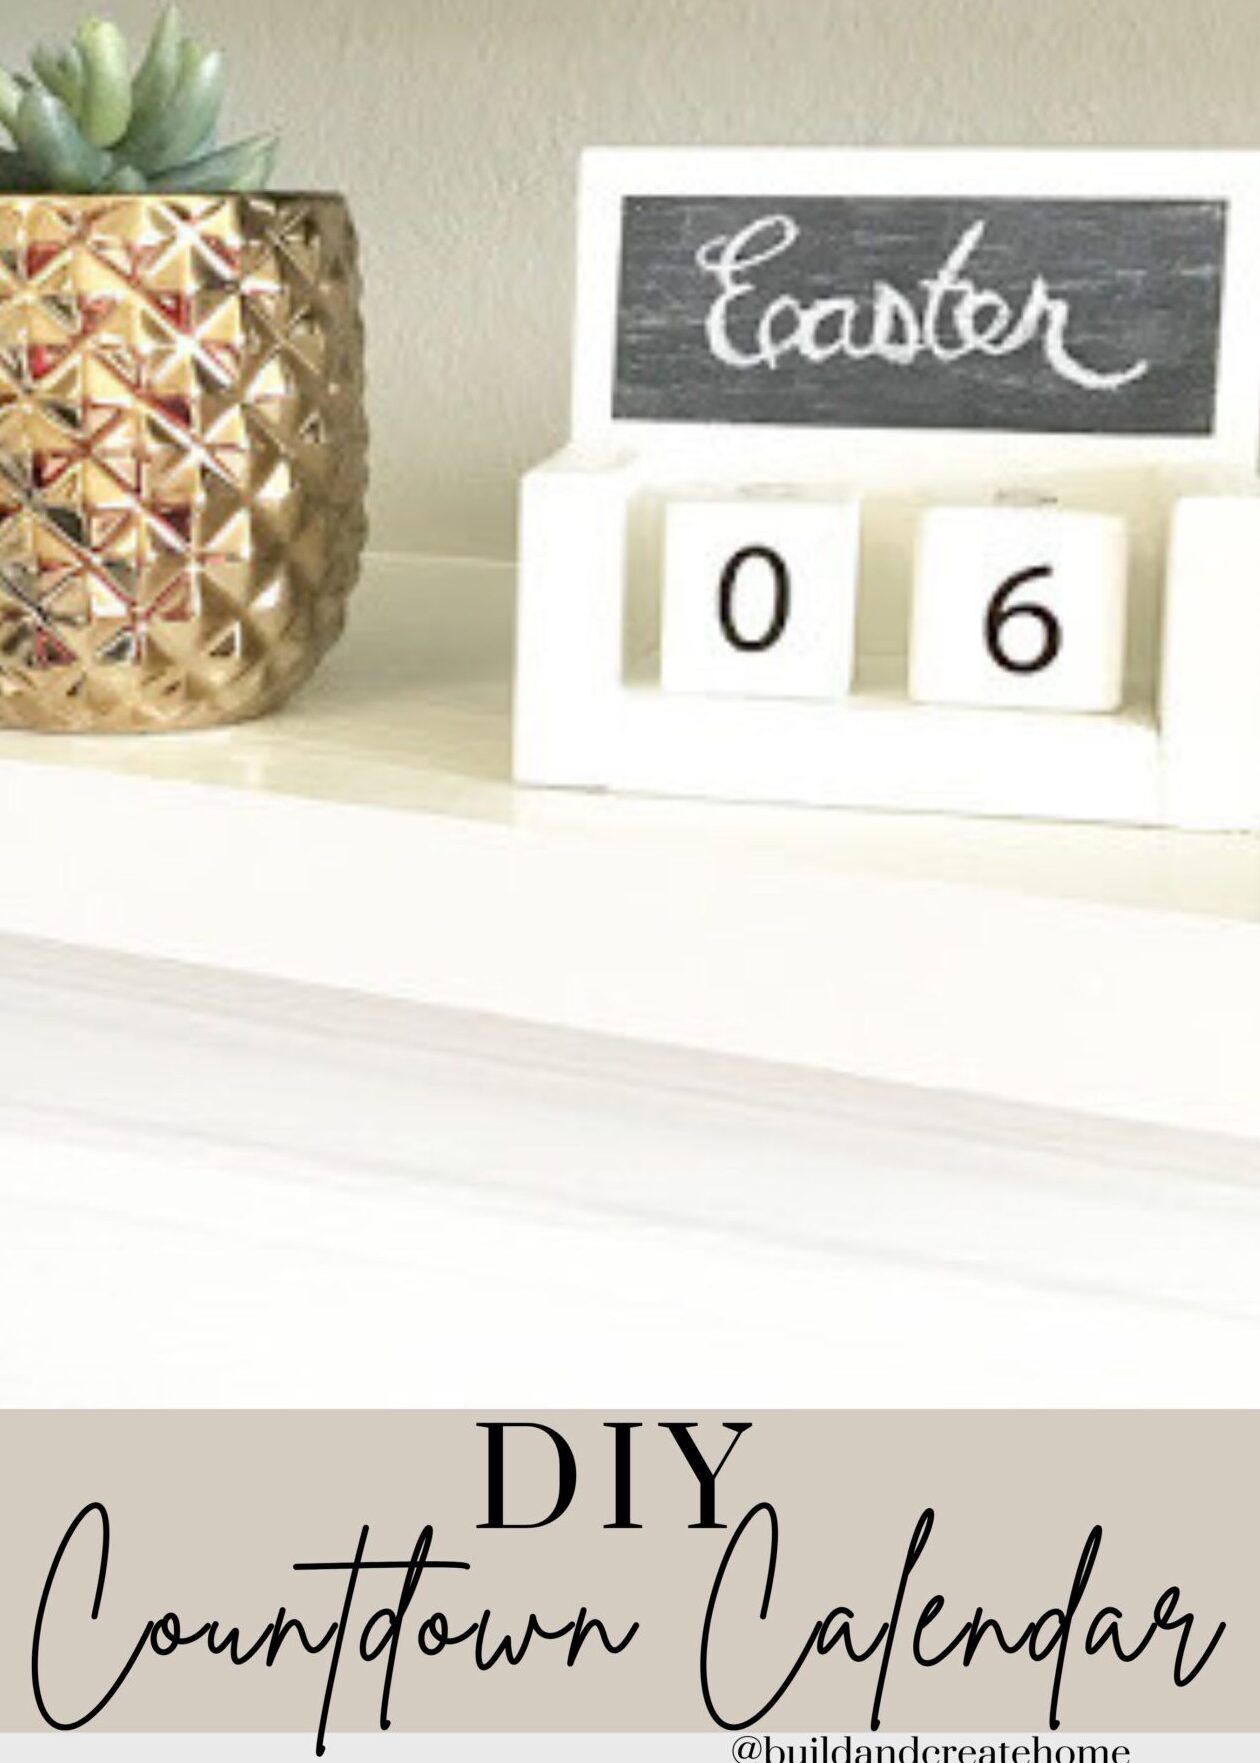
DIY Chalkboard Countdown Calendar Blocks- this craft is just what you’re looking for if things sneak up on you. (Me.) I decided I needed to have something to keep these important holidays more “in-my-face” so to speak. So enters the DIY Chalkboard Countdown Calendar Blocks.
You can use it for birthdays, holidays, end-of-school, etc. I love a versatile project. It’s another easy-peasy build for the beginner builders out there. Or a 5-minute build for a more seasoned builder. 😉 And if you do any woodworking you can probably find all the necessary pieces in your scrap pile! I love projects like that!
YOU’LL NEED THE FOLLOWING ITEMS:
BUILDING:
-1×6 scrap cut to 5″
-1×3 scraps (2 cut to 2.5″ and 1 cut to 4″)
-2×2 scraps (2 cut to 1.5″)
-Wood glue
-Screws or brad nails
-Paint
-Chalkboard paint (instructions included for making your own)
-Chalk 😉
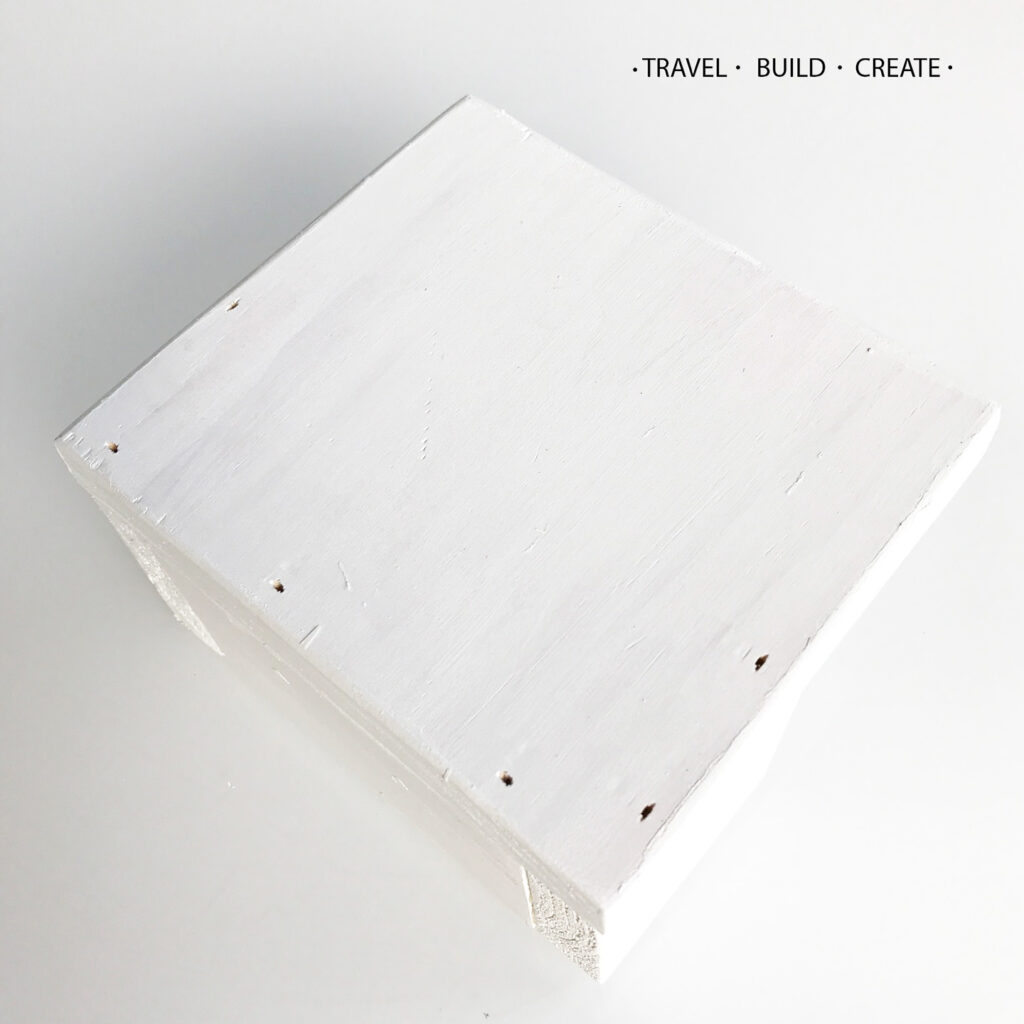
STEP 1:
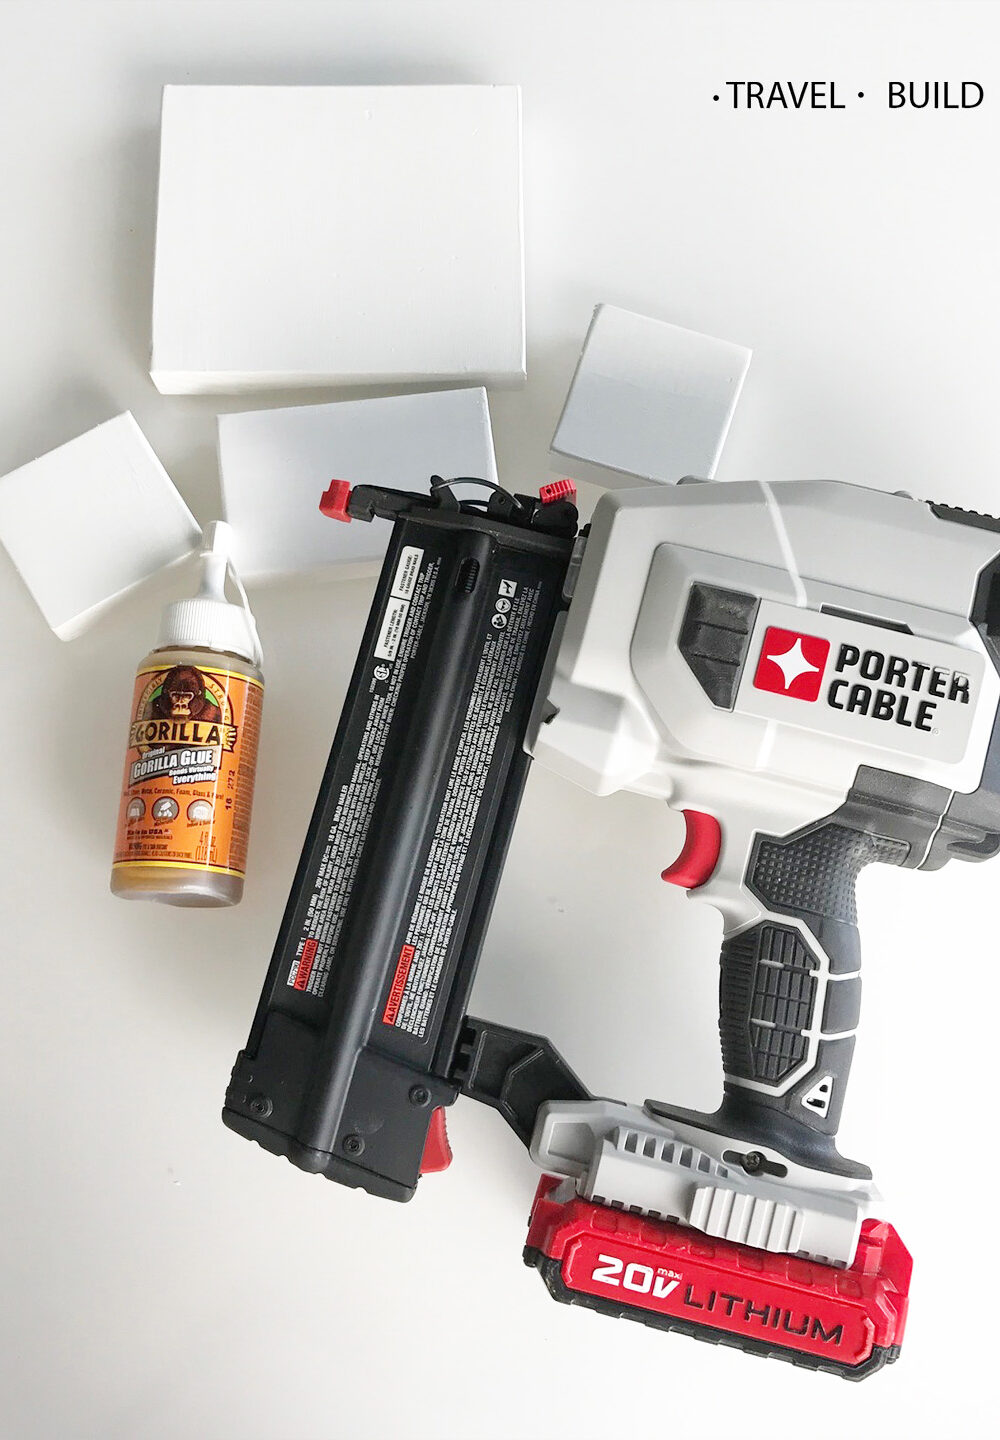
Get all your pieces cut out. I’ve found that not all stores have their pieces milled to the same thickness, so make sure you cut your 2×2’s to be exactly as long as they are wide to make a nice little cube.
They’re typically 1.5″x1.5″, so ideally, you’d cut them to 1.5″ long. But measure just in case. They may actually be 1 9/16 or something really close. It won’t make a huge difference, but you might notice it. See how my one on the bottom is slightly rectangular…? I should have measured before; just assumed mine were 1.5″. Oh, well.
STEP 2: Prime the wood for your calendar
I like to prime my pieces once before putting them together. I think it makes it just a little easier. You can do this step after putting it together if you’d prefer.
STEP 3: Assemble the wood
This step will depend on your supplies. If you don’t have a nail gun, don’t stress. You can easily use some screws. Just pre-drill your holes, sink them, and cover them with wood putty.
This cordless brad nailer a Christmas gift from my husband, and it’s seriously made my life so much easier. I HATED getting our huge air compressor out whenever I wanted to use the brad nailer. I highly recommend getting one if you’ve been on the fence.
Using my arms as a stabilizer, I propped them on the base, then glued and nailed the back to both the arms and the base first.
Then I moved to the sides and also attached the arms to the base.
STEP 4: Add the paint to make it a chalkboard
Now’s where you’ll want to fill your nail holes, the sand really well, and paint.
STEP 5: Prep your chalkboard paint
I used a simple recipe I shared on my Attempting Aloha blog over 6 years ago! I love it because it uses basic (cheap!) acrylic craft paints that you can buy in any color!
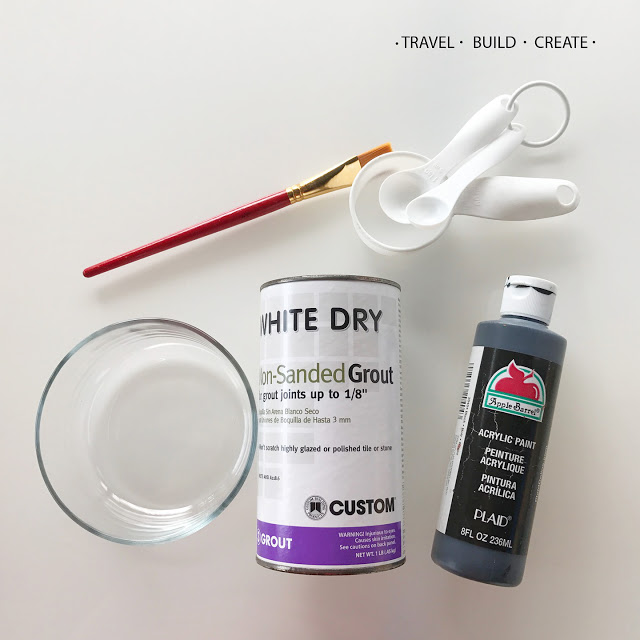
Here’s what you’ll need for the DIY Chalk paint portion of the calendar:
-Non-sanded grout. 1.5 t.
I bought this at a local small home-improvement store for $2, which will probably last forever. Ha!
-Acrylic craft paint in ANY color! 1/4 c.
-Old measuring supplies since it might be hard to get the paint off plastic…optional if you like to live on the edge.
(you may want to half this recipe if only using it to make one calendar)
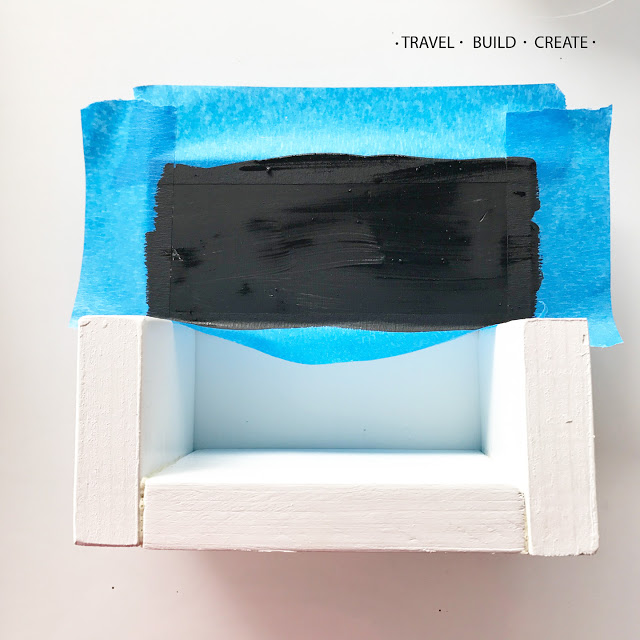
Mix your unsanded grout and paint together. You can see here that it made quite a bit. I was going to make more than one, so that worked for me. As mentioned above, I’d half it if you only do one calendar.
It will probably be really clumpy, and that’s totally normal. Just mix it until they’re combined, and there aren’t any HUGE lumps.
Tape a small border around the edges of your calendar and paint away! I did 3 layers just to be safe.
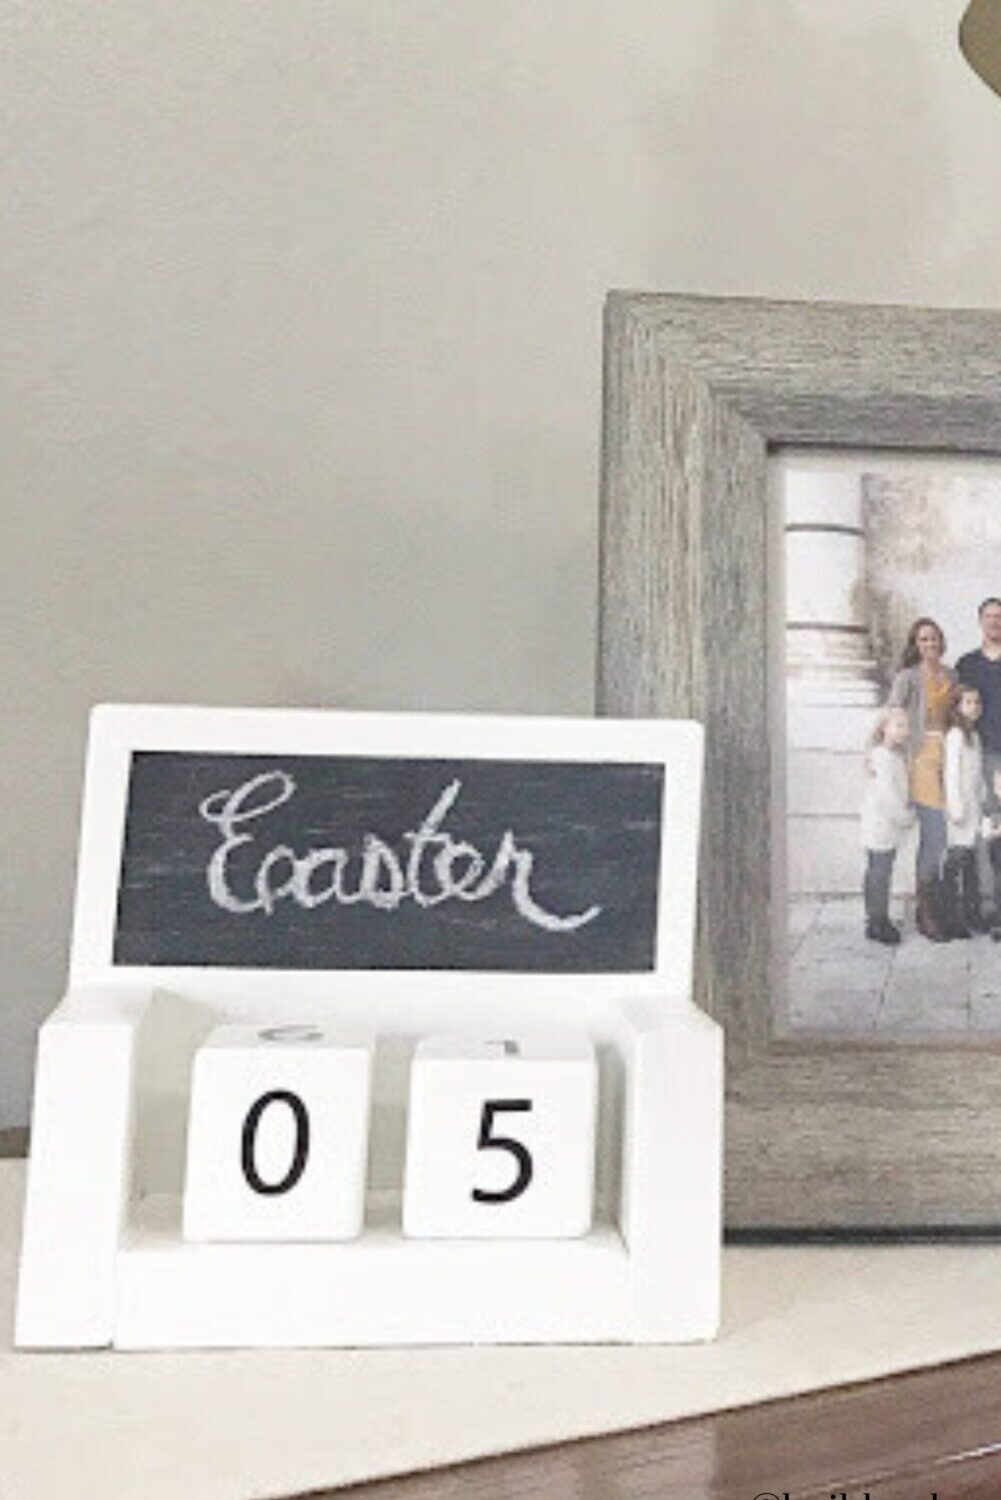
Step 5: Chalk and erase the chalkboard on the calendar
Once your paint is dry, take a piece of chalk and turn it on its side and rub all over your painted area. After it’s completely covered, erase it, and your chalkboard is ready to go!
Step 6: Add the “calendar” month, numbers or count down!
It wouldn’t be a DIY Chalkboard Countdown Calendar Blocks… without the countdown calendar part!
For the two cubes, you’ll be able to count down from 32. You must add a third cube if you want to go any higher than that. Or, if you don’t mind only using one number from 9 down (instead of 09, etc.), you can omit the 0 in the second cube and use a second 3. That will get you up to 39…
Cube 1 will need 0, 1, 2, 3, 4, 5
Cube 2 will need 0, 1, 2, 7, 8, 9/6 (make sure the font you use makes the 9 and 6 look the same if flipped, so they can be used interchangeably)
I have horrible handwriting, so I had to cheat and use my Silhouette Cameo to cut out the letters and paint them in.
Now I have to go out and actually buy gifts for the kids! Oops… Procrastinator through and through.
More gifts for someone you love? What about a stovetop cover, new tools, or something to make them laugh?
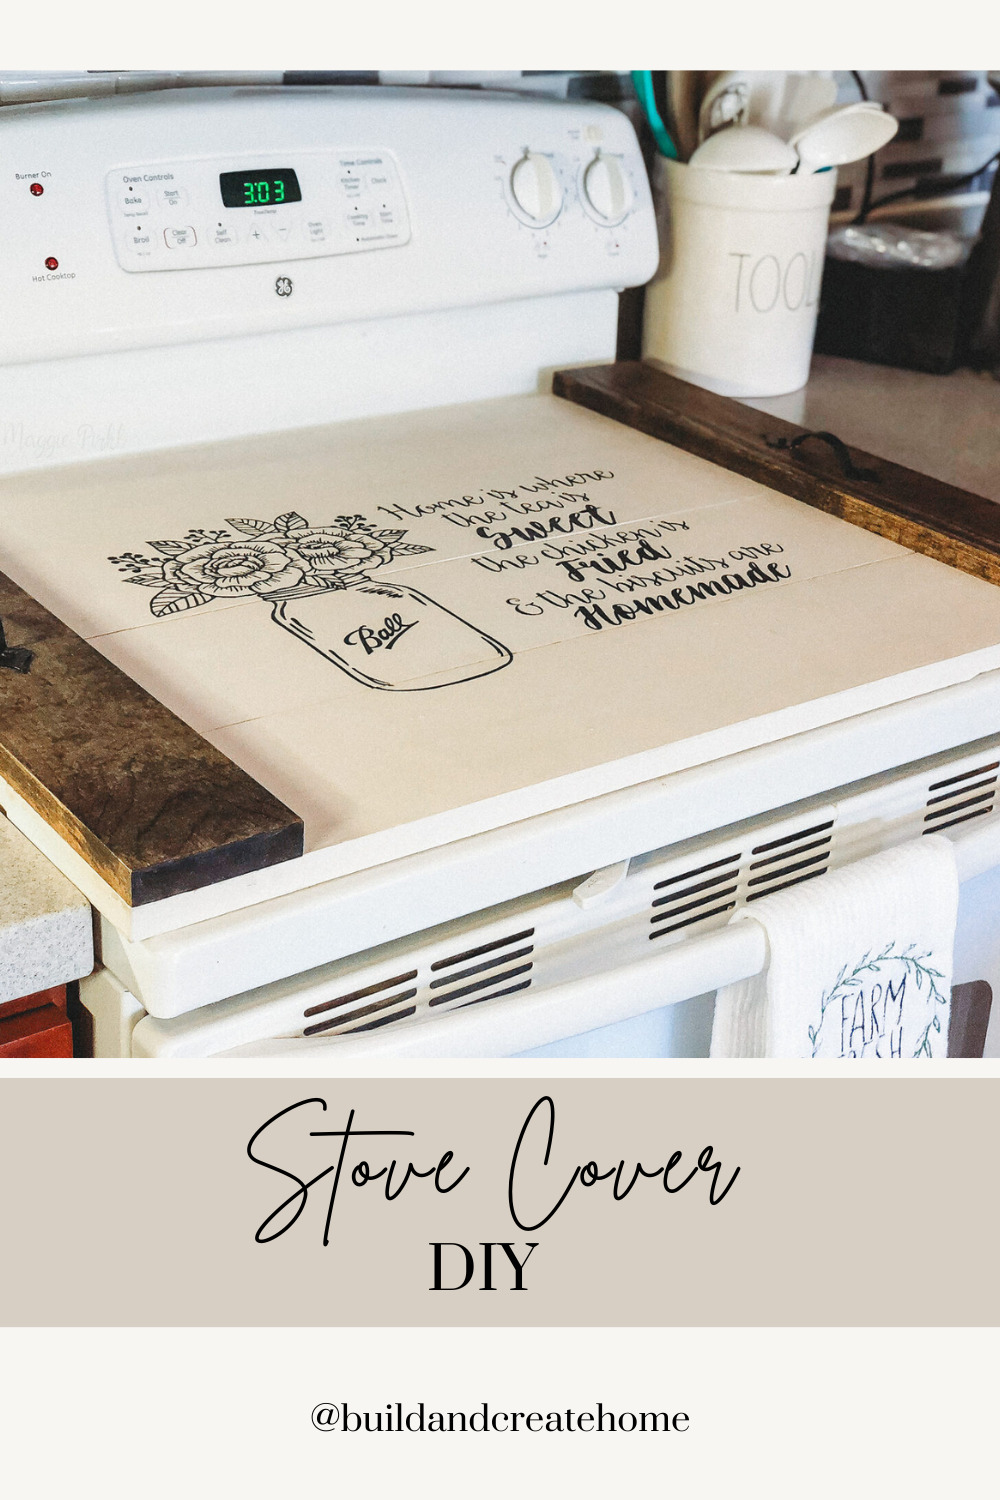
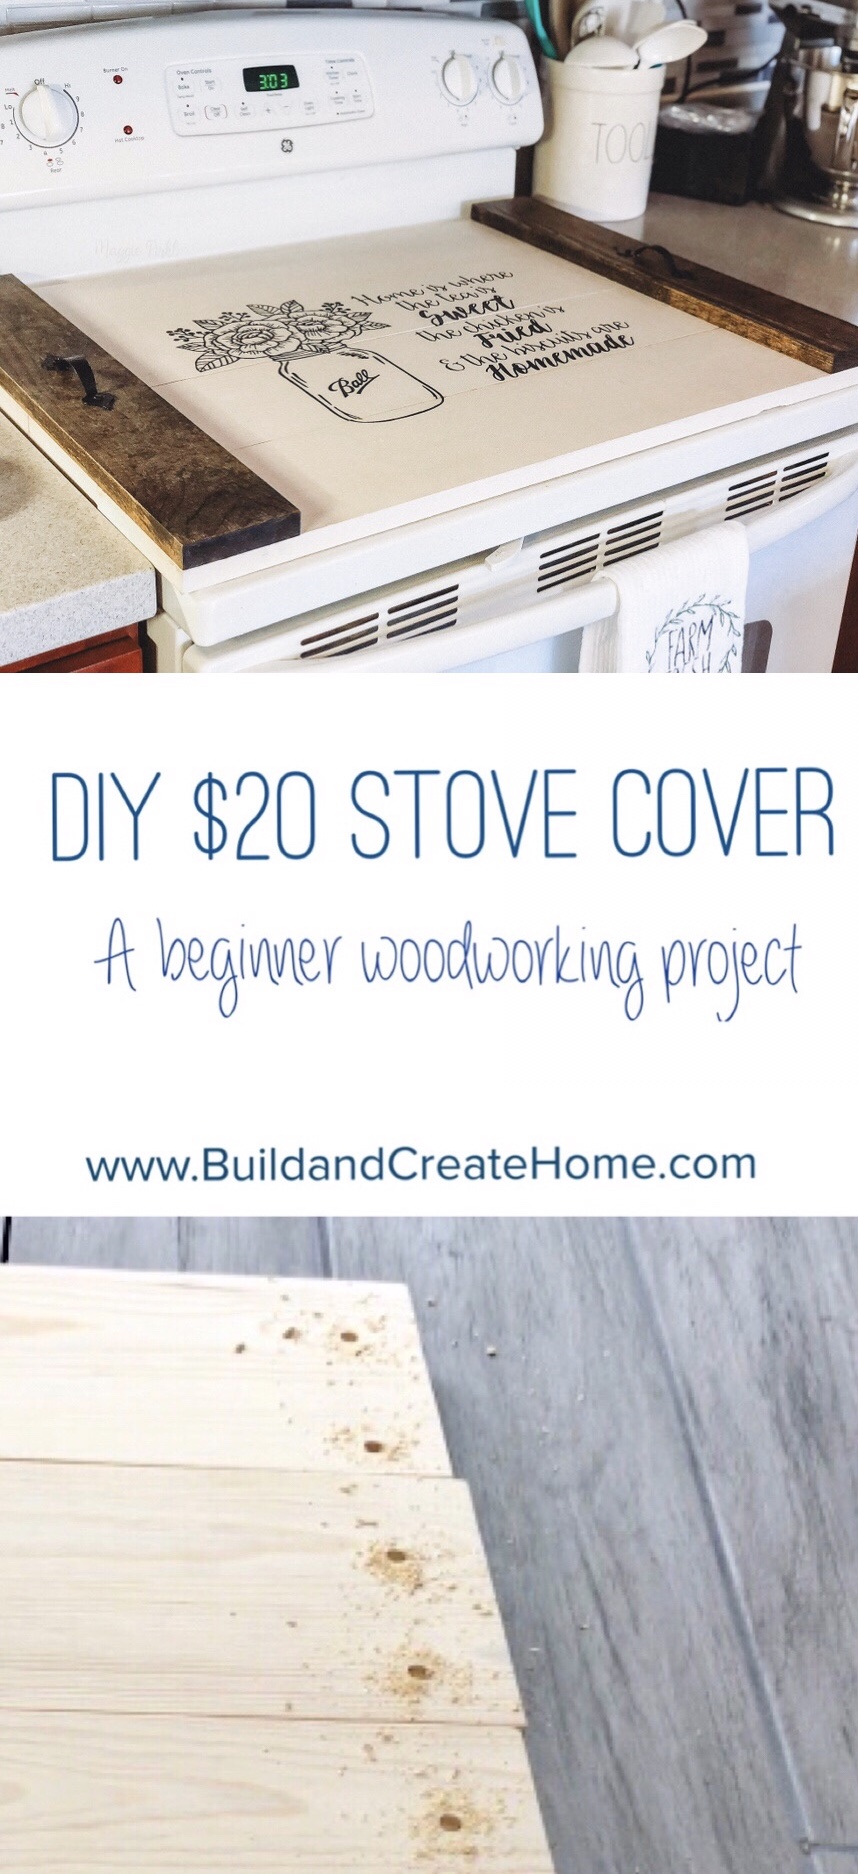
This February you may be looking for a thoughtful *cough* simple *cough* gift! Look no further than this DIY Stove Cover! (Also called noodle boards)! Including handles, this project should only cost $20.
This is a super easy beginner woodworker project that only requires a drill and a saw to cut your lumber.
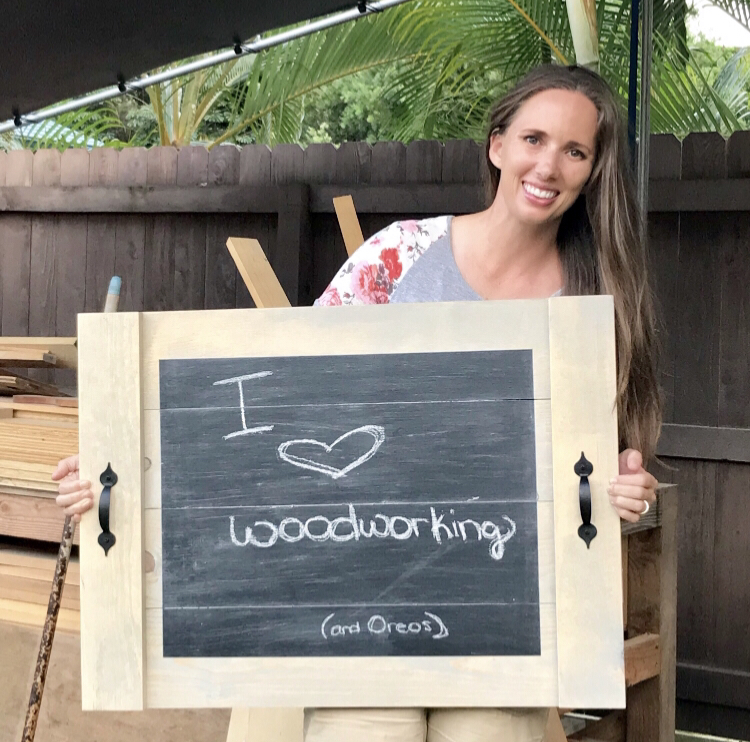
When I lived in Hawaii I taught some local woodworking classes, and we did these for two classes. The ladies loved making them, and it made me think about what a great gift they would make!
This post contains affiliate links. Please visit my disclosures for more information. Thank you for supporting my blog.
These stove covers are for decorative use only. With the flat bottom, they are best suited for a glass cooktop and are for standard 30″ x 22″ surfaces. Please adjust the plans if your cooktop has different measurements
Supplies to build your stove cover:
You can visit my Amazon page to see what tools and products I typically use.
Before using these plans, please measure your stovetop to make sure it will fit. The finished dimensions of this stove cover will be 30″ wide x 22″ deep.
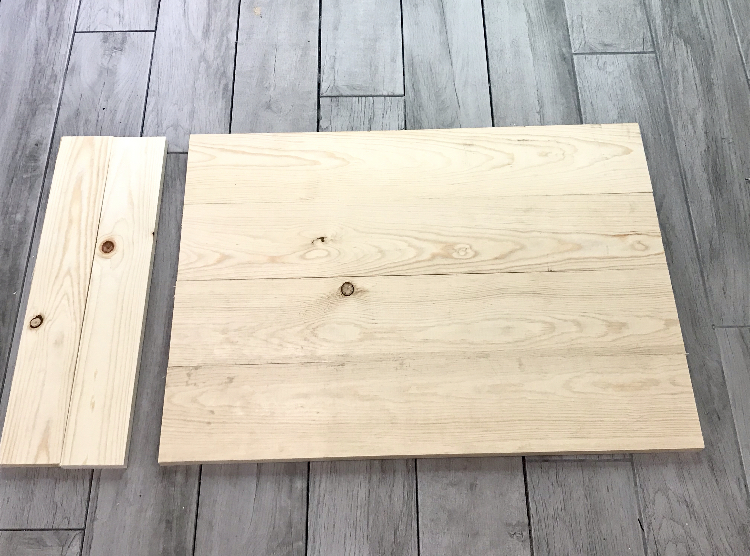
You will need four 1 x 6 pieces cut at 30″ each. Once those are cut, lay them next to each other and measure the width of all four. It should be 22″, but I have found that different mills can vary the lumber width just slightly, so it’s always better to measure first.
Then cut your 1×4 pieces to the length you just measured. Again, this “should” be 22″.
Step 2: Sand and prep lumber for your stovetop cover
I prefer to sand my pieces before assembling and then again once assembled. This is a personal preference, but it will really help get in between the boards. I use a more coarse grit for this initial sanding, so start with 80 or 100 grit depending on what shape your lumber is in.
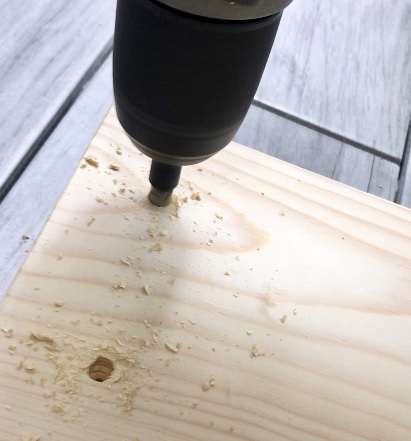
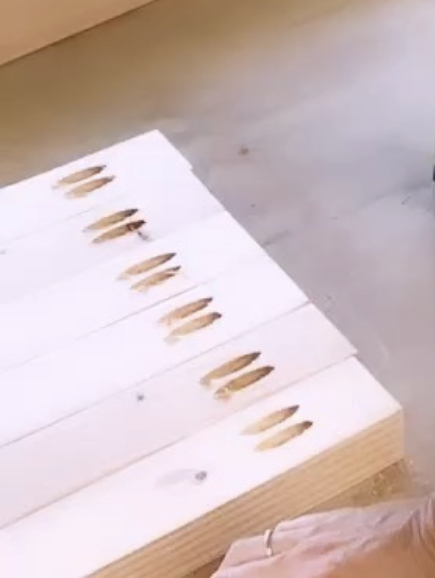
Step 3: Drill countersink holes
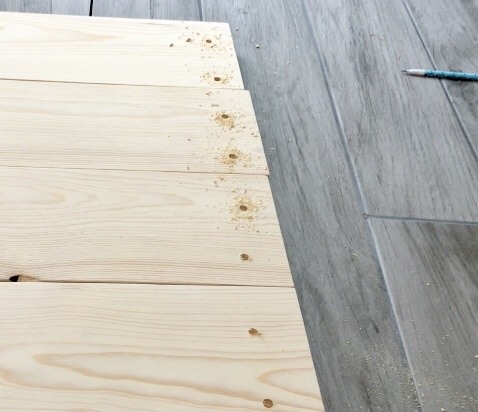
Lay out your pieces how you want them. Check for knots and where you’d like those to be on your boards, etc. Once you have it how you want it, flip the entire thing upside down, so the 1×4’s are upside down on the bottom, and the 1x6s are upside down on top of them.
Now drill your countersink holes. You will only want them to go about 1/2 way into your lumber, so be careful you don’t go too deep. If you’re unfamiliar with a countersink bit or what it does, it’s used to carve out a small spot for the head of the screw to sit. That way it won’t be above the lumber and possibly scratch your cooktop.
I drilled four holes on each board (two on each side). Just make sure they will catch the 1×4 board below.
Step 4: Glue and assemble the stove cover
Now remove the 1×6 pieces, and make sure you keep them in the correct order, so you know how to place them back down when you’re finished gluing.
Glue:
Apply wood glue to the back of your 1×4’s. Make sure not to get too close to the edges as the glue will expand slightly.
Attach with screws:
Place the 1×6 pieces back on top of the 1×4’s with the countersink holes face up. Align corners well.
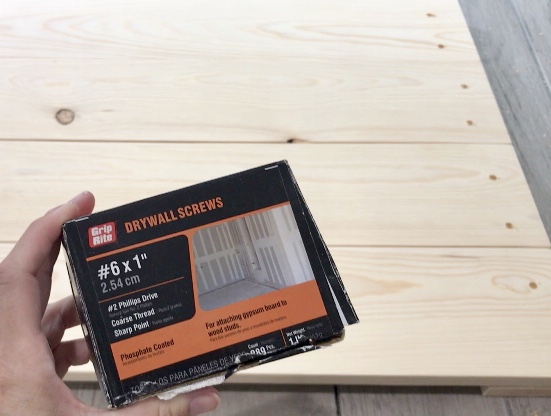
I use drywall screws because they’re inexpensive and grab really well. They work great for a simple project like this. I found it easiest to keep it square by driving the first two screws into the front two holes on the front board. Then the back two holes on the backboard. Then you can just fill in the rest!
Step 5: Attach the handles to your stove cover
If you purchased the handles I recommended above, attaching the handles is a snap. Since the screws are inserted through the front, you just need to make sure they’re centered top to bottom and left to right. The exact measurement I got for those Liberty brand handles was 9.25″ from the top of the 1×4 to the center of the top hole in the handle. Then 1.75″ from the side of the board to that same hole.
If you are installing a different handle that works like a drawer pull with the bolt going in the back, you will need to make sure to countersink your holes again to keep your cooktop safe.
And that’s it! Now you can stain or finish it however you’d like. These are decorative pieces and not meant for handling food, so we did not use food-safe stain for our class.
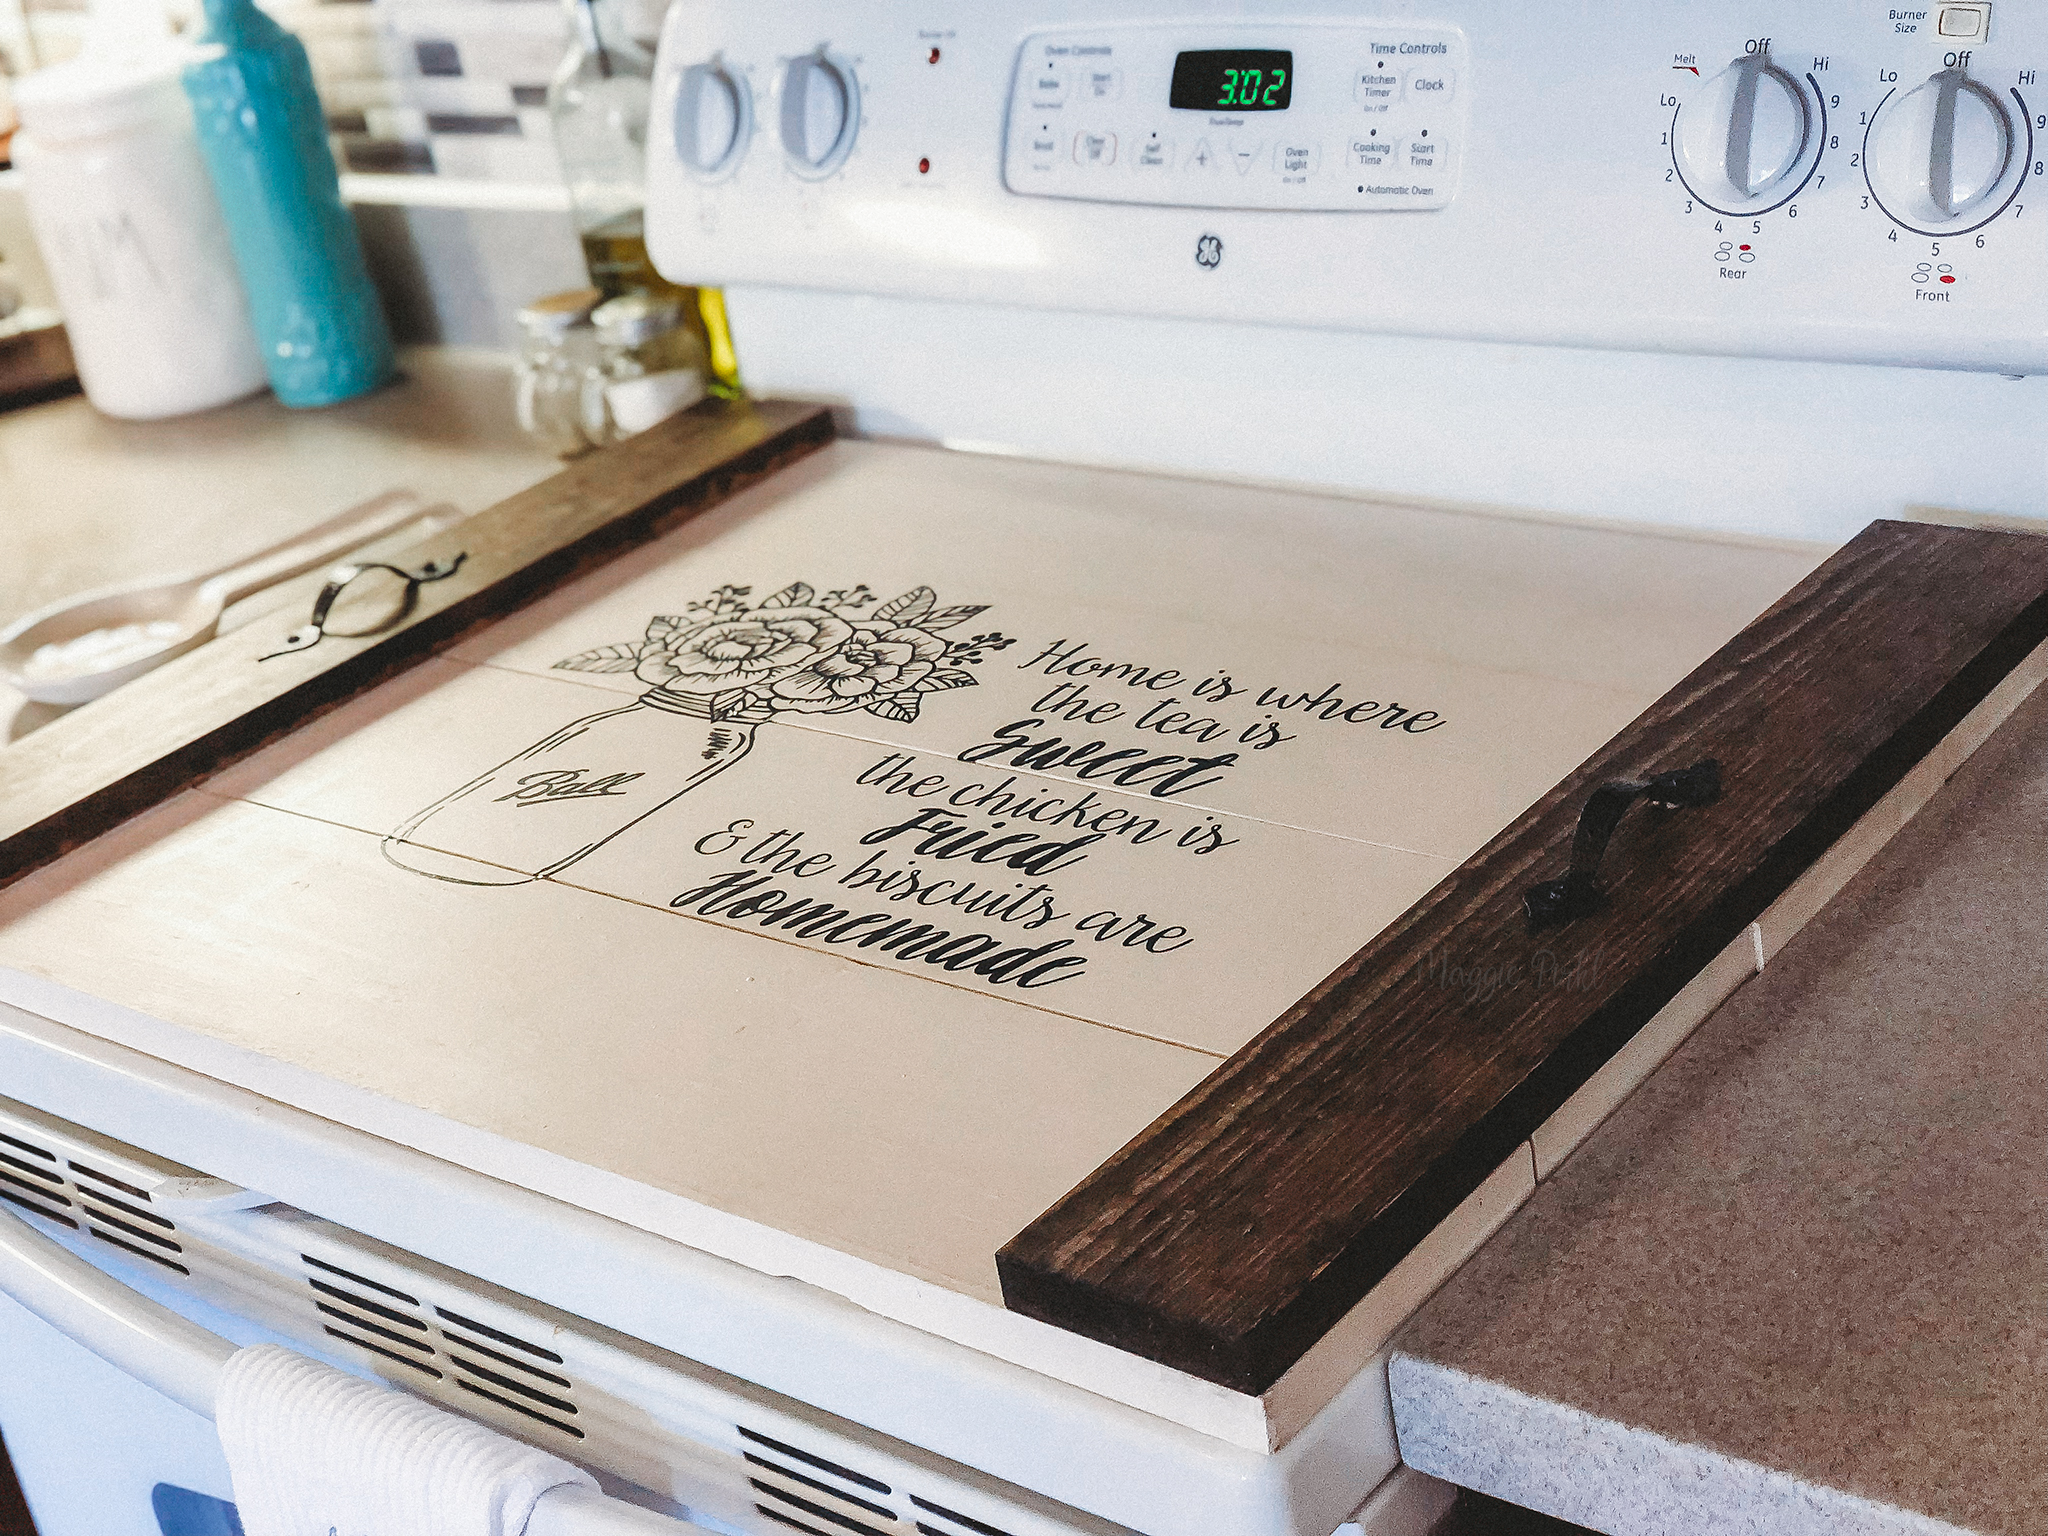
A few ladies chose to do chalk paint (like me!) as a decorative touch. Just be careful placing hot pots and pans on them since the chalk paint can’t be sealed.
And I have to give a big thank you to one of my students for sharing pics of the stove cover she assembled in my class. Doesn’t it look amazing in her home?! You can visit Maggie’s Instagram feed here. 🙂
And as always, feel free to tag me on Instagram if you make any of my projects. I’d love to feature your builds in my stories!
Looking for a quick and simple scrap wood project? Excellent! This one will take you 10 minutes if you’re familiar with woodworking. Maybe 15 if you’re a beginner. 😉
Tools you will need to build your test tube vase stand:
Sandpaper Test Tubes
1×4″ lumber (at least 31″ long) Wood glue
Wood putty
Stain or paint
1.25″ brad nails
Cut list for DIY test tube vase stand:
2 pieces at 12″ (for top and bottom)
2 pieces at 3″ (for sides)
I almost feel guilty making a tutorial since these are so easy to make! But if I can save you a few minutes taking measurements, then my job is complete.
Assembling your DIY test tube vase stand:
Step 1: Cut your 1×4’s and sand any splintered edges.
Step 2: Mark one of your 12″ pieces for the vase holes.
Mark at 2.25″, 4.75″, 7.25″, and 9.75″. Be sure to also mark them on the center front-to-back. For most 1×4 lumber, the center will be at 1.75″.
Step 3: Use your forstner bit to drill the holes.
You might have some break out on the back side of your piece. Since it won’t be seen, I didn’t worry about it too much. If you’re concerned, you can place your wood on top of a scrap piece of wood and clamp them together. This will lessen the amount of break out on your piece.
Step 4: Use wood glue and brad nails to attach the bottoms to the sides.
I only used 8 nails total. Two on each side. Very basic.
Step 5: Stain and enjoy!
That’s it! I told you it was super easy!
I made a YouTube video for you in case you’re a beginner and want to see all the steps done along the way.
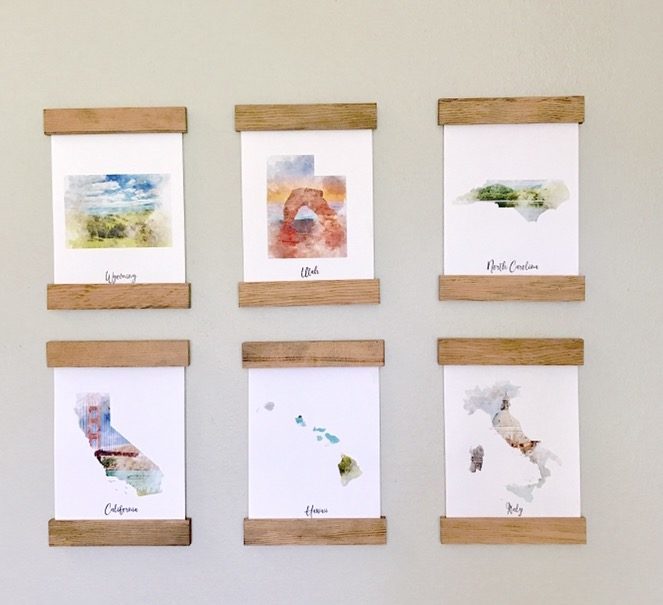
So you might be asking why I put the word “magnetic” in quotation marks…it’s because I tried the magnetic idea. And I hated it. I’ll tell you a little bit more about it and what I decided to do instead.
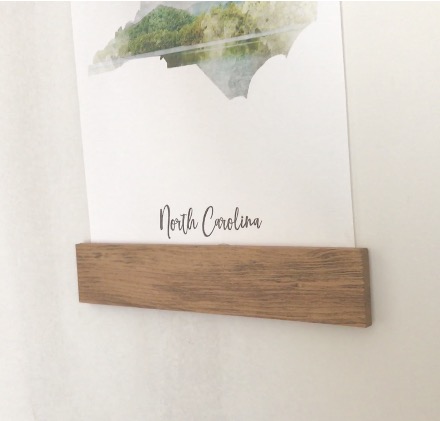
First, I bought these watercolor prints from Jane. If you haven’t heard of Jane, it’s an online daily deals boutique. I’ve seen these cute prints featured quite a few times. Mine are 8×10 size, and they are printed on card stock. I had hoped they were going to be canvas, but oh well. I still really love the prints.
When the prints came in, I confirmed they are actually 8.5″ x 11″, so be sure to measure and confirm yours are the same size before you start cutting!
Here are some other 8×10 prints that would look awesome on these frames:
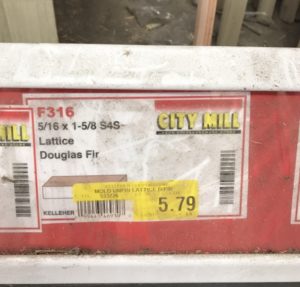
I used lattice trim since it’s nice and thin. It’s only 5/16″ deep, and I used 1 5/8″ wide trim for mine, and the ones available at my local hardware store were Douglas Fir.
Next, I cut my pieces to 9.25″ length. That way I got 10 pieces out of each 8′ board. Each framed picture will require 4 boards, so you’ll get 2 1/2 pics out of each 8′ board.
For my 6 prints, I purchased 3 boards and had some scrap wood left over.
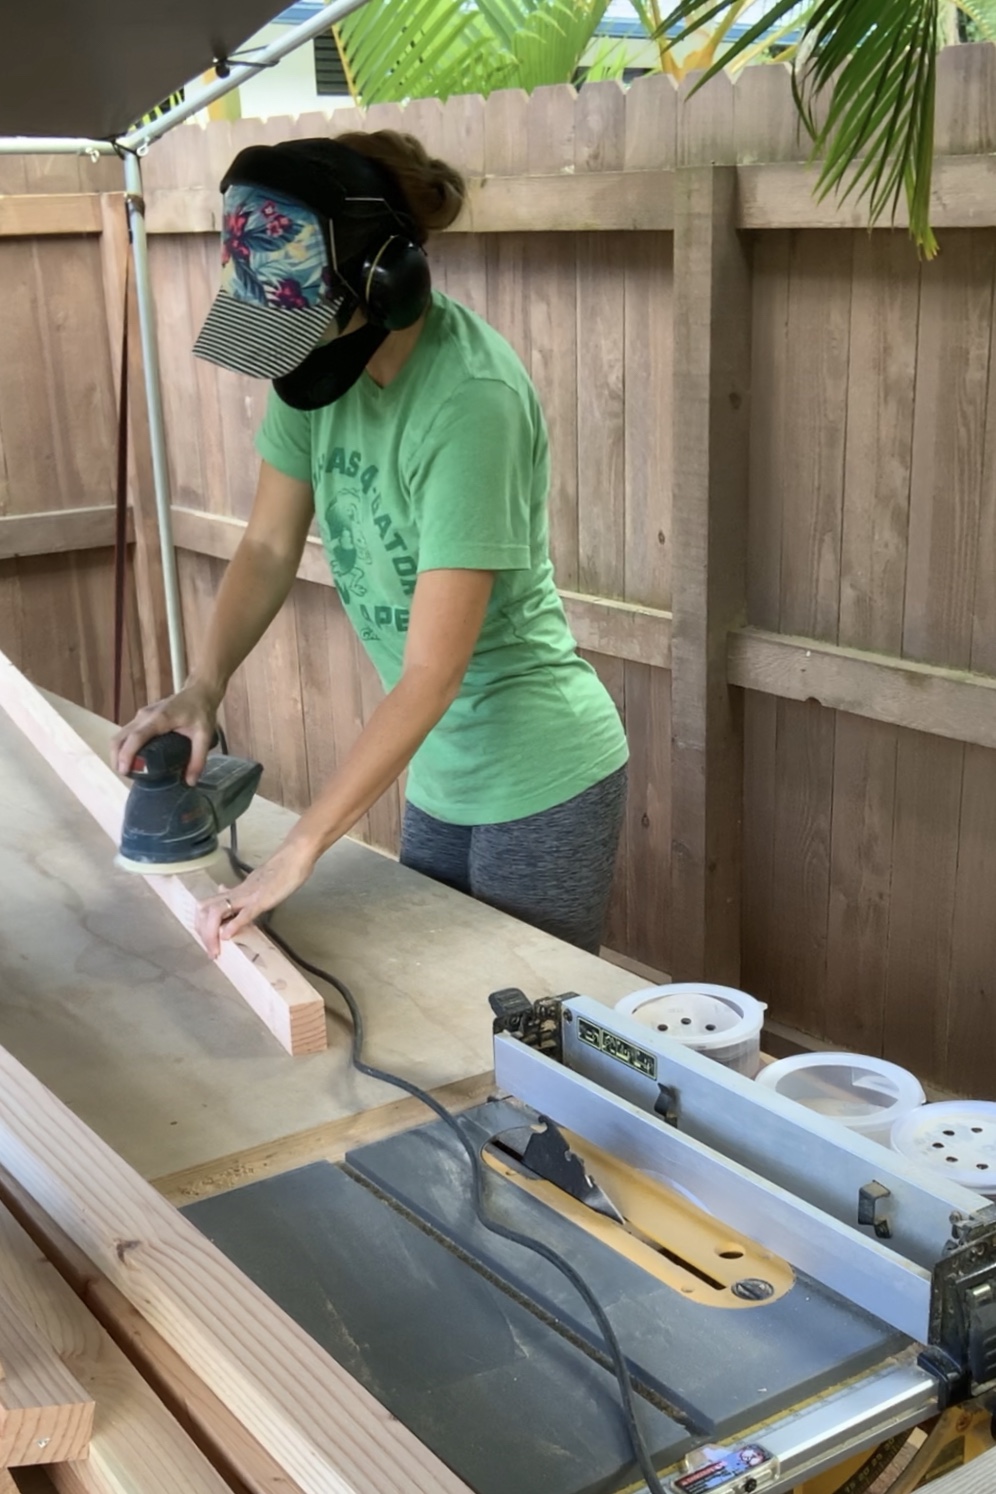
Once you’ve got your boards cut to 9.25″, you’ll want to sand the edges. I love this little sander by Gator Finishing! Super comfortable grip, and is great for tight spots, too!
I stained my boards with Minwax in Early American. I left them unfinished (no top coat).
Step 2: Assemble your frame
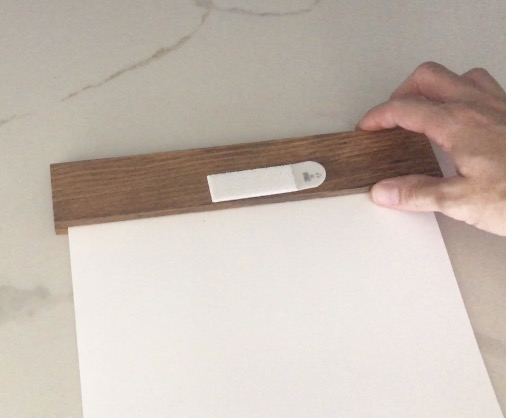
Once the frames were assembled, I used the magnetic strips. I bought the sticky kind, and ended up cutting them about 1/2 inch shorter than the frames.
I was so excited to try out these strips…but they ended up being a pain in the butt! They were really hard to lay straight and keep from being crooked. The card stock kept sliding around as I tried to attach the Command Strips to the wall. And when I was finally finished, a big breeze came through my window and actually blew one of the pieces of card stock out of the bottom part of the frame!
So I returned to the drawing board and removed all the magnetic strips. I decided that since these were cheap prints, and I don’t think I will ever be re-framing them, I’d go ahead and use hot glue! Yes, this will destroy the prints if I ever want to use the frames for something else. But as I said, these are cheap, card stock prints. Not family heirloom portraits. 😉
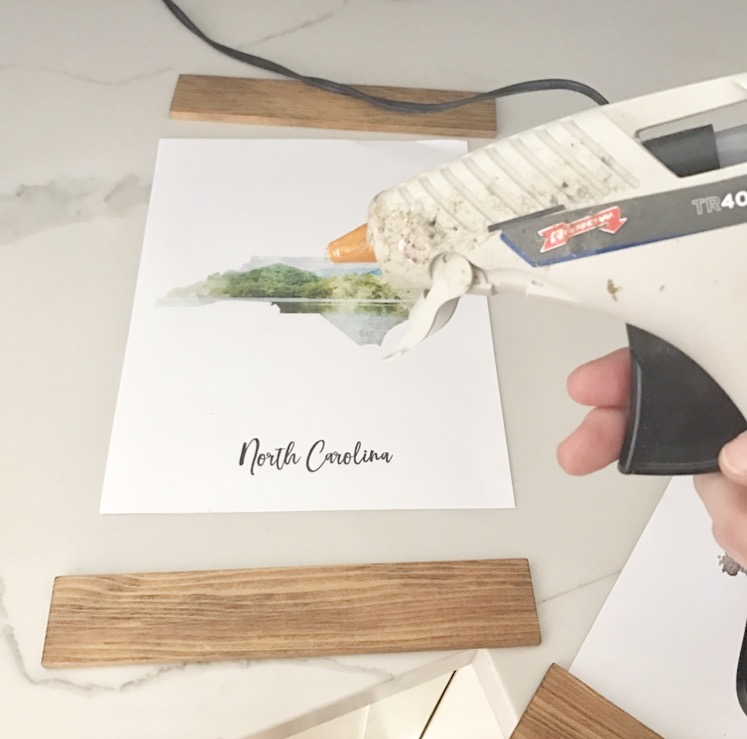
I measured 1/2″ down for the bottom edge and drew a line, then did the same at the top (1/2″ up). And then I got my hot glue gun ready.
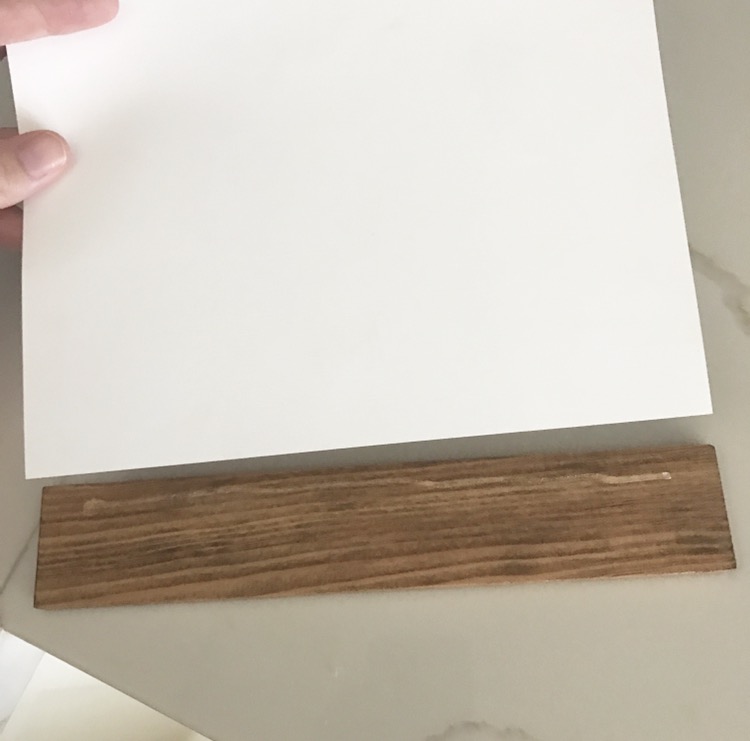
Next, flip the print over and line it up on the lines you drew.
Then, I added glue to the second piece and sandwiched my paper between the two boards. I made sure it was totally dry before I let up on the boards, but hot glue dries fairly quickly, so I didn’t have to wait long.
Step 3: Figure out how to hang your DIY Frames
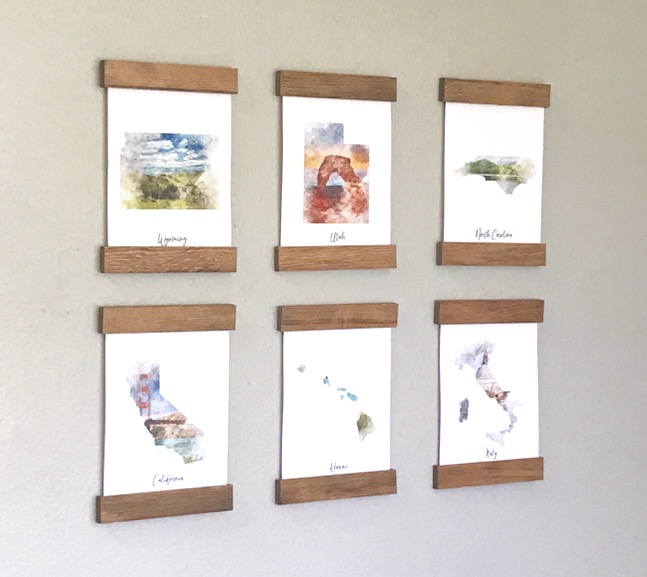
The last step is to attach the Command strips, and you’re done! I used one Command strip on the top and one on the bottom as well to keep them from flapping around in the wind. Here is where, you could also add a magnet, if you’re looking for a frame to go on the fridge!
So there you have it! A cheap and easy project, the perfect DIY for someone you love. It cost me $18 to frame eight prints. Not too bad!
Be sure to follow me on Instagram and watch my instastories for more tips and tricks! And if you’re looking for other easy DIYs, check this one out!
Today we’re going to do another great beginner woodworking project! If you need the most simple Christmas DIY, please read the bench makeover article. If you’re ready to move on to a bit more complex, but still simple project… this is it! A DIY stocking shelf that makes a great stocking shelf for Christmas or can be easily used in an entryway year-round!
This post was sponsored by my friends at Worx and may contain affiliate links. Opinions, tutorials, and plans are my own.
This is truly a beginner DIY project since all you need is a drill if you are able to have lumber cut at your local home improvement store! If not, you’ll need a saw.
Supplies needed to make a DIY stocking shelf:
– 1×6 (cut to 30″ for this 5 stocking shelf)
– 1×4 (also cut to 30″)
– Hooks
– 1.25″ drywall screws
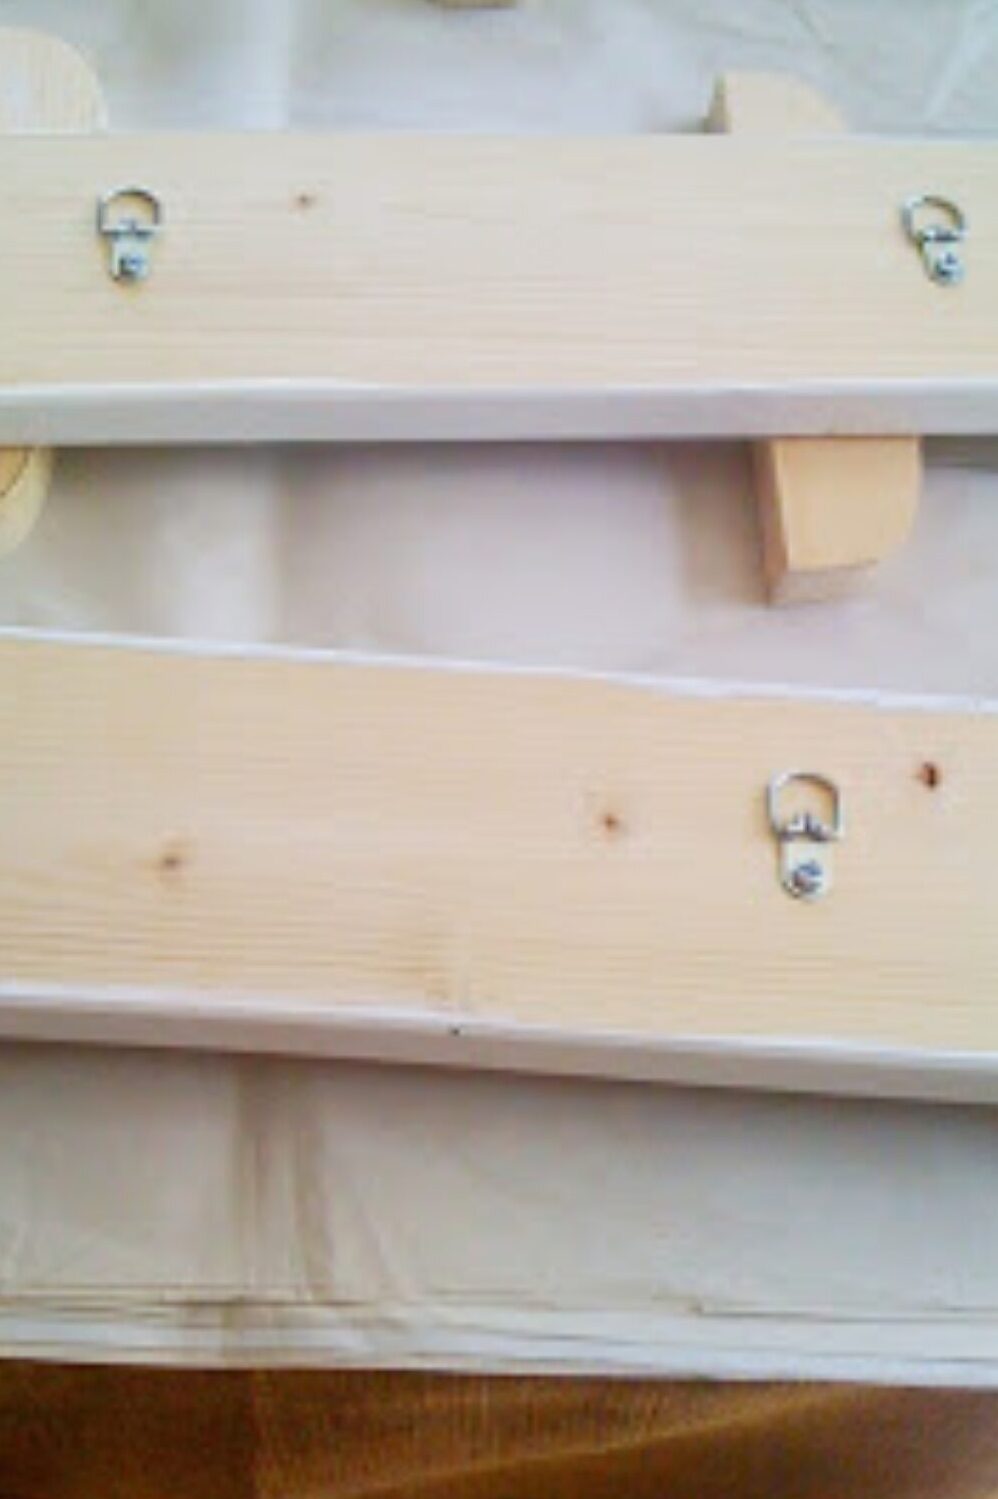
– D-ring hooks or sawtooth hooks
– Stain of your choice
Tools needed to make a DIY stocking shelf:
-drill
Step 1- Cut your lumber:
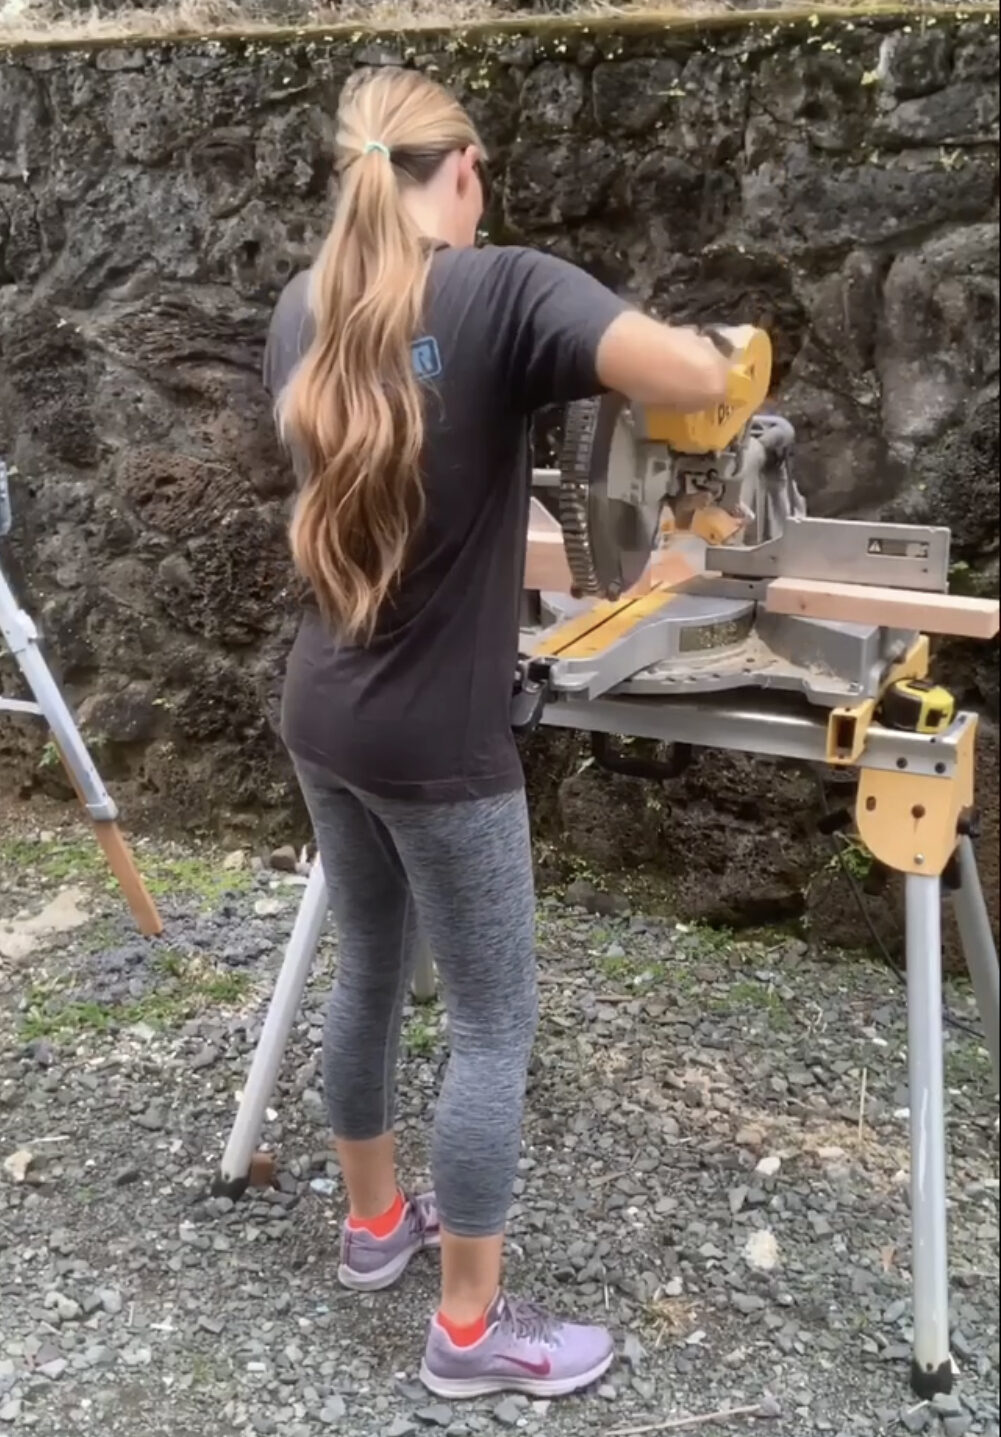
Cut your lumber. Some home improvement stores will cut dimensional lumber for you. If yours doesn’t, you can use a hand saw or any power saw of your choice to cut your pieces. I recommend a miter saw for this type of cut.
For 5 stockings, I did 30″. You need to cut both your 1×6 and 1×4 to the same size. I recommend going to up 35″ or 36″ for 6 stockings, but I don’t think I would go smaller for fewer stockings. Just space them out more on the 30″ size.
Step 2 – Lay out your pieces:
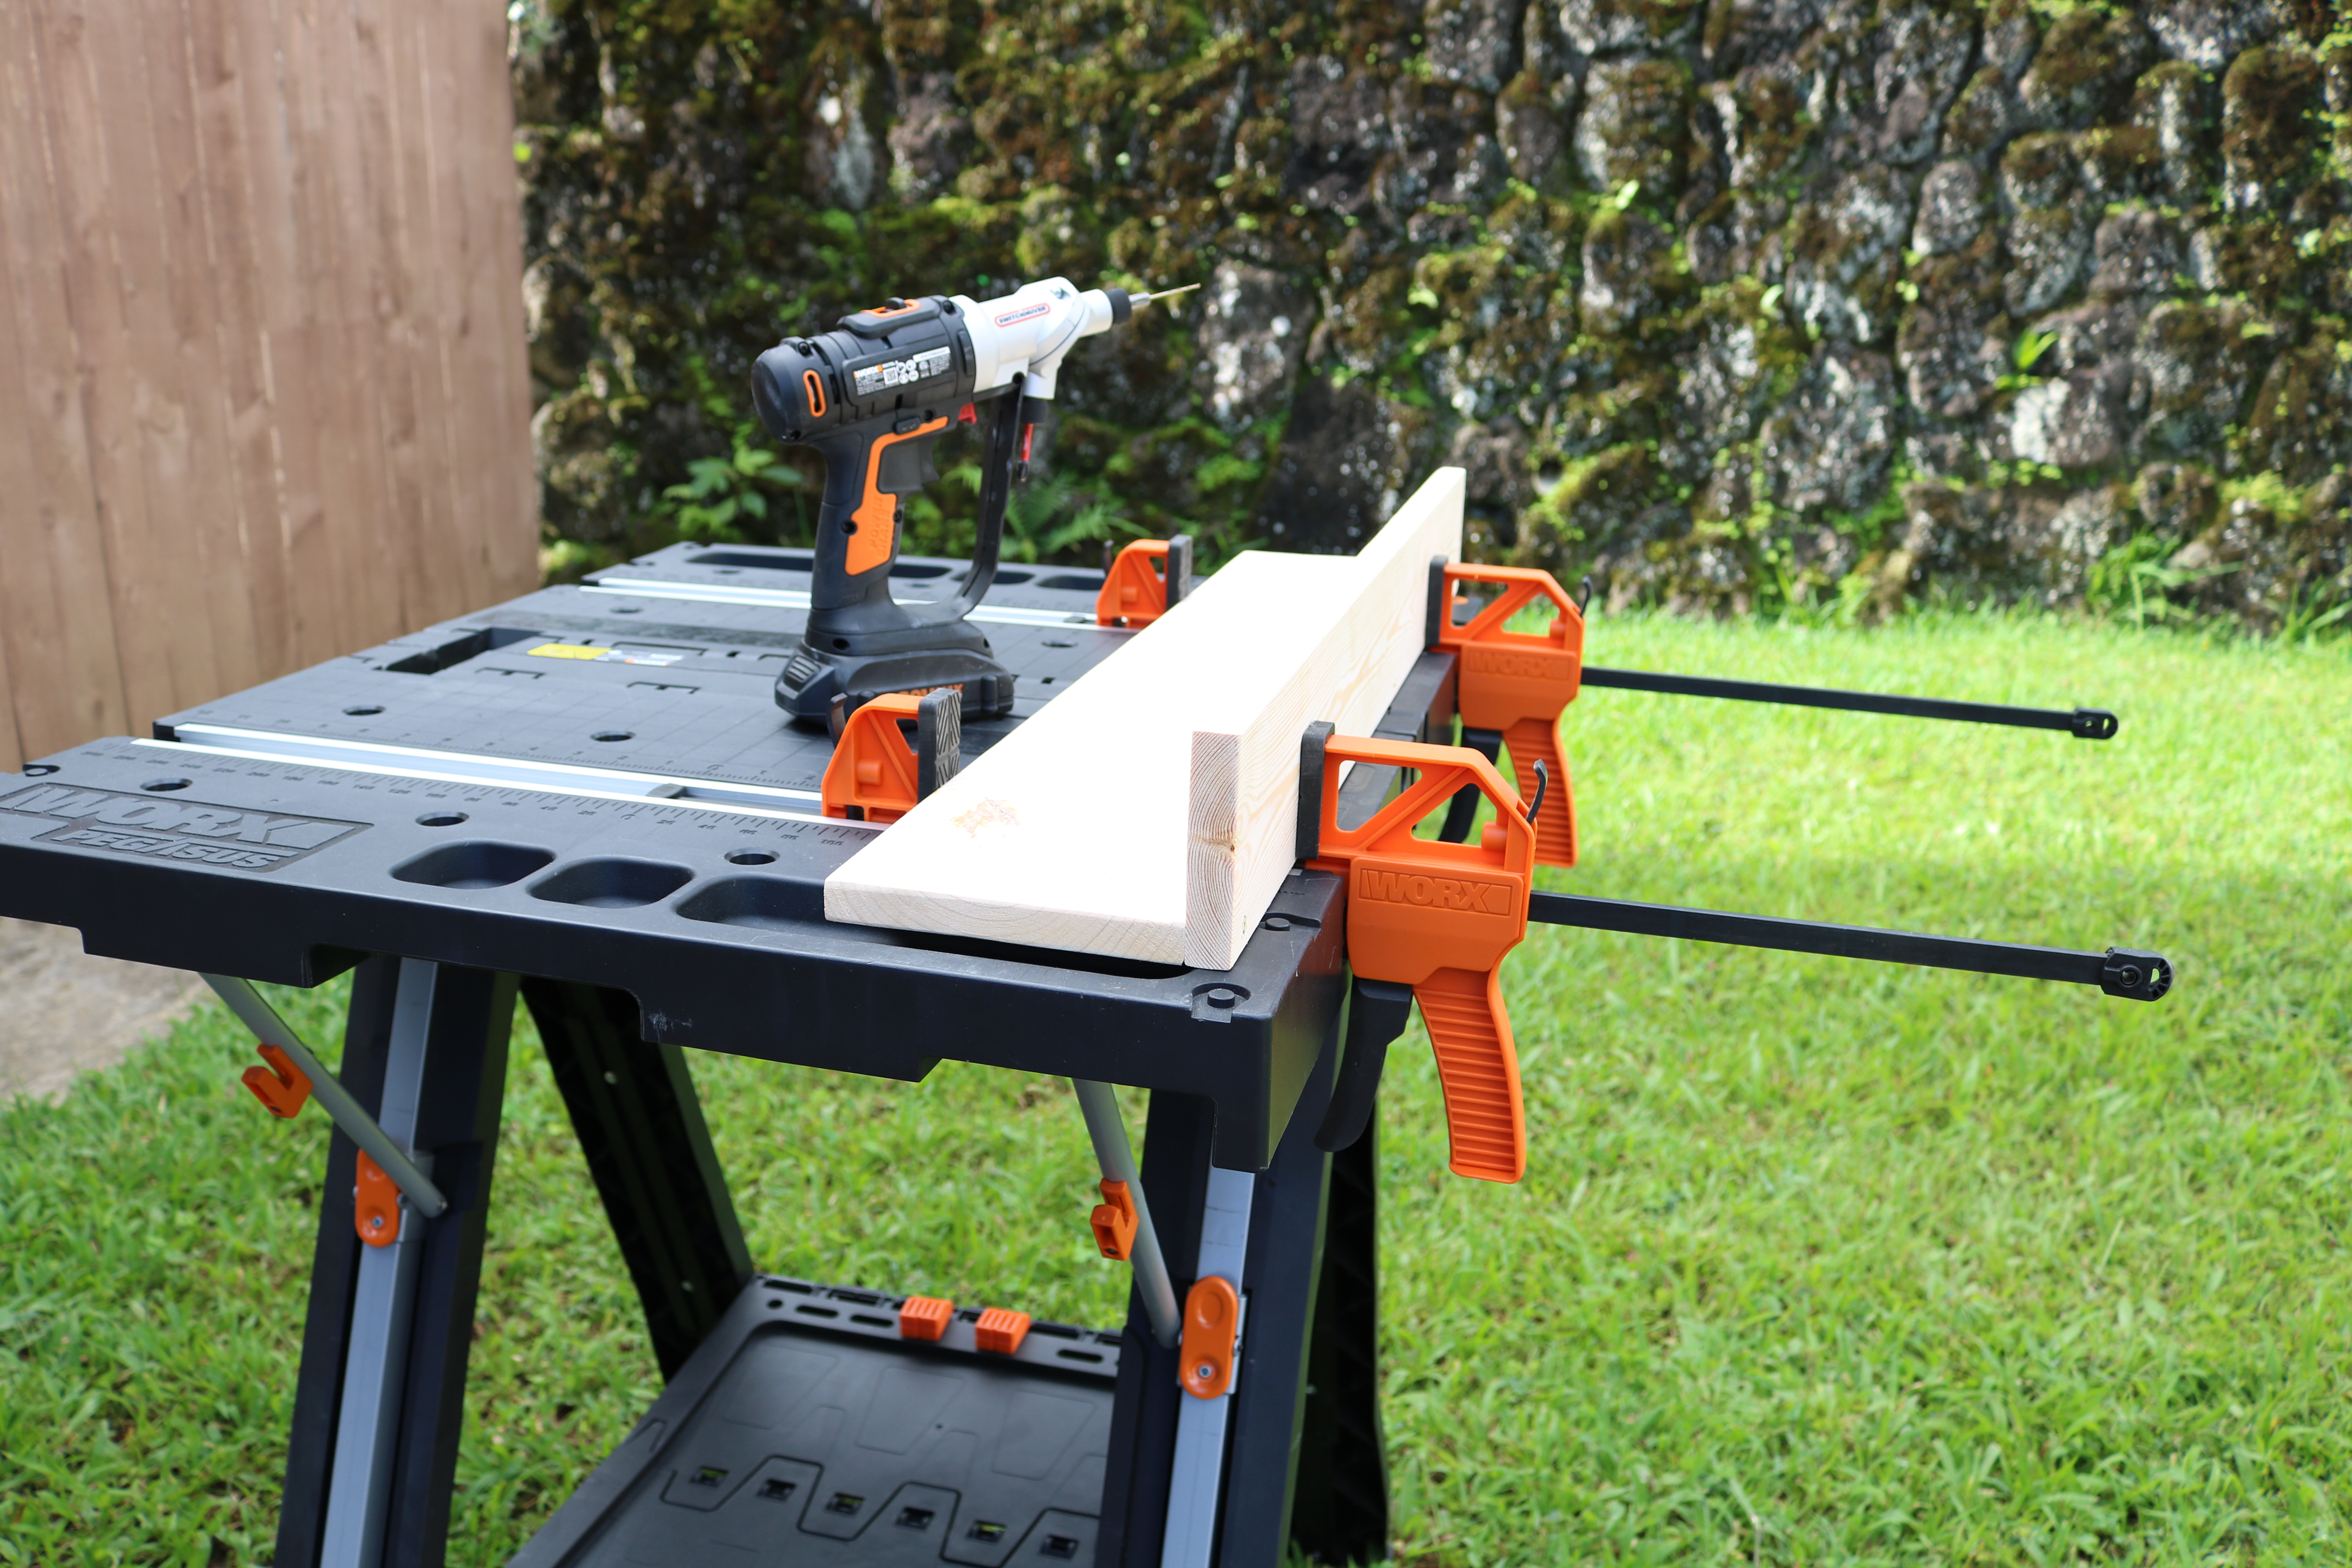
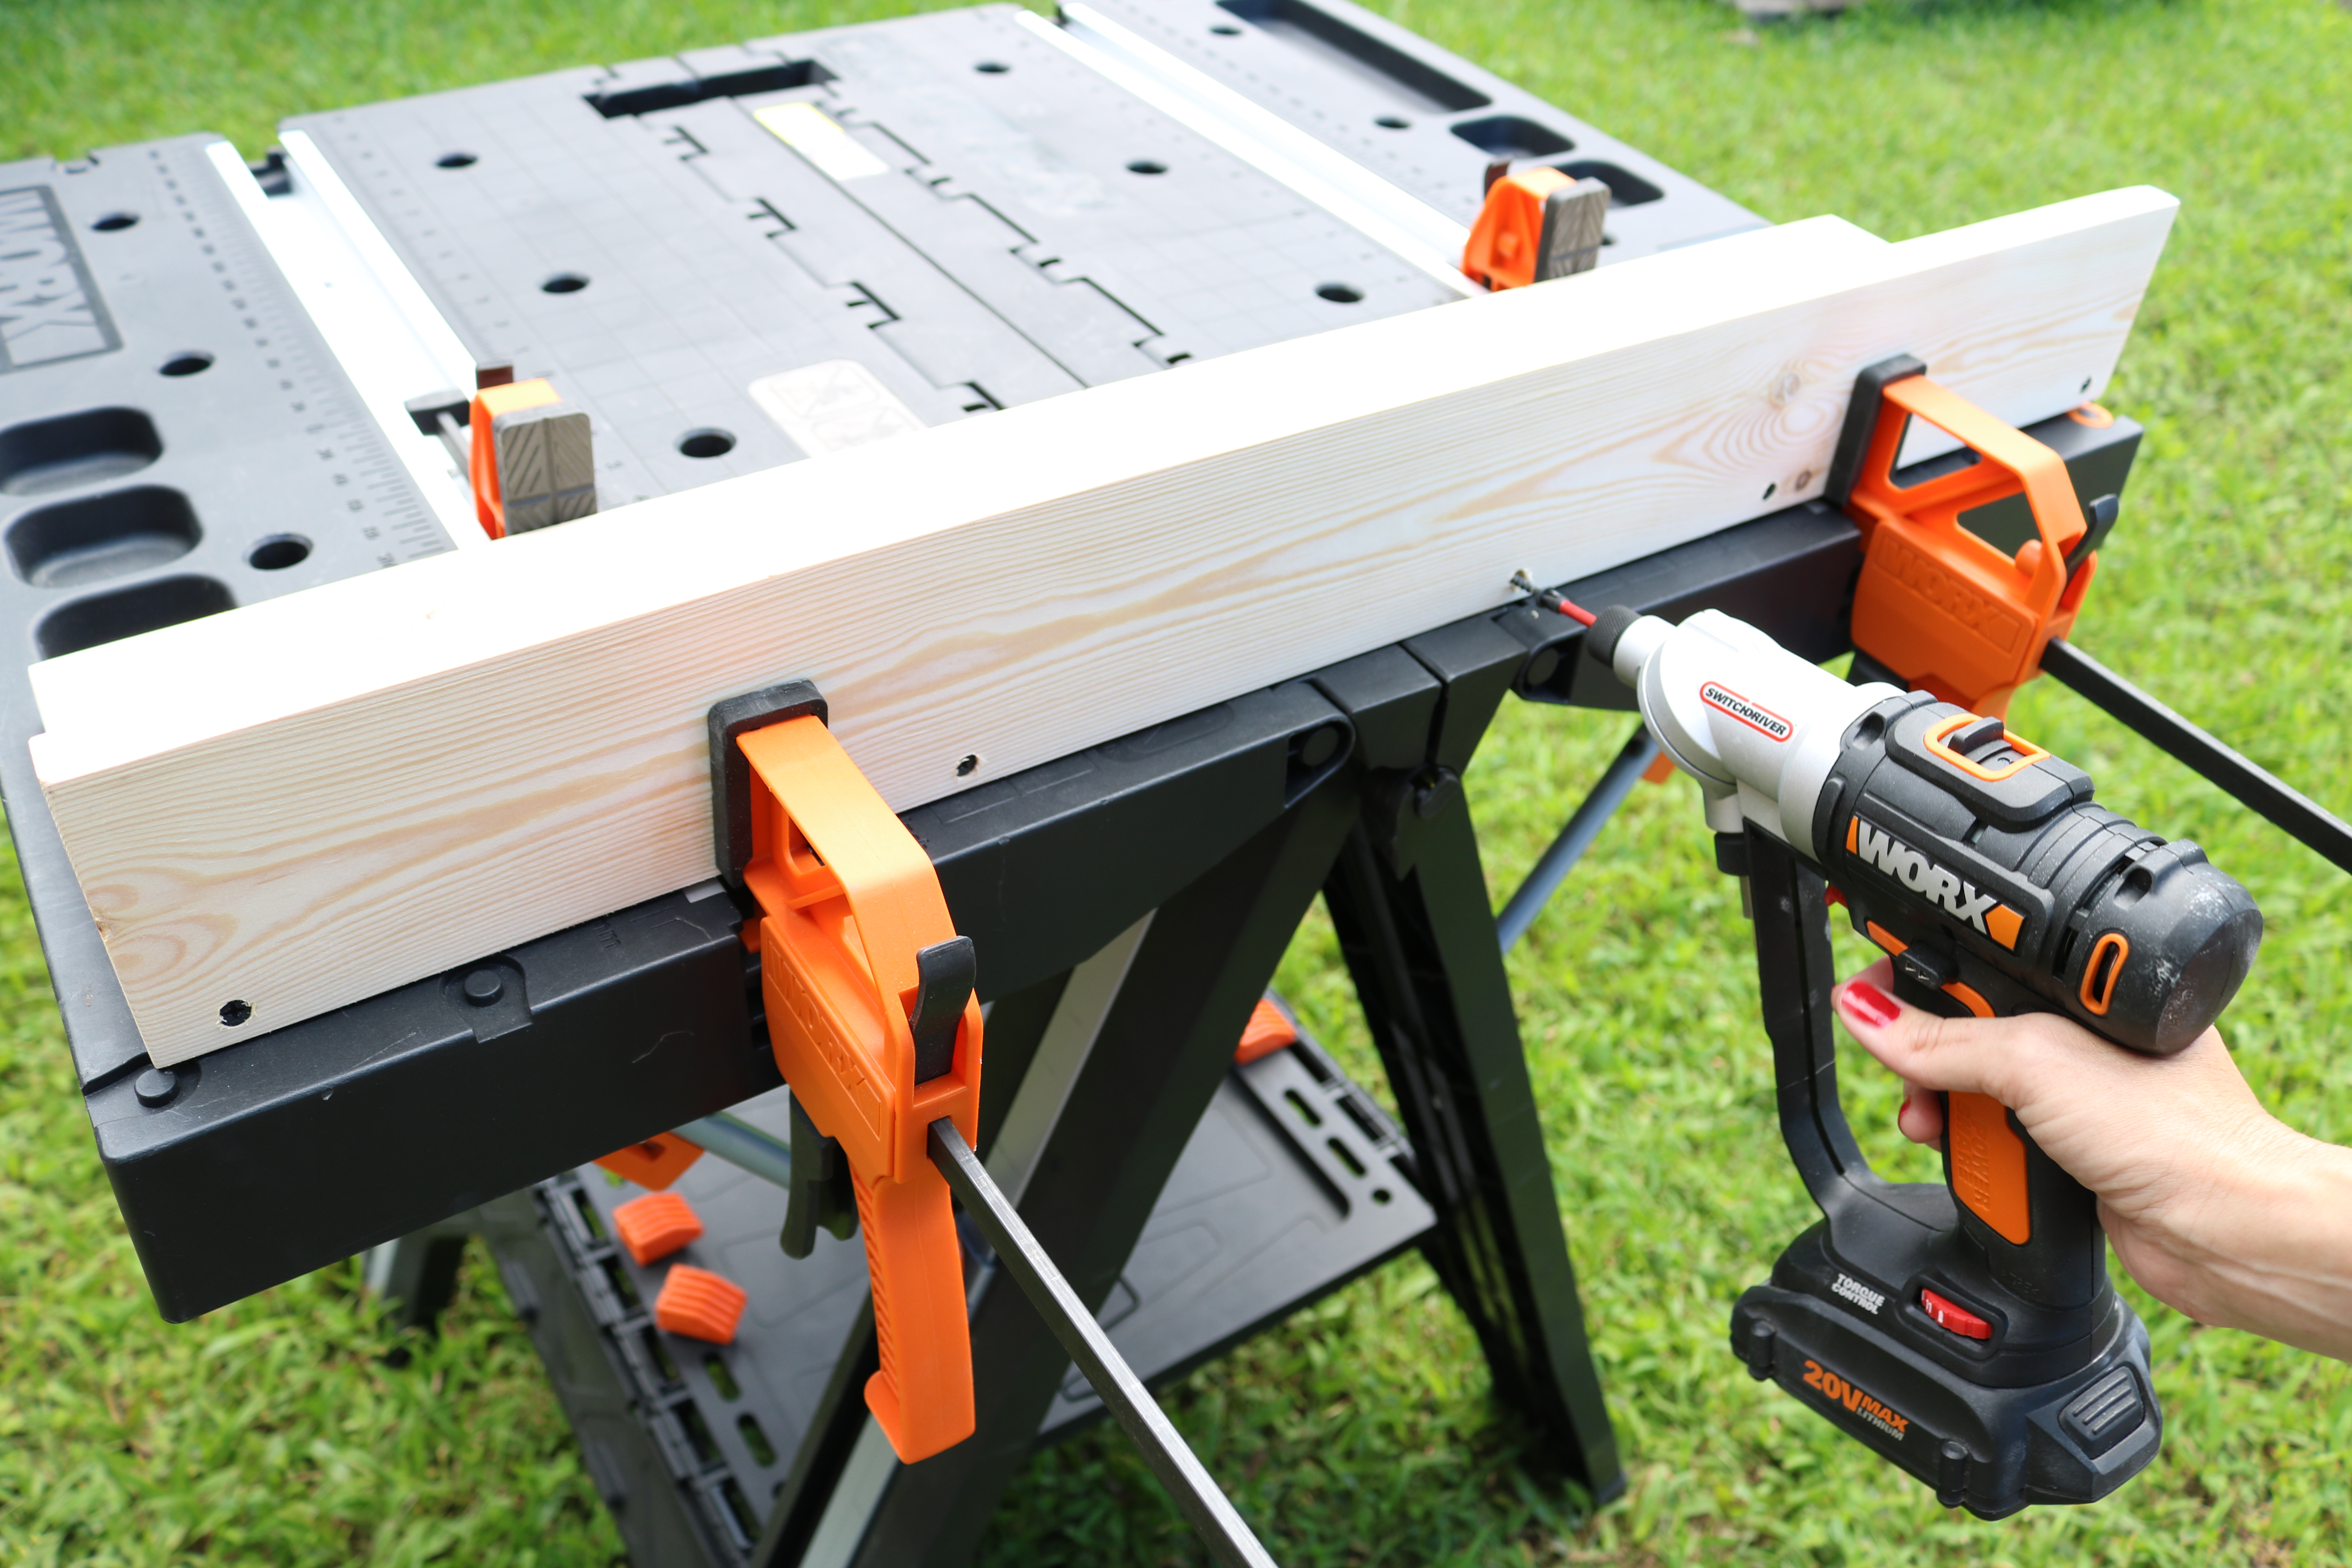
Lay your 1×6 face-up and put your 1×4 right up against it on its side. This is where my Worx Pegasus came in handy! It can be tricky to drill pilot holes into two pieces of lumber without a clamp (or two!). I was able to lay it on my bench and clamp it within seconds. It made drilling my pilot holes a breeze!
Step 3 – Attach two pieces:
After drilling 5 pilot holes, I used my 1.25″ drywall screws to attach the two pieces together.
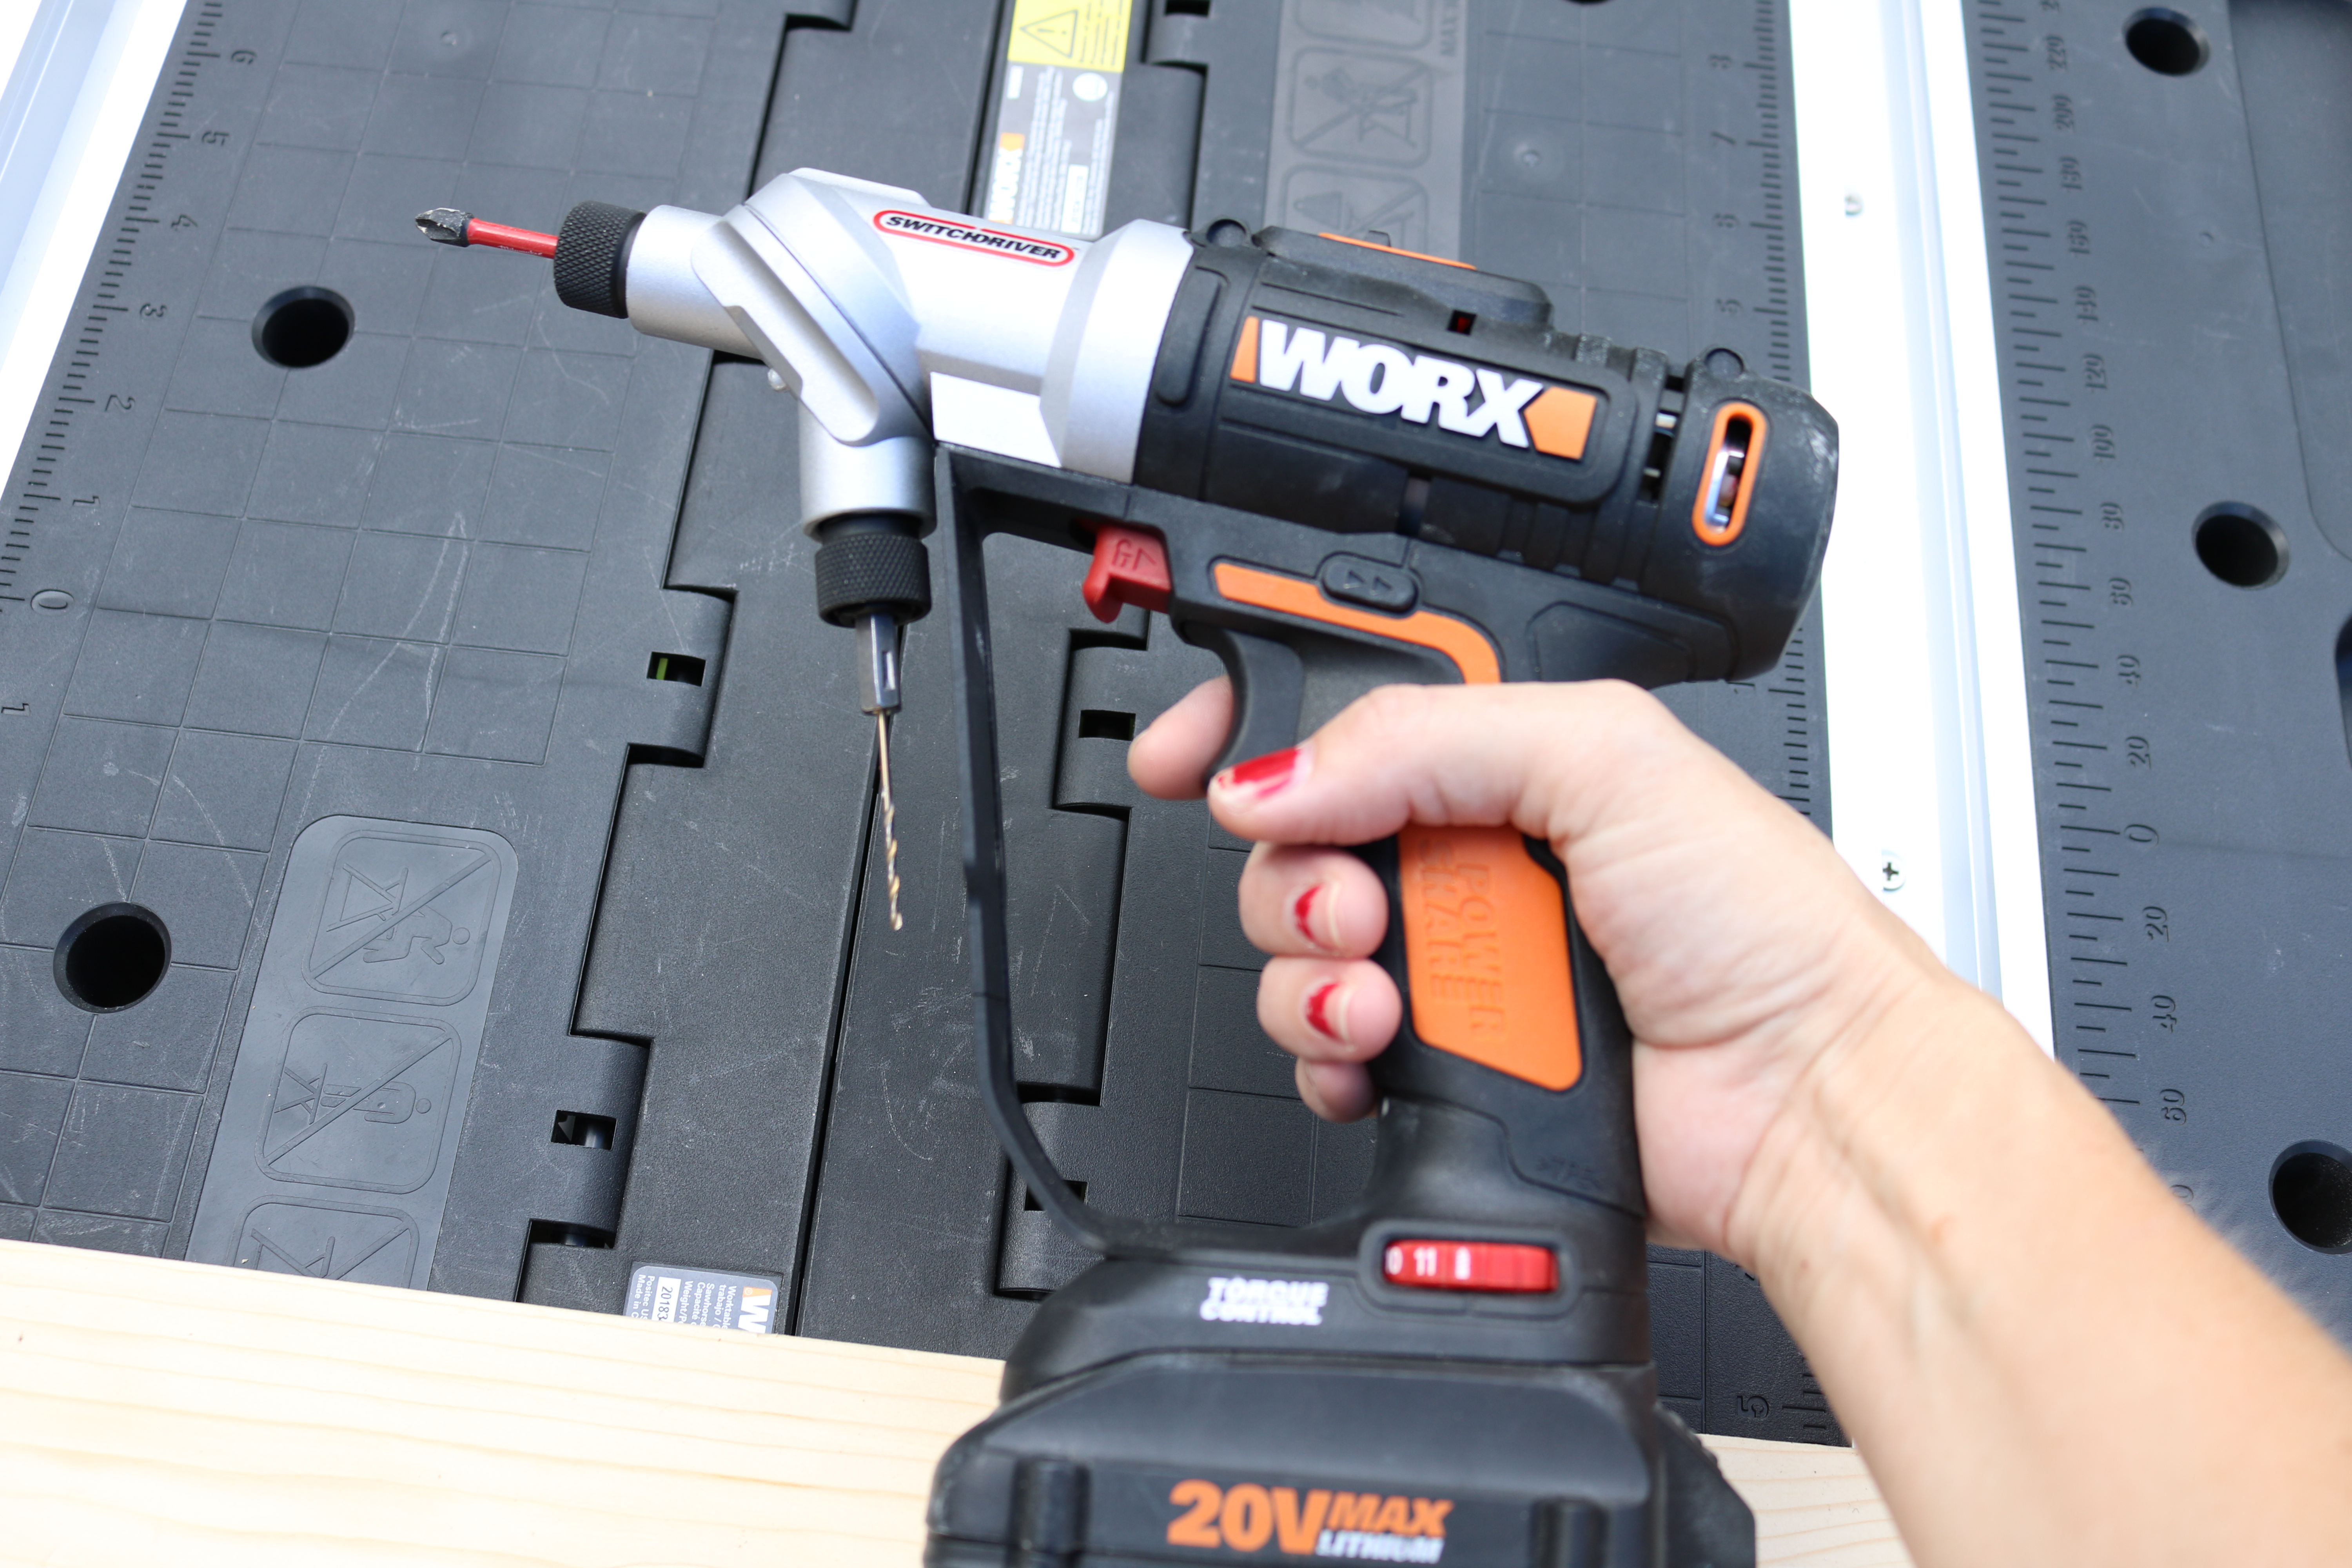
This drill I used is also made by Worx and is called the Switchdriver. You can go back and forth between different bits without having to have multiple drills! It’s also a very lightweight drill but still sturdy and able to be set upright (some lightweight drills fall over when set up like that).
Step 4 – Stain:
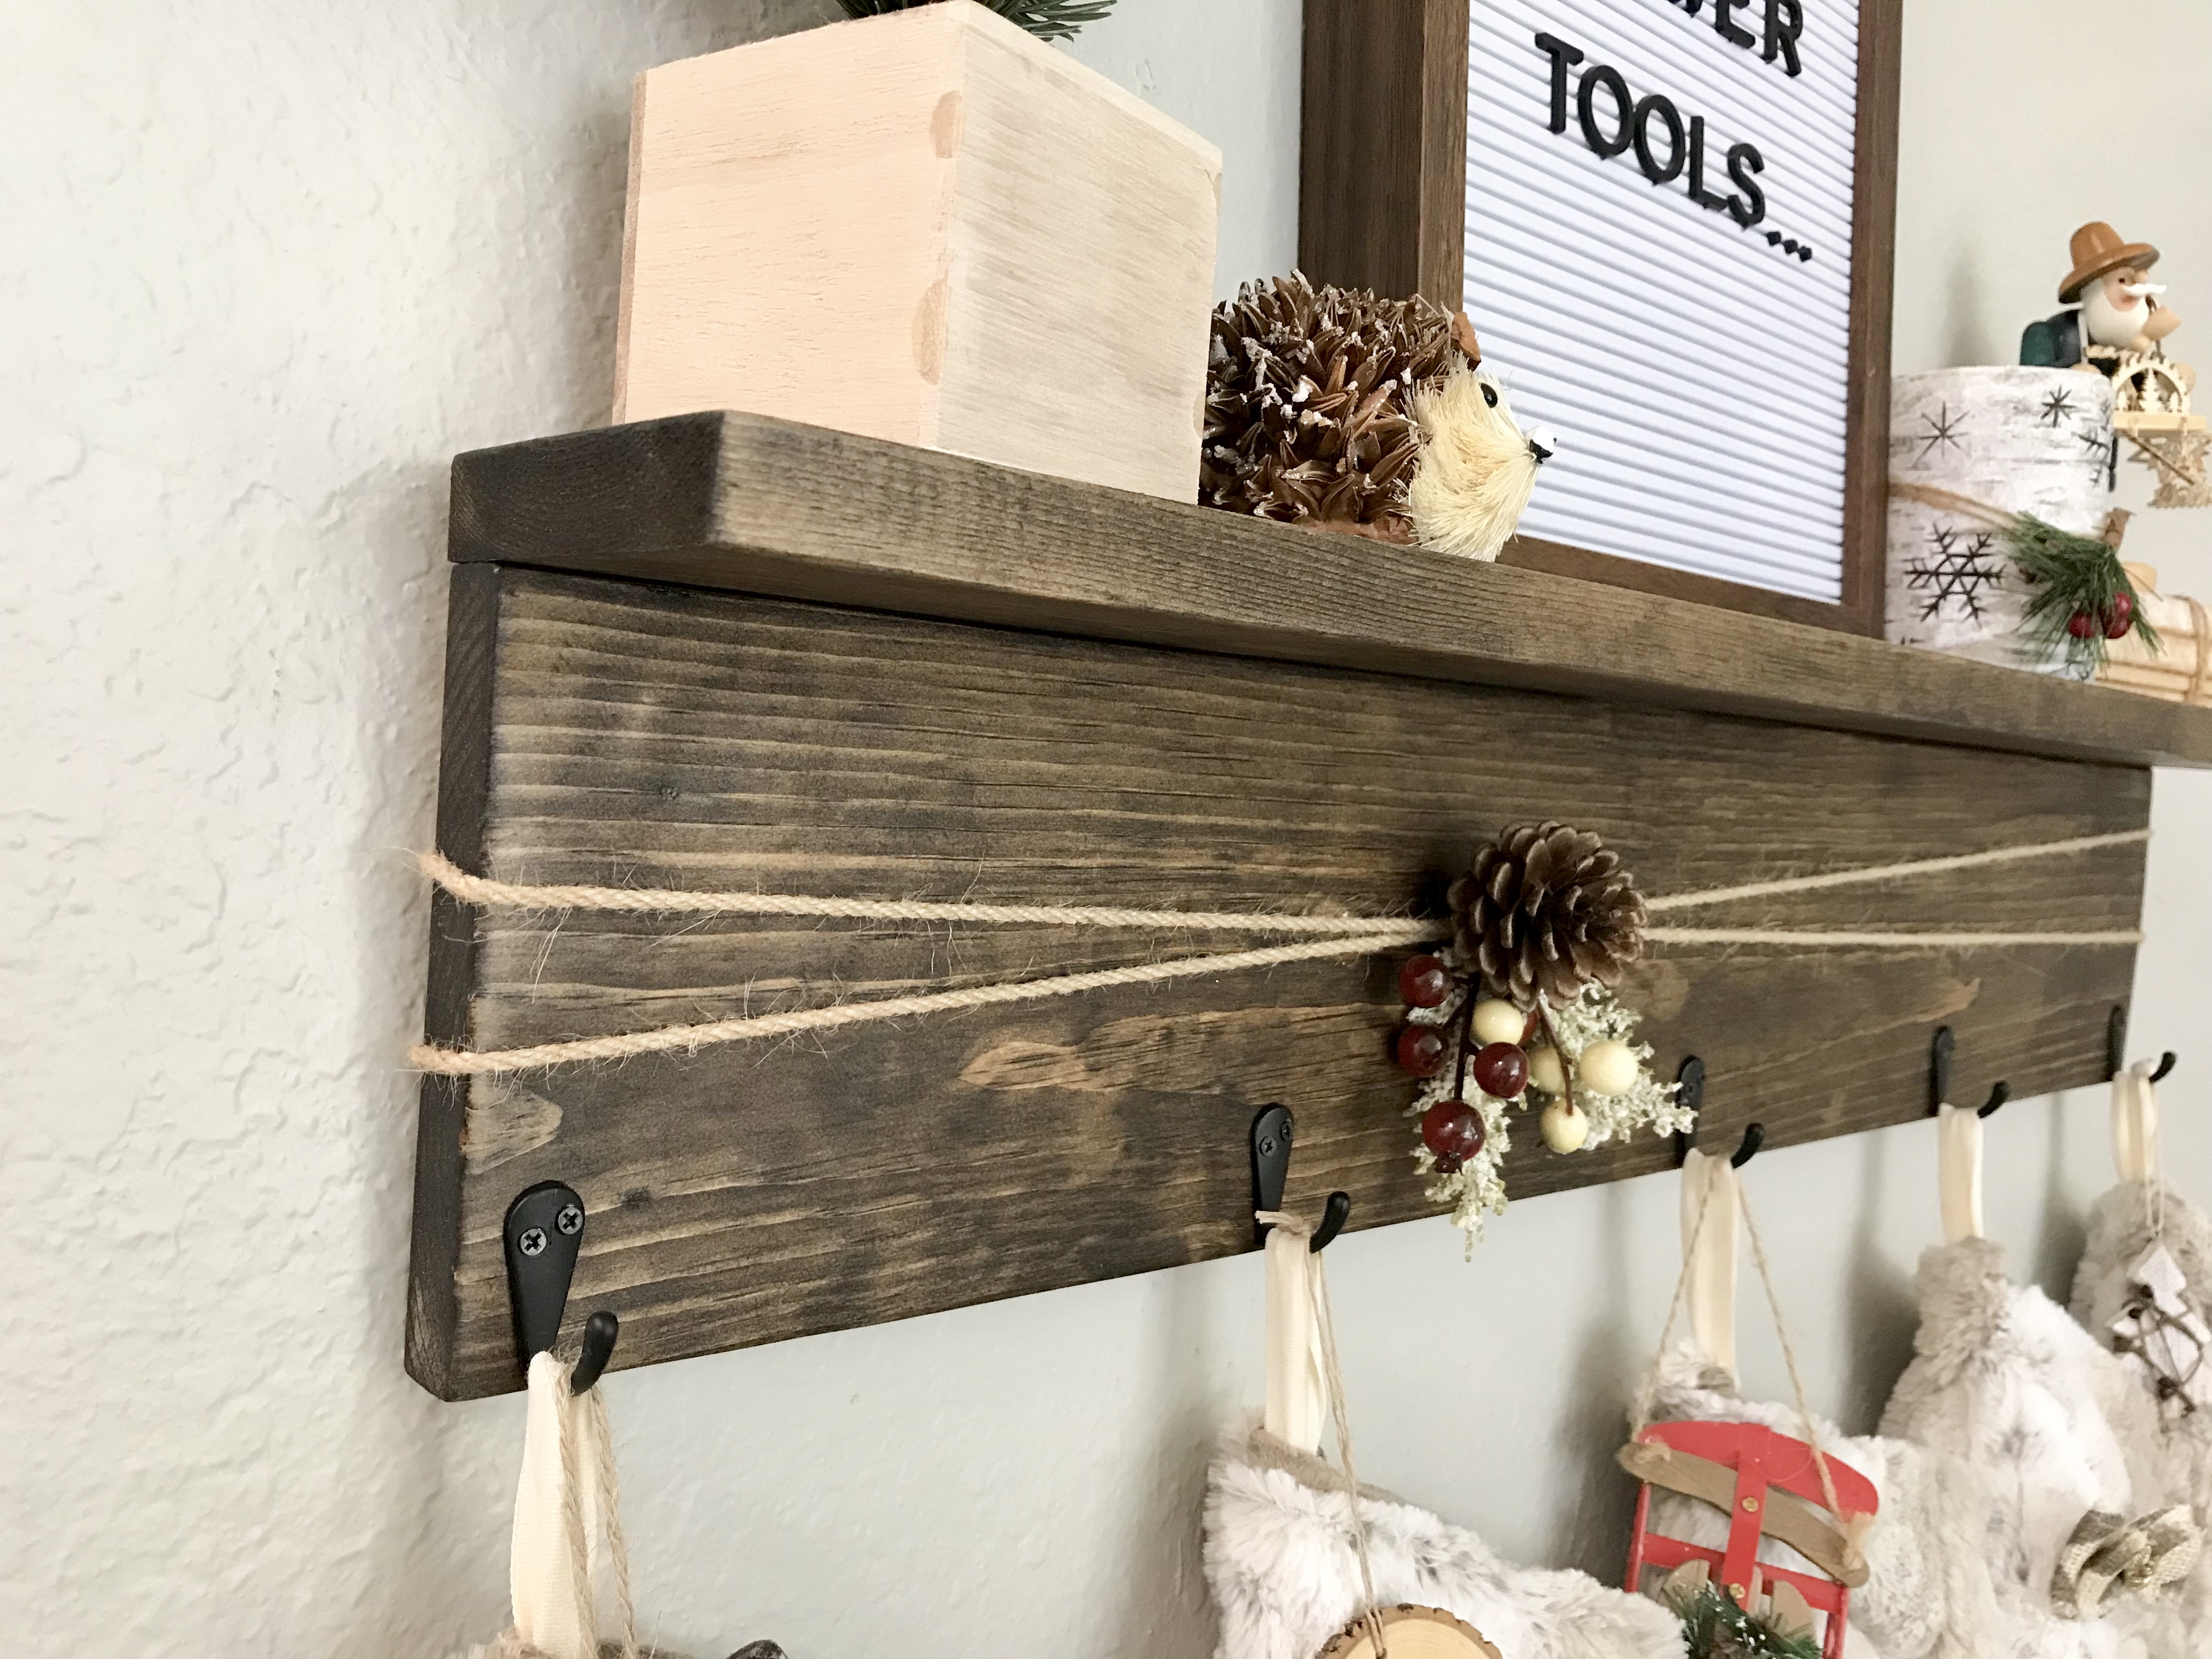
I used Minwax in Dark Walnut for this shelf, and I tied jute rope around it to make it removable after the holidays.
Step 5 – Attach hooks:
I purchased these hooks from Amazon. They come with a small screwdriver, and you don’t even need to drill a pilot hole into pine since it’s such a soft wood. They go in very easily!
Step 6 – Attach D-rings or sawtooth hooks:
You can use either D-rings or sawtooth hooks to attach the shelf to the wall. Just make sure if you’re using sawtooth hooks that you have long enough nails. Some of them come with short nails, and they won’t hold the weight of the shelf very well.
D-rings are the safer option, but they will make the shelf tilt forward just slightly at the top. Another option is to do one hook in the center and then Command strips on the sides for added stability and support.
And that’s it! Super easy project! And it was even easier thanks to my Worx Pegasus workbench and my Switchdriver duel drill. I’m really a fan!
If you’re interested in either item, you can purchase directly through the Worx website. They have a discount going on right now on the Pegasus! AND, through the end of 2018, you can use my promo code WXCHARLEE to save an additional 10% on your entire Worx purchase! So go snag yourself some goodies!
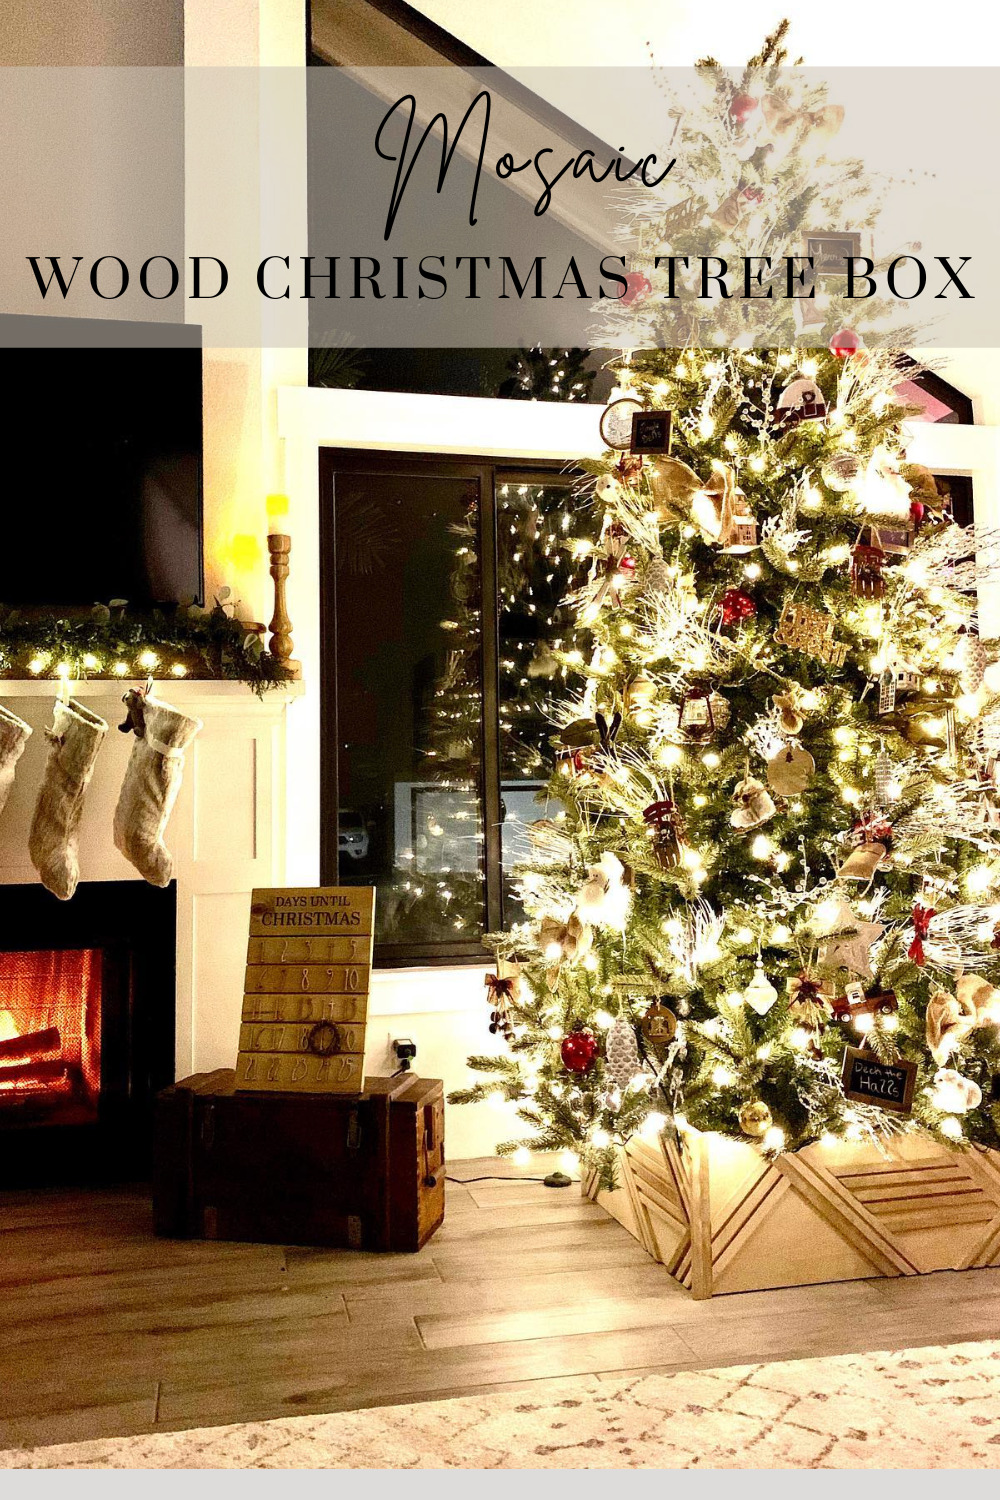
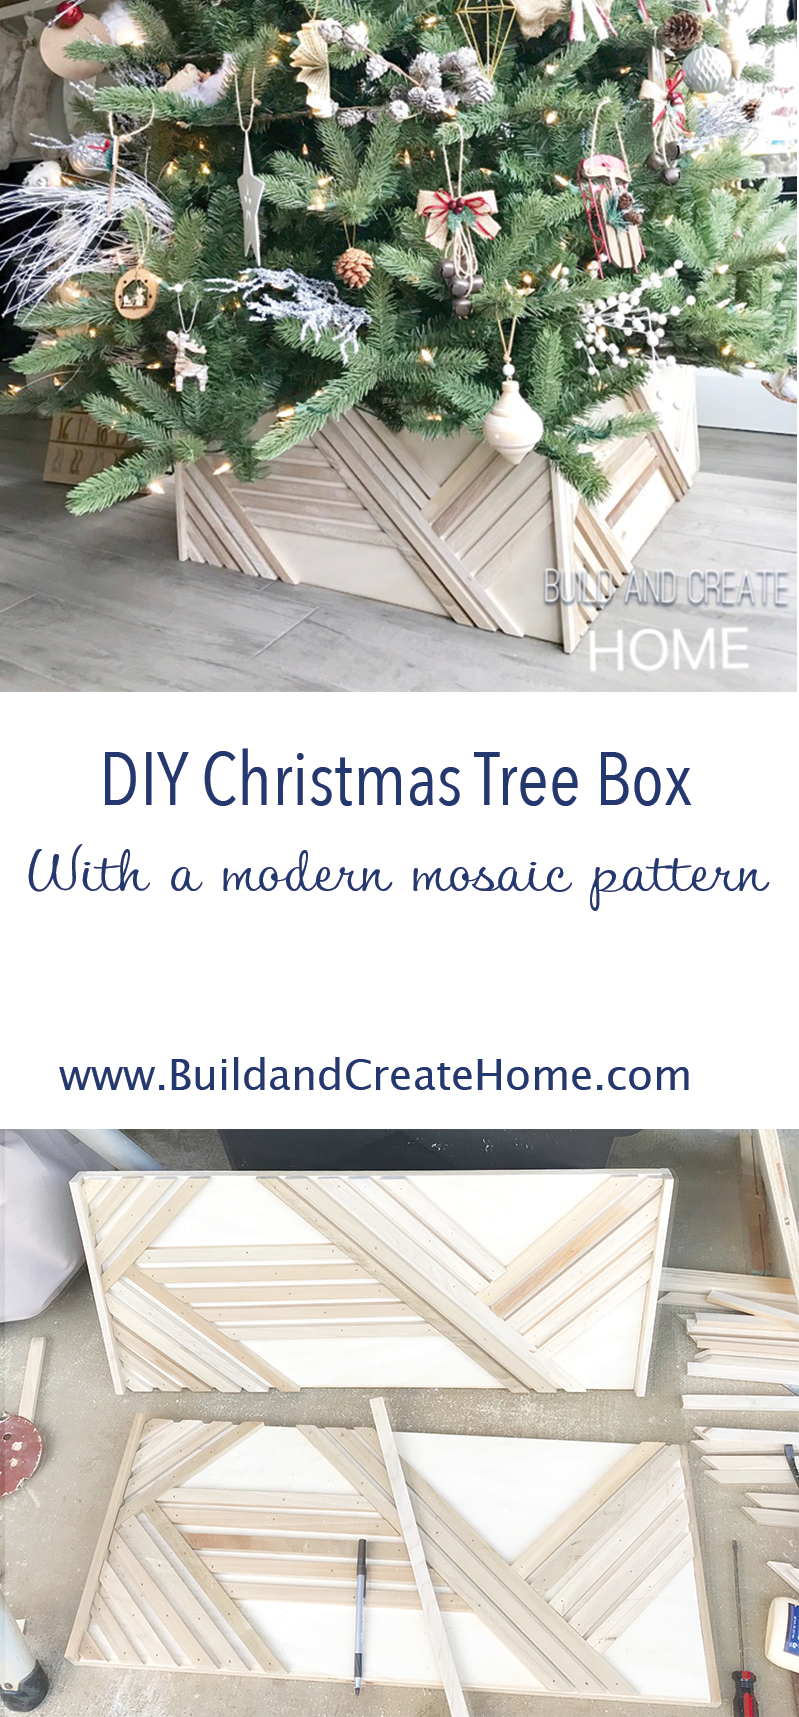
It’s the most wonderful time of the year. That means it’s the most wonderful time to DIY. And with everything else going on in your life at this season… we need a simple DIY that won’t add one more thing to your plate. Enter DIY Christmas Tree Box with a mosaic pattern. It’s simple. It’s adorable. And it is amplifying your already beautiful tree.
I’ve always loved the look of Christmas tree boxes, but I never quite got around to making one for myself. This year, I knew I wanted to build one, but I looked everywhere for a more modern version and couldn’t find anything I liked or anything that was even similar to what I was looking for.
All the boxes had either a basic slat pattern or an X pattern, and most modern trees were being put in baskets… and don’t get me wrong… I like the look of the baskets, but I wasn’t ready to pay a lot of money for them. (If you know me- I’m all about DIY on a budget. Reusing pieces from holiday to holiday- just like my magical changing bench– and even building things that can stay out year-round like this shelf!)
The idea to make one with a mosaic pattern popped into my head, and I couldn’t stop thinking about it. I had a million other things to do, but I immediately dropped everything and started building my DIY Christmas Tree Box. Ha!
So let’s get on to the tutorial!
This post contains affiliate links. Please visit my disclosure page if you would like more information and thank you for your support.
** This is my original design and idea. I hope to see many more in the future and would love to see what you create using my design as inspiration. Please feel free to tag me on Instagram or Facebook, and I will share in my stories. I love seeing what you come up with! **
Supplies needed for your DIY mosaic Christmas tree box:
– .75″ poplar plywood (dimensions will depend on your tree stand size – see step 1)
– Any 1 x poplar material to rip into smaller pieces for the mosaic pattern (or see step 2 for other alternatives)
– Wood filler
– .75″ brad nails
– 1.25″ Kreg pocket hole screws
Tools needed to build a modern Christmas tree stand
Step 1 – Measure your tree stand for your modern Christmas tree stand
I set up my Christmas tree metal stand and measured from corner to corner (or leg to leg). My tree is 10′ tall and fake, and I measured about 24″ from the outside of one leg to the outside of the next. I knew I wanted a little wiggle room, and two of my sides would be inset on the other sides, so I decided to go with 27″ and 12″ tall from floor to the base of the tree.
**You may find it helpful to put on the bottom layer of the tree if it’s a fake tree, but I wouldn’t assemble the full tree until after you finish putting your box together. I’m guessing smaller trees have smaller stands? Feel free to correct me if that is wrong…
Step 2 – Cut your Christmas stand lumber
I got lucky and had some 3/4″ poplar plywood left over from my pantry build (see my Instagram feed for more pics and details on that!). And they were even ripped to 12″ since that was the depth of my upper shelves! I considered it a sign that I should build this stand. 😉
You can probably get away with a 24″ wide box and just use a 2 ft x 4 ft sheet of plywood and have it ripped right there in the home improvement store. You’ll need to account for two sides being 1.5″ smaller on the inside since they will be inset in the other two sides when assembled. I chose to keep mine like this (so a tiny bit of a rectangle rather than a perfect square) to make it easier when cutting the mosaic pieces. It was much easier to design 4 identical panels rather than account for two being shorter.
**Be sure to account for blade width! So if you’re trying to get 4 even pieces out of one panel, be safe and do 11.75″ wide.
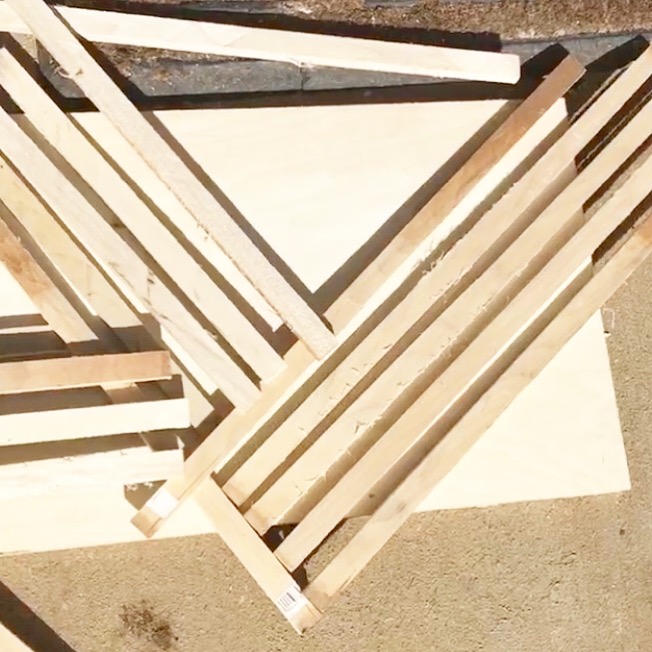
I chose poplar for my plywood and my mosaic because I love the look of it unstained and wanted that light color. This project could definitely be done with alternative lumber, though! You know how I love to see your tweaks on my ideas.
I ripped dozens of 3/8″ pieces of poplar out of scrap 1×4’s and 1×6’s that we had from doing our baseboard and door and window trim in our home addition. So yes! This was an entirely free project for me. Not to mention… I got rid of lots of our scrap wood! The amount you need will depend on how detailed you want your mosaic to be. It would be safe to guess that I probably used one 1×6 x 8′ long. I might have to make another one just to be sure. 😉
The I ripped a piece to 1.25″ and then turned it on its side and ripped it into 3/8″ pieces. I used this to trim the visible plywood edges after I was finished and kept it the same width as the mosaic pieces.
**ALTERNATIVE – If you don’t have a table saw or are uncomfortable using one, you could also purchase a very thin hardwood spline. It would have more of a rounded look, but it would be easier and wouldn’t require the use of a table saw.
Step 3 – Drill pocket holes in your plywood
I took two panels of my cut plywood and set my Kreg pocket hole jig to 3/4″ lumber. Then I drilled 4 holes in each side of two panels. Don’t assemble them yet since it will be much easier to attach the mosaic pattern with them down flat.
Step 4 – Sand your wood mosaic strips
You could do this step after cutting your small pieces, but I found it much more manageable to sand the long strips and then just do touch-up sanding on the ends after making my miter cuts.
Step 5 – Make it cute! (A cute tree stand is a MUST)
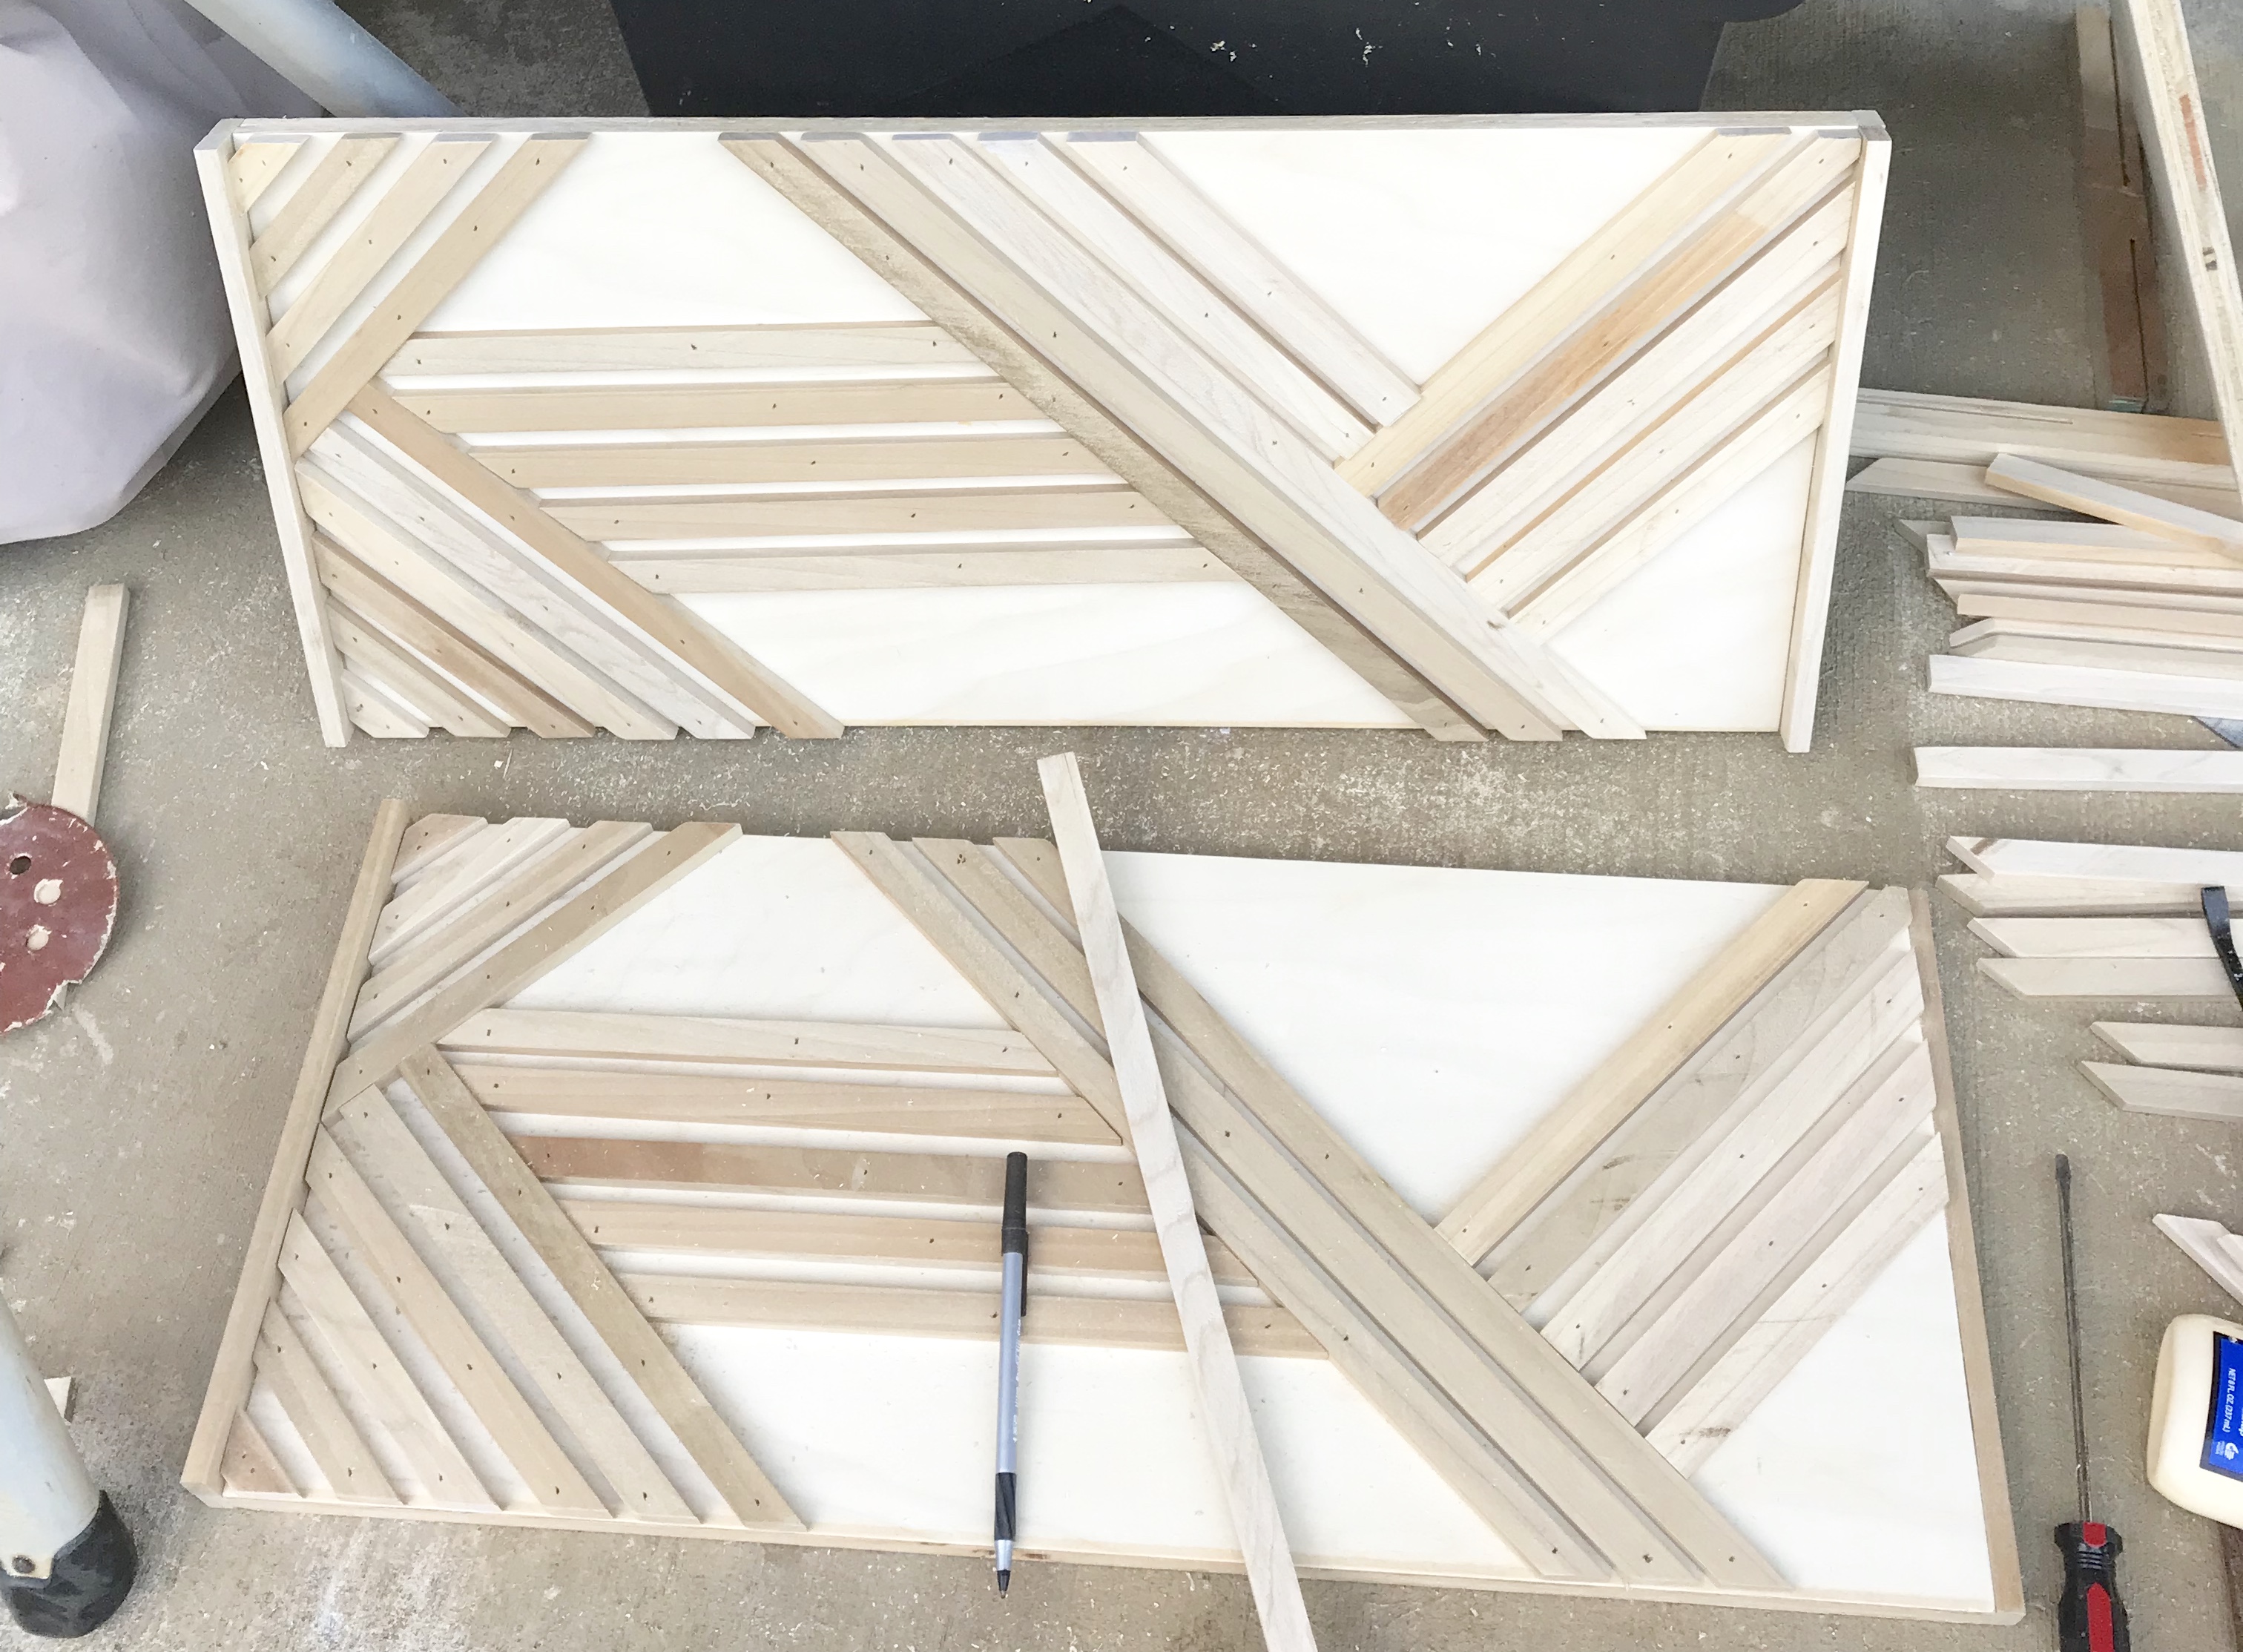
This part was easier for me since I had lots of small pieces. It might be more complicated with just a few long pieces. You could either sketch it out on paper and just cut and adjust as you go. You can also cut one of your strips into random smaller pieces and place them around to see what you like. To make my life easier, I stuck with all 45-degree angles. I knew I had to do TONS of these and wanted to make it just a touch more simple.
Step 6 – Cut your wood mosaic pieces
I used my miter saw for this. I laid out all 4 of my panels and then started in one corner. It made it easier to cut all 4 matching pieces before moving on to my next piece. I just laid the strip right on the plywood and marked where I needed to cut, using only straight zero-degree cuts or 45-degree angles.
Towards the end, my pieces were in slightly different places on each panel, so for those last 5 or 6 cuts, I had to measure on each individual panel rather than cutting 4 of the exact same pieces.
Step 7 – Attach the wood mosaic pieces
Lay your panel pieces out with the pocket holes facing down.
I normally use wood glue when doing my mosaics. But these pieces were so tiny, and I knew it would be very difficult to sand in between them. Because they were so small, I decided to forego the wood glue and just nail them on. I used 3/4″ brad nails and 18 gauge brad nailer to attach. And I did each panel individually just to make sure I liked the look.
Then I also attached the trim to the two panels without pocket holes.
Step 8 – Fill holes with wood filler
My favorite wood filler is DAP Plastic Wood. It’s a lot of tiny holes to fill, and you’re definitely welcome to leave it as is, but I prefer the look of filled holes. It does require some sanding afterward, though!
Step 9 – Assemble your Wood Christmas tree box
And now’s the fun part! Use your 1.25″ Kreg pocket hole screws to assemble the box. I again opted to omit the wood glue since I knew the box would be for decoration only. I wanted to be able to remove the screws, so I can store 4 panels flat instead of lugging around the huge box. That was a big bonus for me!
This wood box stand has a rustic feel- to find some woodsy and rustic decor here:
That’s it! A modern, DIY Christmas tree box for about $30 if building a 24″ box!
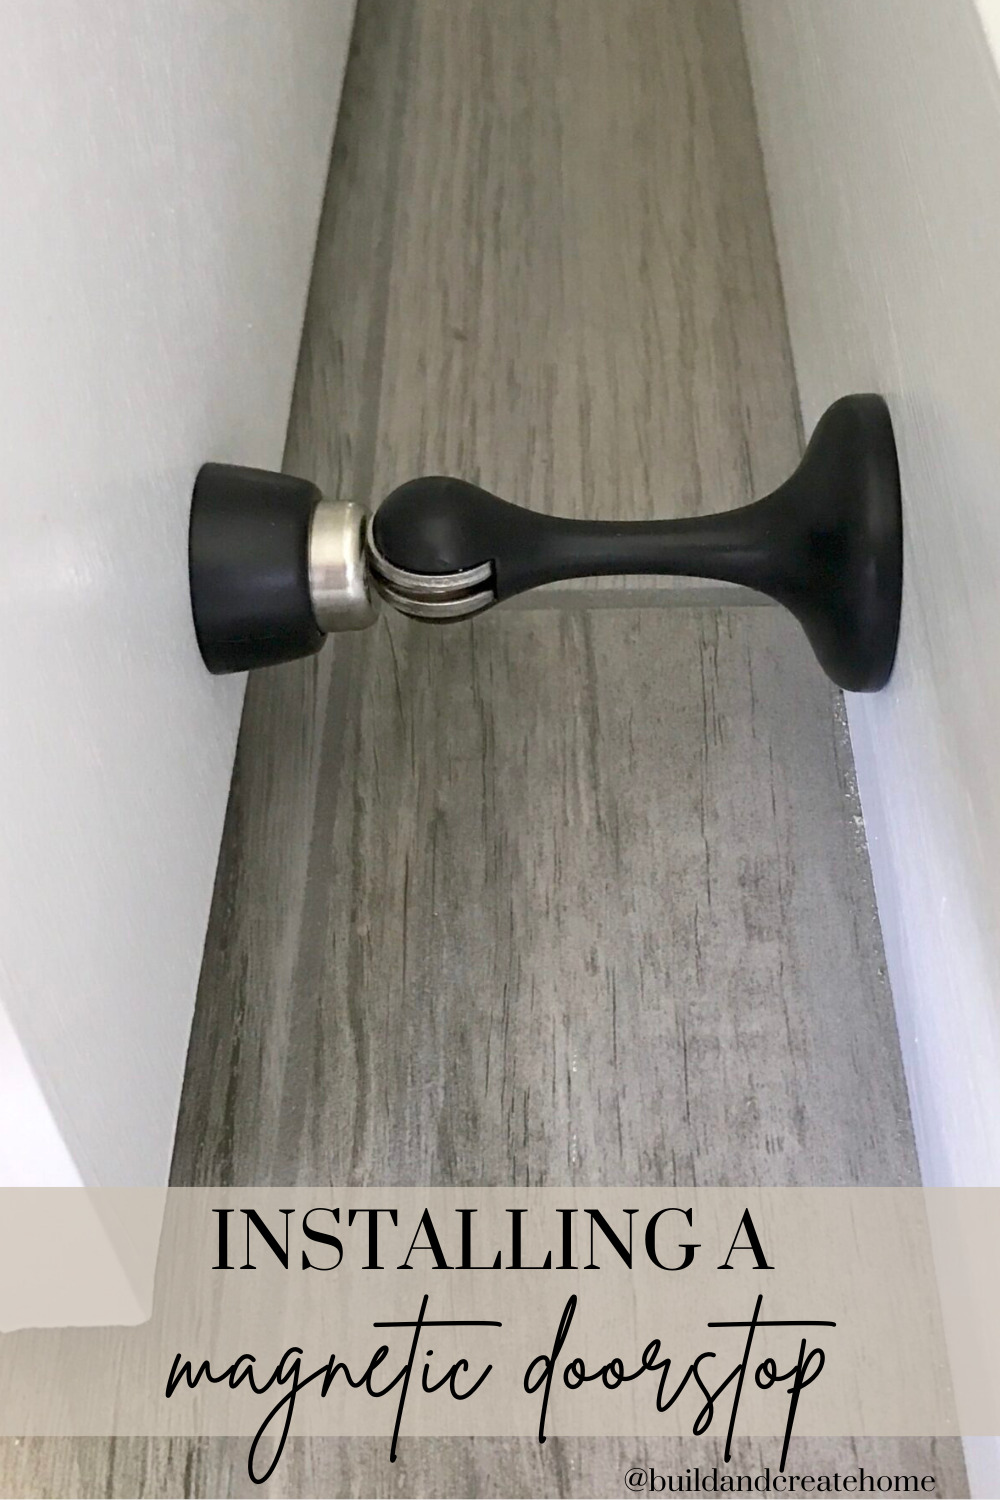
Installing a Magnetic Doorstop – Keeping Doors from Slamming Shut
Today we’re talking about doorstops. Living in Hawaii, we kept our windows open most of the time. I loved that great weather and get the trade winds kept us cool, but it meant our doors were constantly slamming shut!
I found these magnetic doorstops while browsing around a home improvement store one day and took them home and installed them. Game. Changer! WOW.
They serve two purposes:
1) Keep your door knob from banging into the wall.
2) They keep the door open!
(This post contains affiliate links. Please see my disclosures page for more information!)
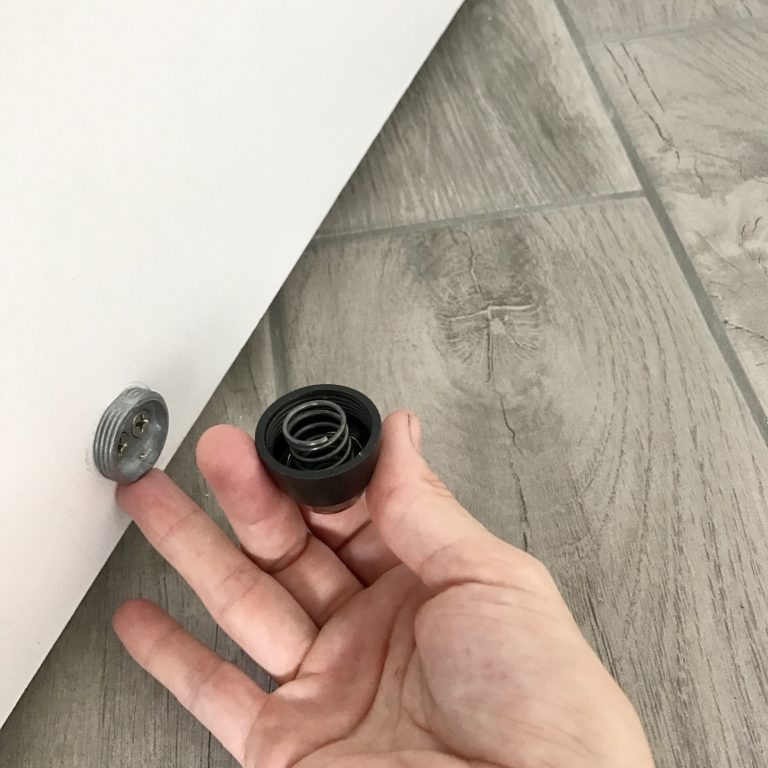
So I’ll show you what I used and how easy they are to install.
1- Figure out where you want your door stopper to go and draw a faint line in pencil around the circles on both the door and the wall.
Some doors have hollow cores, so you’ll have less chance of it tearing out if you keep it closer to the outside edge of the door (within about 3″).
2) Twist off the base from the small doorpiece and attach it where you drew your circle on the door. I drilled small pilot holes before placing screws.
Step 3 – Twist on the door piece.
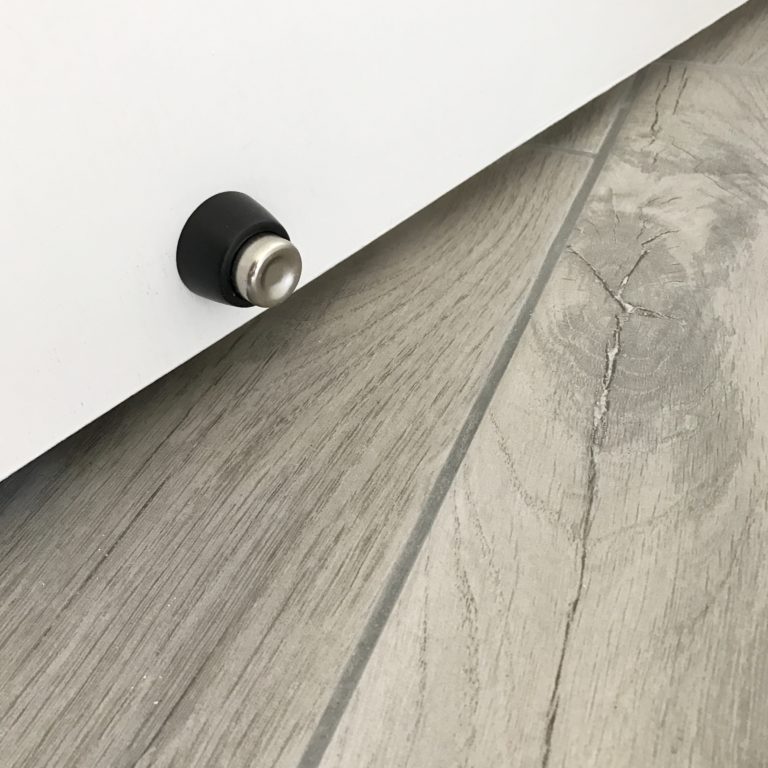
Step 4 – Test the wall piece again just to double-check that it aligns with where you’ve installed your door piece.
(Obviously optional, but doesn’t hurt to check!)
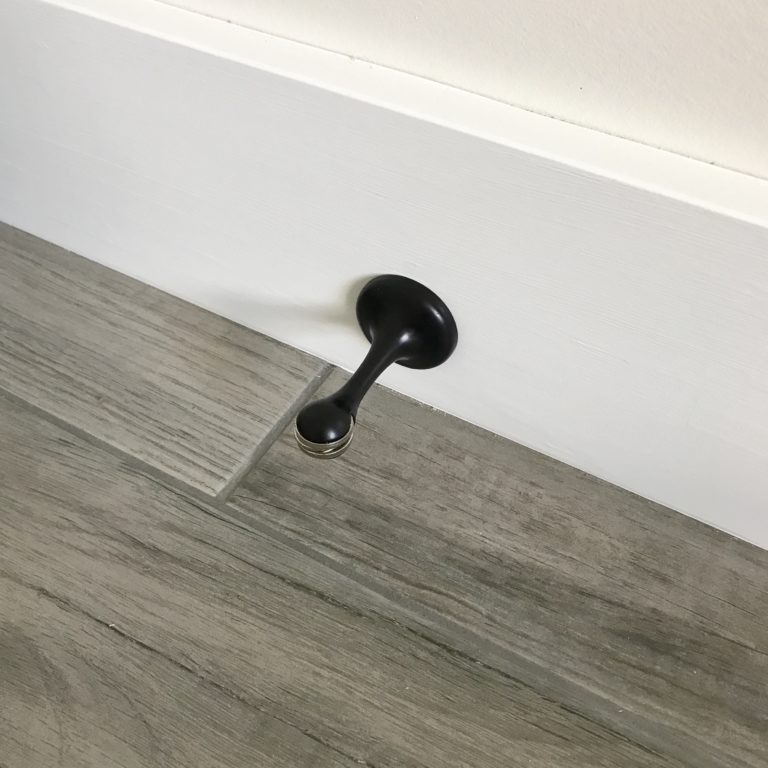
Step 5 – Attach the flat piece to the wall and then twist on your stopper!
Easy peasy! Five minutes…no lie. Installing a Magnetic Doorstop…you can do it!
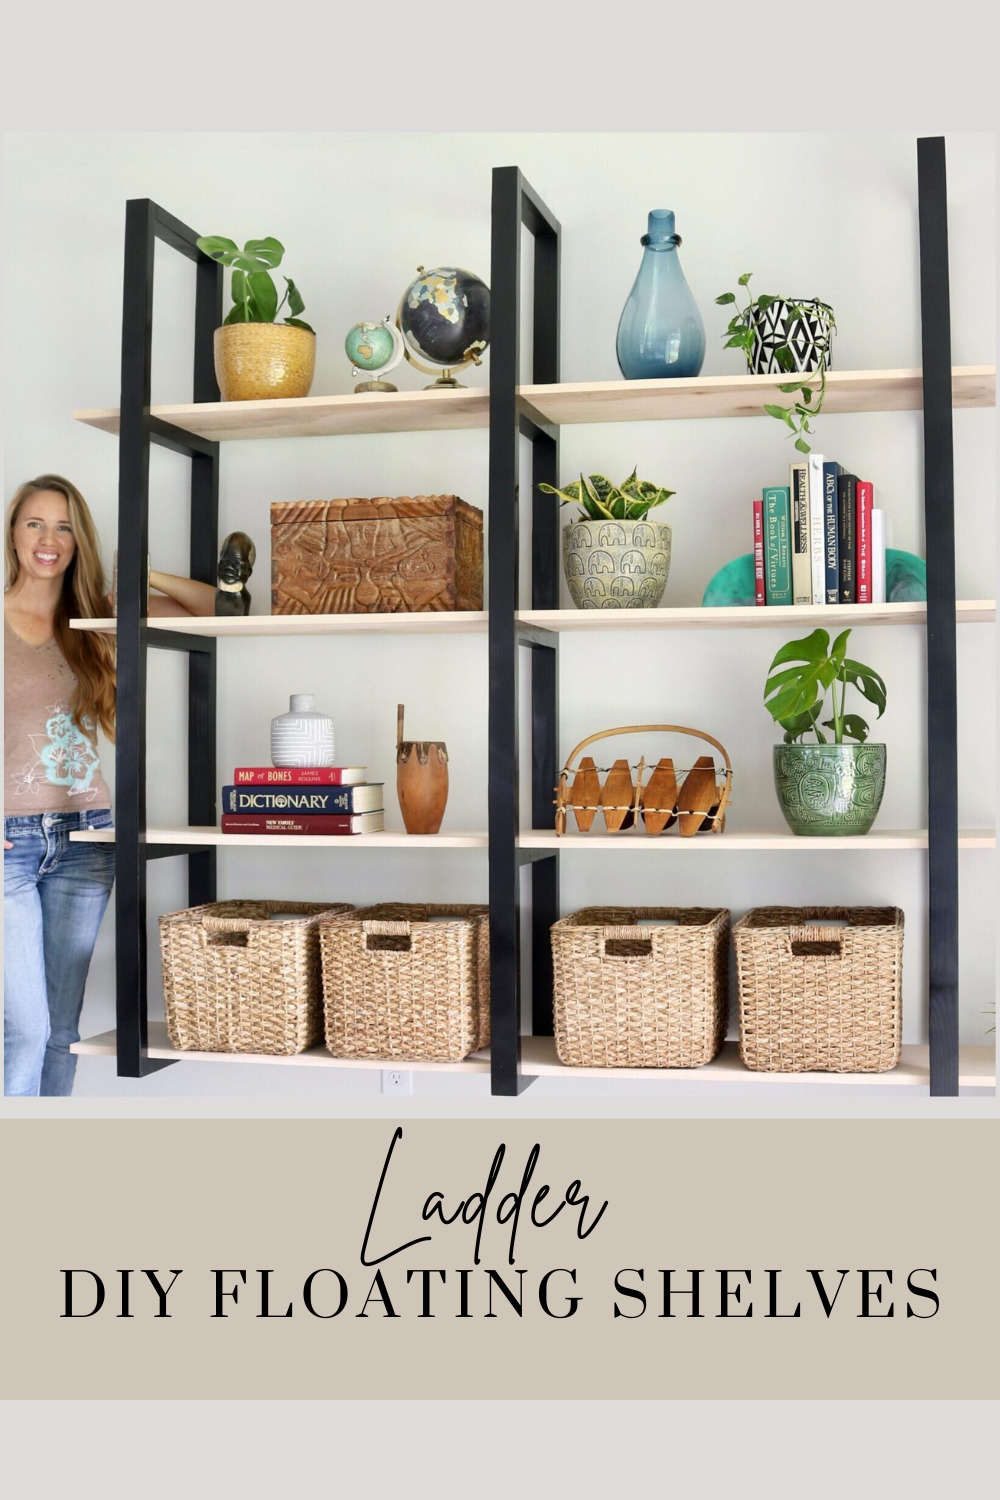
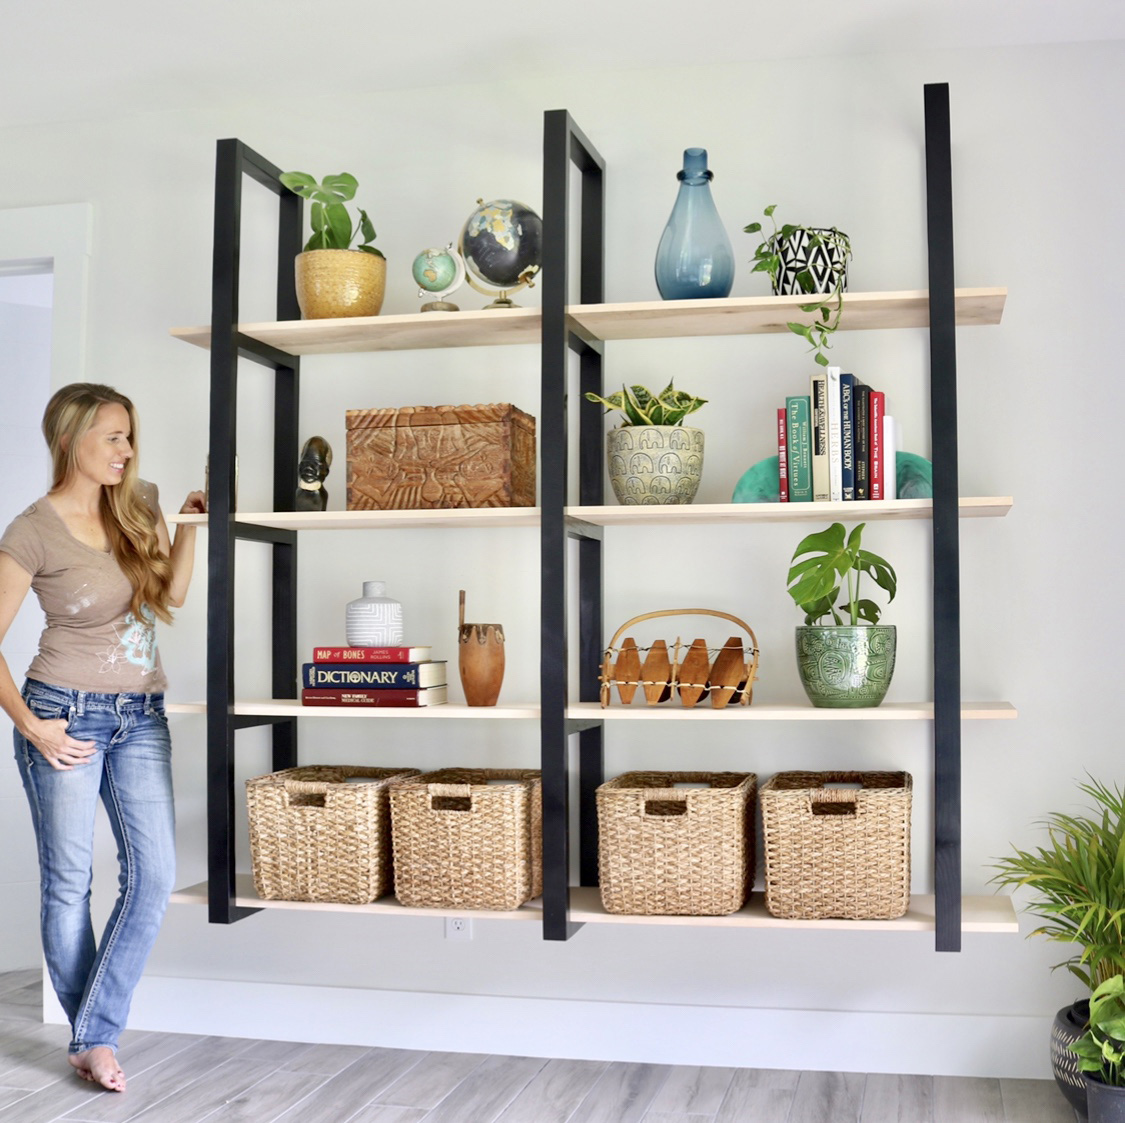
These DIY Floating Ladder Shelves is the perfect thing to add to any office space. It gives you more storage and more space for item after item in your home.
BEFORE BUYING SUPPLIES, PLEASE DO STEP 1!
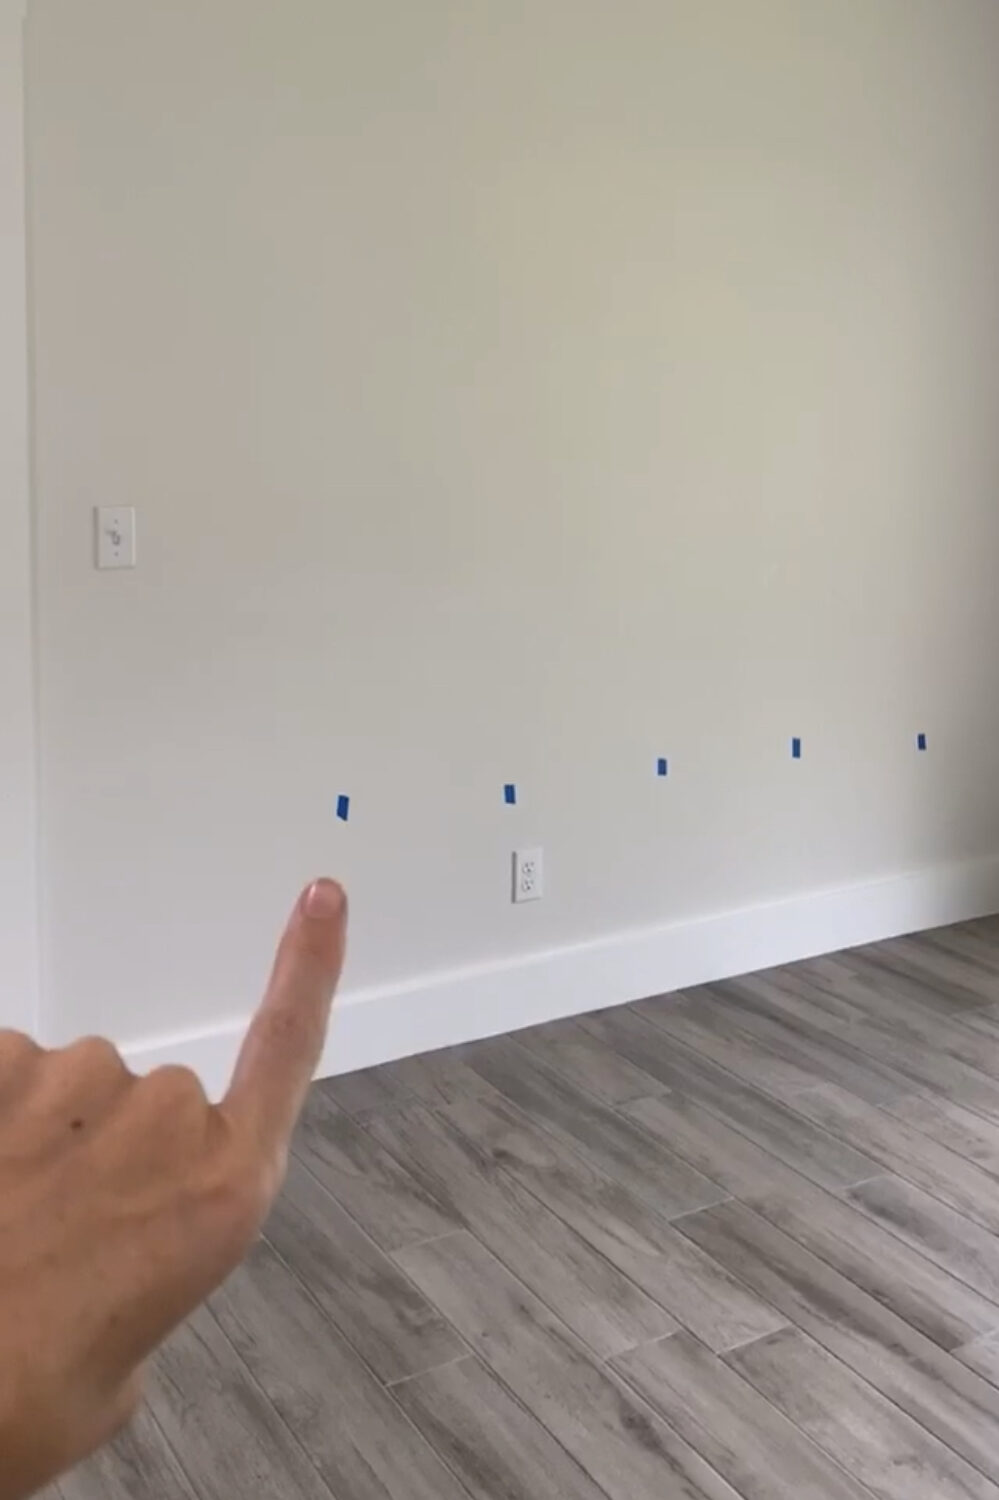
Step 1: Use a stud finder to find the studs in your wall
**This is the most important step for building the unit without a cleat across the back. In order for these shelves to be strong enough, you will need to attach each of the vertical pieces directly to a stud.
(If you don’t have a stud finder, consider it a worthy investment!)
For homes in the U.S., the standard spacing is 16″ on center, so my vertical pieces are spaced 32″ on center. If yours are spaced more than 32″, please keep shelf strength in mind and consider either doubling the plywood or using a hardwood instead; otherwise, you may find your shelves sagging over time.
Please also note that you will need enough room on either end to be able to slide the shelves in. I’ll be sharing a solution for tight spaces in an upcoming project!
Step 2: Gather supplies needed to build the Floating Ladder Shelves
**I’m going to provide instructions to build the shelves exactly like mine. Please make adjustments based on the stud distance you measured in step 1.
SUPPLIES:
– 2x4s (x7)
– 1 sheet of 3/4″ birch or maple plywood (ripped to 11.75″)
– Iron-on veneer edge banding (I used birch)
– 3.25″ deck screws (you will need at least 12
– 1.25″ screws
– 2″ pocket hole screws (at least 60)
– Paint and stain
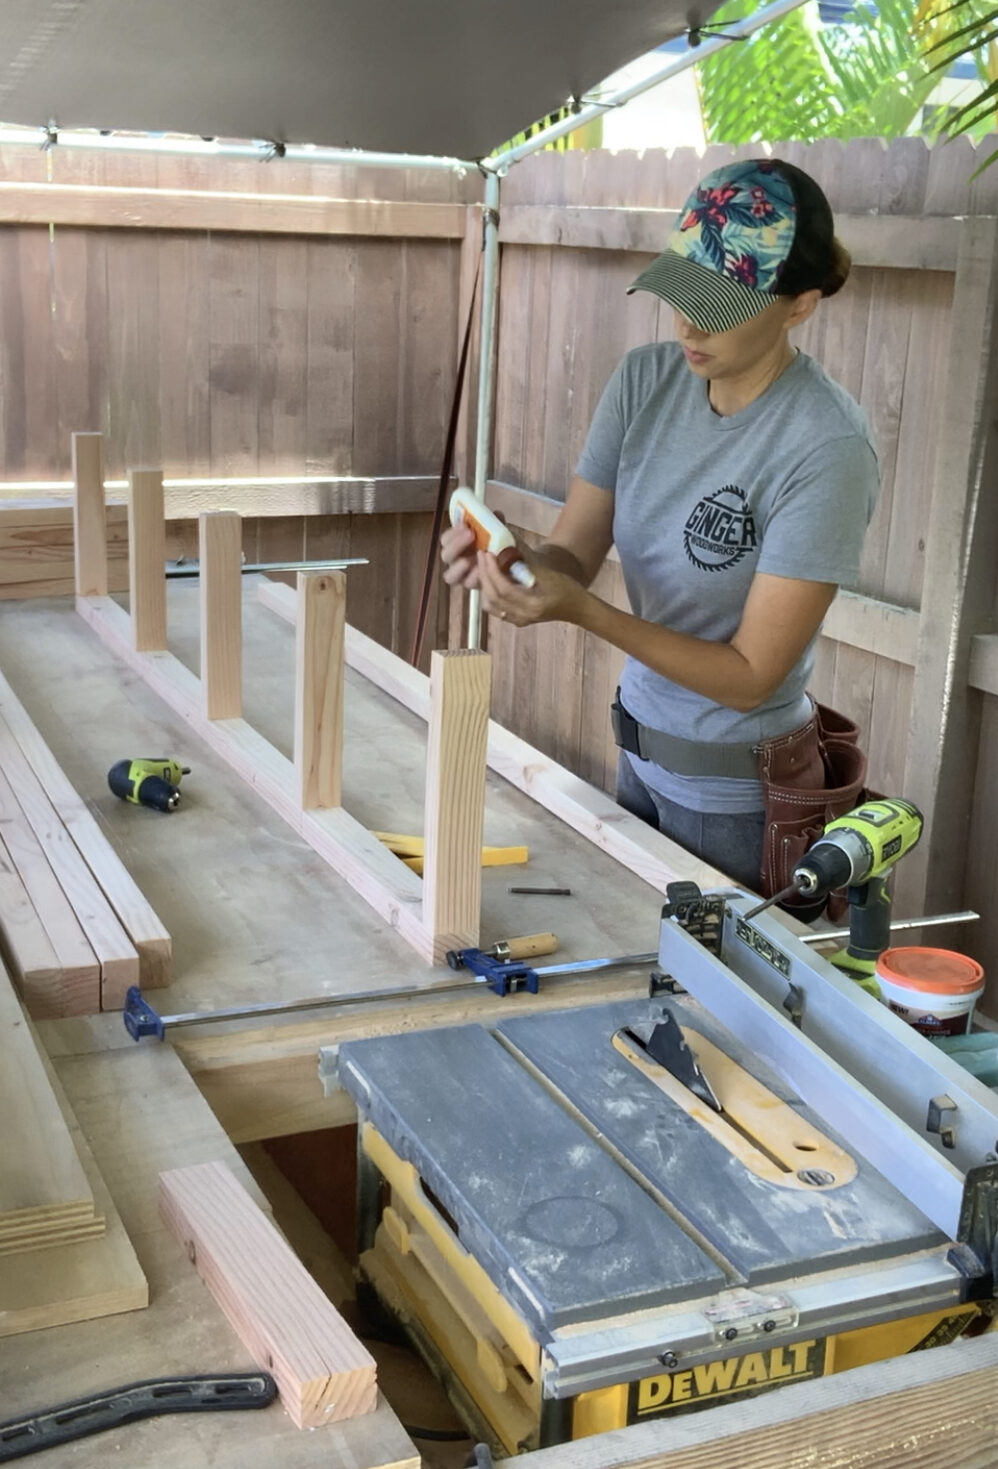
Step 3: Prep the 2x4s
If you’re using standard, construction-grade 2x4s, they might be in rough shape. If you’re looking for quick and easy, you can leave them as is, patch a few knots, sand a little, and move on to the next step. I really wanted my Floating Ladder Shelves to look clean, and I wanted them to be a bit more narrow than the standard 3.5″ width. I used my table saw to rip off the round-over edge on one side and then flipped it over and ripped it down to 2.75″.
Then I took it to my planer and ran it through once on each side to smooth out the rough top and bottom a bit.
And then I sanded. And sanded. And sanded. Ha! Don’t skip this step! Since I had planed already, I started with 100 grit and moved up to 220. If you don’t have a planer, you may need to start with a lower grit.
Step 4: Cut the 2x4s
Cut 6 of your 2x4s down to 72″ each for your vertical pieces for the Floating Ladder Shelves. Then, using the off-cuts from your vertical pieces and the last 2×4, cut 15 pieces to 11 7/8″.
Sand off any tear-out you may have.
Step 5: Drill pocket holes
Use a pocket hole jig to make 2 pocket holes in each side of your 15 rails. Sand any tear out.
Step 6: Assemble the floating ladder shelf frame
Attach the small rail pieces to the long vertical pieces using 2″ pocket hole screws. Keep the pocket holes facing up, so they will be covered with shelves or at the top and not visible to anyone under 7’2″ tall. 😉 I also used wood glue at each joint.
For equal spacing, there should be 17 5/8″ from the bottom of one rail to the bottom of the next rail.
Step 7: Cut the plywood down to length
Since the plywood is less than 12″, I just used my miter saw to cut each piece to 76″. This gave me about a 4.5″ overhang on each end.
I gave them each a light sanding with 220 grit sandpaper and my orbital sander and then attached the iron-on edge banding. Trim the extra edge banding with a utility knife or an edge banding trimmer like this one.
If you didn’t get a nice seal with the iron, using an orbital sander will heat up the glue and really help bond the two together a little better, too. Just be careful not to over-sand and go through the edge banding!
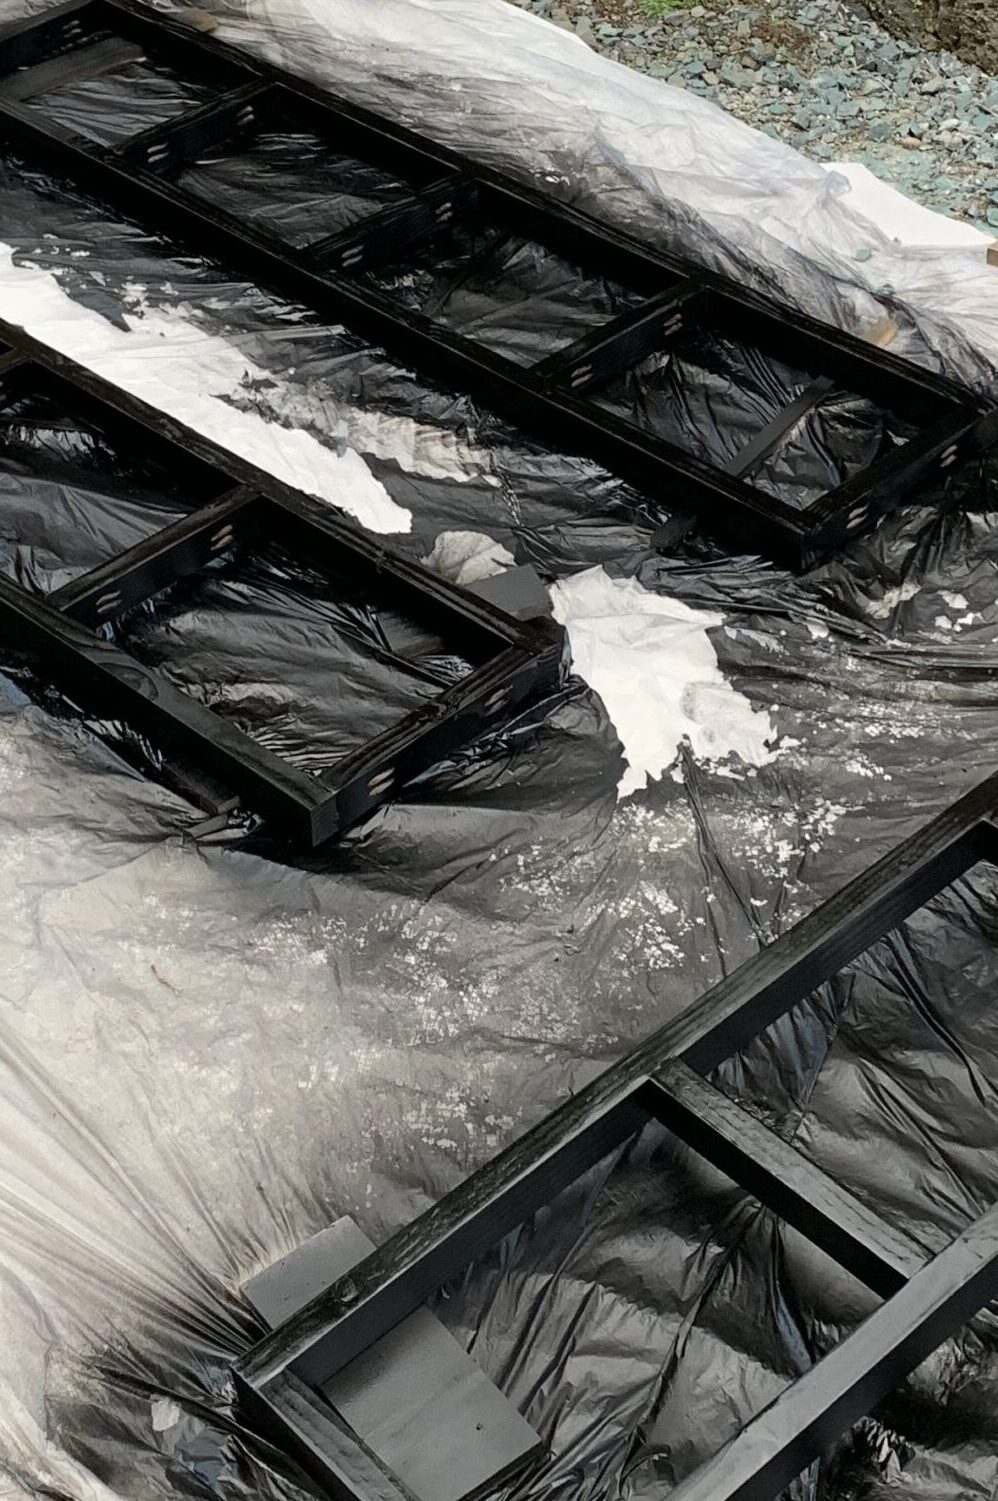
Step 8: Paint and stain
I used my Graco cordless airless sprayer to spray the rails. Black spray paint would also work for this project. I am still undecided on the stain for the shelves and have just left them as is for now.
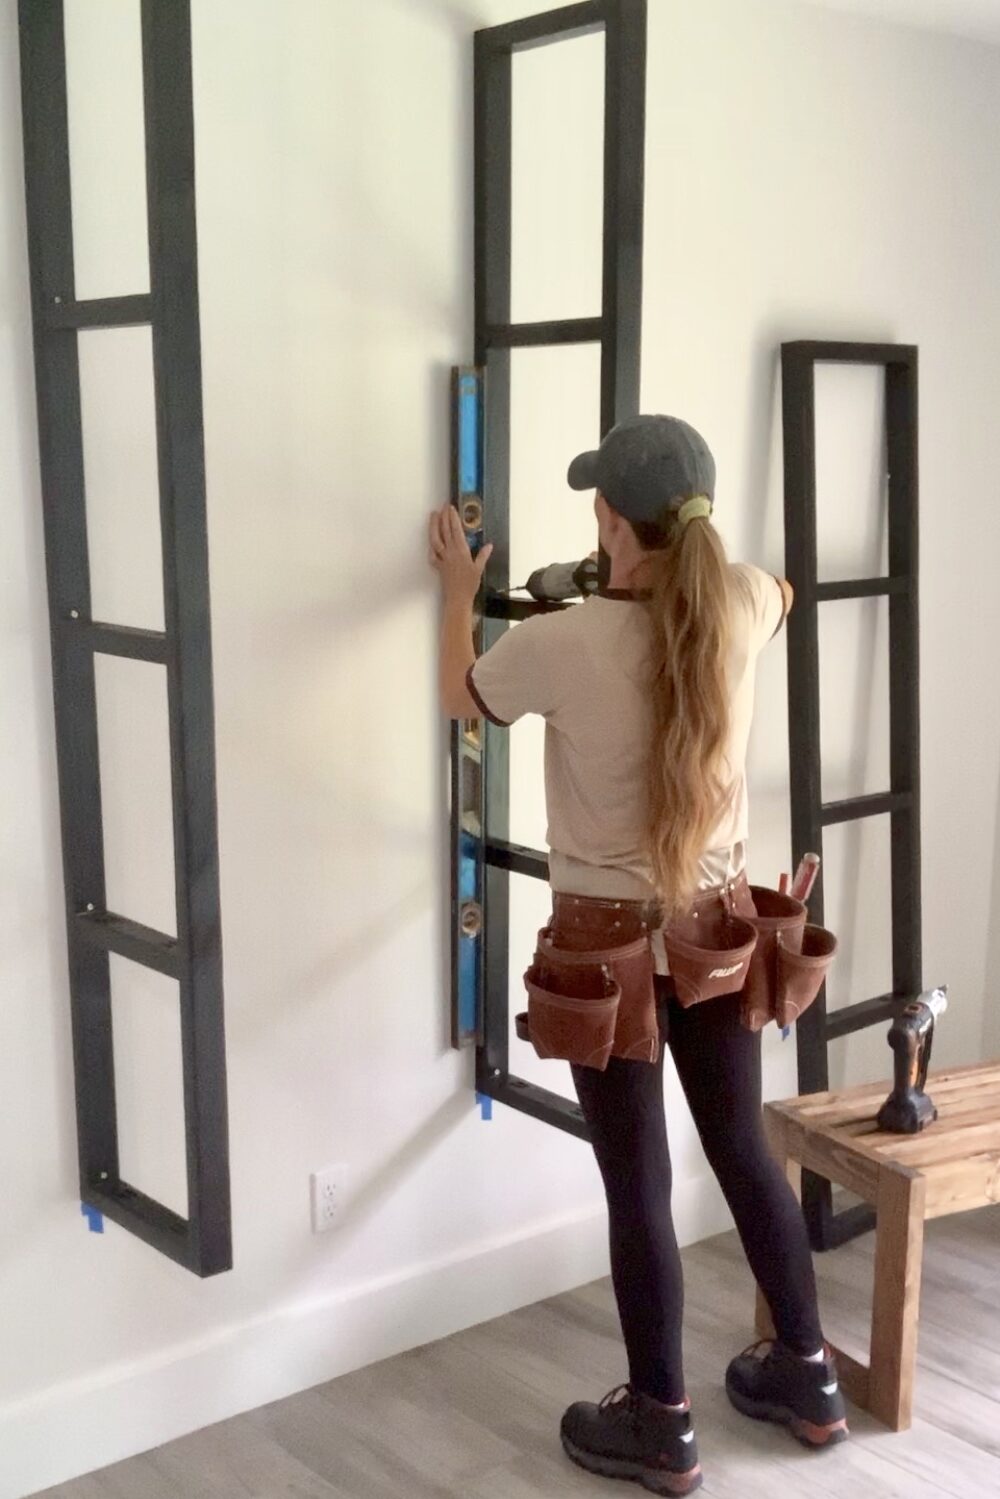
Step 9: Attach to the studs
I used painter’s tape to mark 14.5″ from the floor and had already marked where each of the studs were that I’d be using.
Originally, I had used a bench to help me hold each piece while drilling, but then I decided it was too high and moved them down, and the bench wouldn’t work. Soooo…even though you see me using a bench in the video, I didn’t use it the second time around, and it worked just fine for me to hold them and just brace them on my knee. Ha!
I drilled pilot holes just above each of the bottom 4 rails and also drilled countersink holes, so my screws would sit flush. I wanted them close to the rails, so the plywood shelves would hide them. Then I used an impact driver to drill 3.25″ star head deck screws into the pilot holes I’d made.
Step 10: Place shelves on the Rails
Once each shelf is placed on the rails, use the 1.25″ screws to secure them down to the 2x4s.
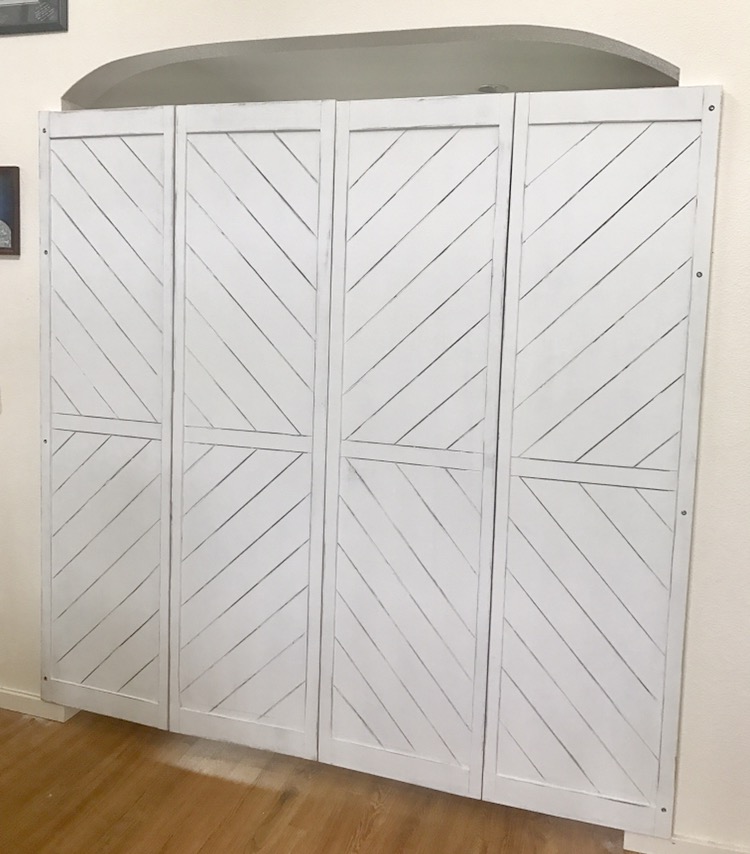
I came up with the idea to route DIY Patterned Mosaic Doors using plywood to make doors when I had a customer come to me and ask me for help enclosing a dining room into a temporary bedroom. Barn doors wouldn’t work for the space, and this was one of my favorite customers, and I really wanted to help her save money, as she was letting her grandmother move in with her family.
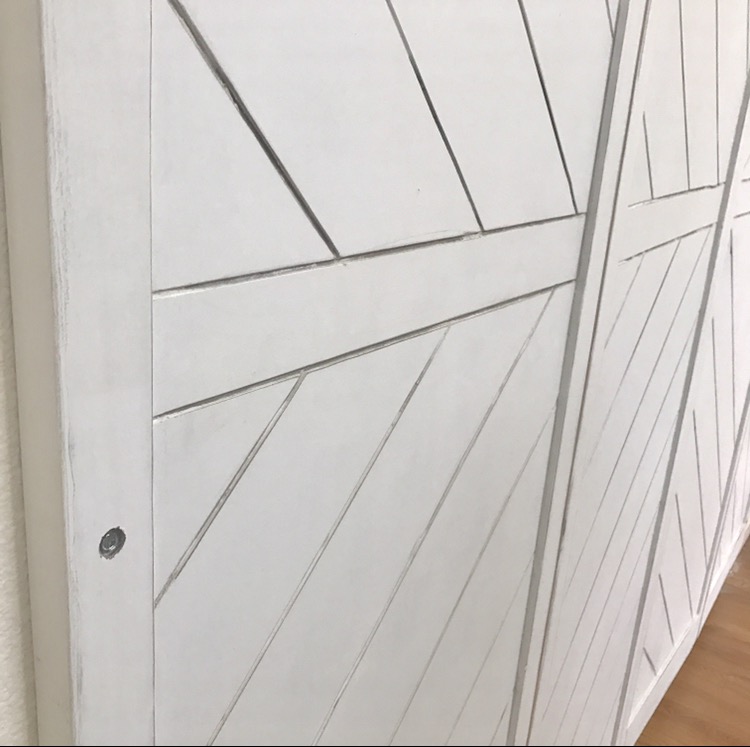
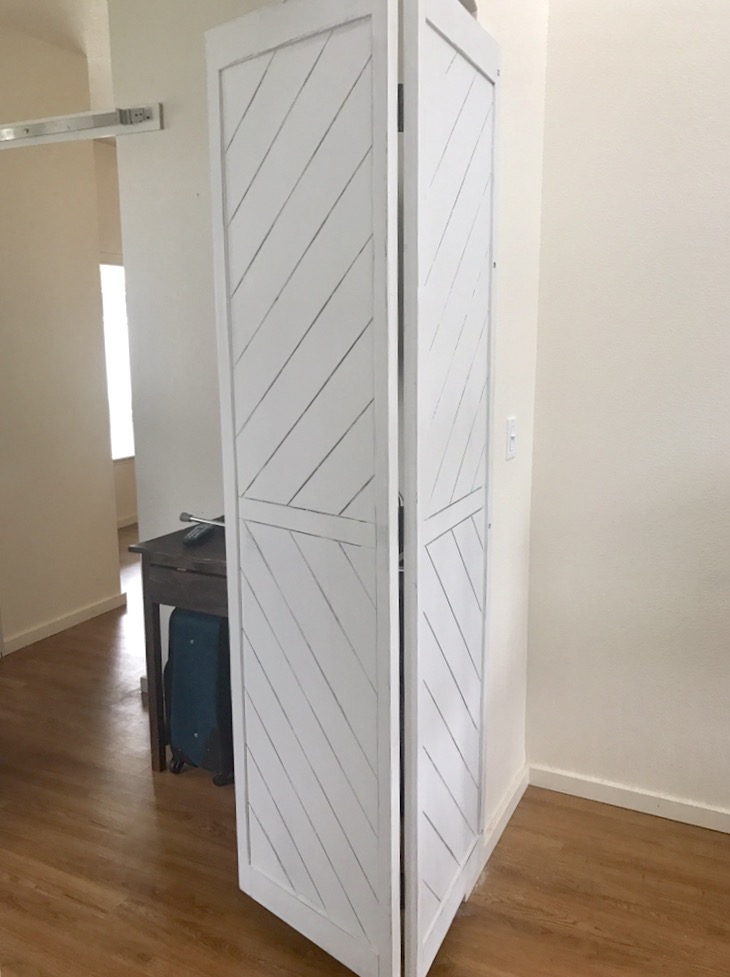
I’d built a few things for her before and knew her style. I thought about doing a kind of shoji or bi-fold door set, but I really wanted there to be a fun and pretty pattern on the outside that faces her living room. I’ve done mosaic designs and patterns like on my DIY Herringbone Barn Door Console and other wood mosaic art pieces. But, I knew all that lumber would be expensive and heavy. I had just really started getting comfortable with my router doing house projects, and I wondered if I could make a pattern in plywood to mimic the look of a mosaic. I had never seen anything like that done before, so I tested it on a small piece of plywood and then pitched the idea to my customer, and she loved it! So I decided to be brave and just go for it.
How to Make a Patterned Mosaic Door with a Router
In this post, I’ll teach you how I used a router to make a pattern in my hand-made doors. This same technique can be used to make barn doors or headboards, or anything else you’d like to make a pattern on!
Step 1 – Purchase materials for routed door
I used 3/4″ birch plywood for the routed section of my doors
I had my plywood ripped to width at the lumber store, so I wouldn’t have to worry about lifting a big sheet of plywood onto my table saw or hoisting it in and out of my car.
Step 2 – Sketch out your DIY routed door pattern
I sketched out two options for my customer and let her choose which one she preferred. Technically, it’s the same pattern…just doors rearranged. 😉
And this is what it would look like with the doors open.
Step 3 – Set up your router and bit for the herringbone pattern
I set my router to cut about 1/8″ deep into the plywood. I didn’t want it to cut too far in, but I also wanted to make sure the grooves were visible.
Step 4 – Get your doors ready to be routed
Make sure you have plenty of battery power and backup batteries if doing multiple doors with a cordless router. I had 8 panels to do, and I think I went through three batteries!
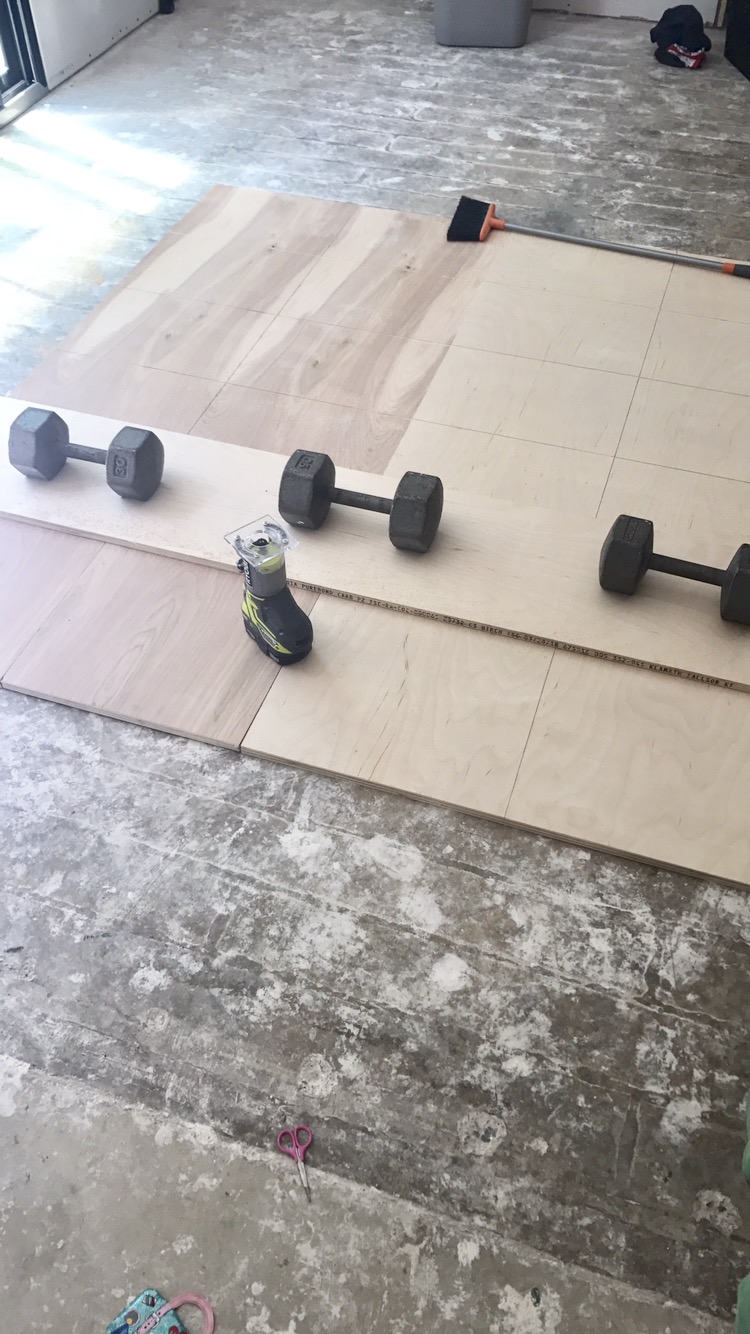
For the plain lined side, I measured where I wanted the lines and set my fence to allow for the distance to the router bit.
Step 5 – Routing the herringbone door pattern
When I first started, I had fully planned to draw out the whole pattern and then mark my fence back from the pattern to account for the distance from the outside edge of my router to the center of the bit. But, I quickly realized just how tedious that was. So I decided to just cheat. Ha! For my “fence,” I happened to be using a large level, and the width of the level plus the distance from the outside of the router to the center of the router bit was almost exactly 4″!
So I measured down 4″ from one corner and then 4″ in from that same corner. This gives a triangle if you connect those two measurements. Then I routed my first line from that first measurement, and then I set my level on that old line and repeated! Easy peasy!
Step 6 – EXTRA TIPS AND TRICKS
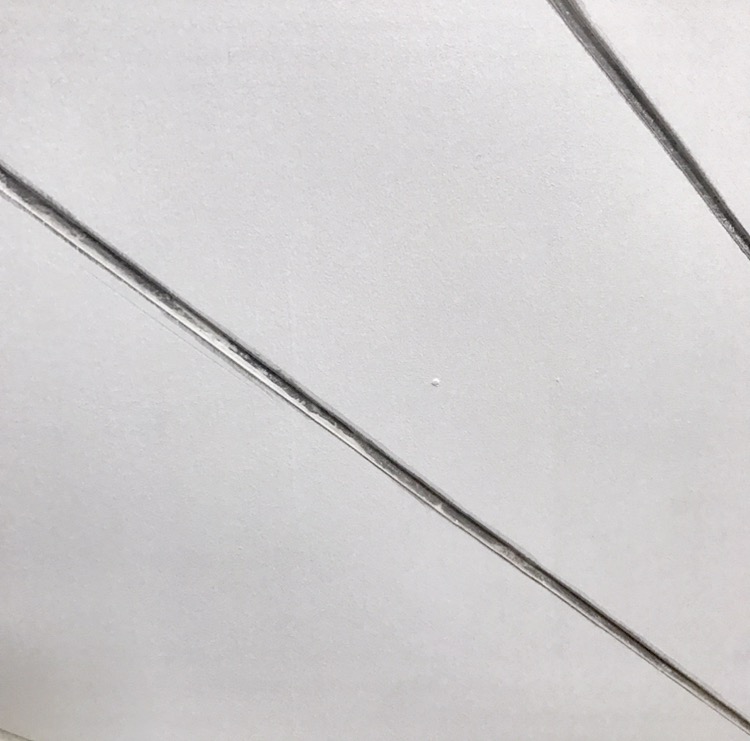
Be sure to keep your router tight to your fence. They can get a little squirrely and try to run away from you! No one wants to do extra patching, so just take your time and keep your fence tight.
And go extra slow when you’re approaching an intersecting line. You want the router bit to just go right in the line and not pass it at all. If you stop too soon, there will be a little extra piece of wood in your pattern. If you stop too late, you’ll have a line that will be difficult to “erase”.
And that’s it! Just sand your edges and finish to your liking! I highly recommend the Gator Micro Zip or an angled sanding sponge to get in those cracks!
I’d love to see if you use my idea on any projects! Feel free to tag me on Instagram or send me an email. 🙂